If you’ve been on social media in the last few weeks, you’ve seen them: charming, slightly jittery stop motion videos of claymation figures and blooming flowers, all generated by AI. Since Luma Labs released its Dream Machine model in mid-June 2026, creators have been hacking it to produce this unique, handcrafted aesthetic. It’s a fun, creative trend that breaks from the usual hyper-smooth AI video.
But for any brand or creator trying to use this for real work, a major problem surfaces immediately: the results are a happy accident. The object you’re animating morphs, the lighting shifts, and the background warps from one frame to the next. It’s a lottery, not a production process. You lack control.
To create deliberate, on-brand stop motion, you don’t need a better prompt. You need a better workflow—one that remembers your subject and style from frame to frame. This workflow is built to do exactly that, starting with a simple product image.
Workflow code: #myup-5q78-bln0Why stop motion is the perfect antidote to 'perfect' AI video
The appeal of stop motion is in its imperfection. Each frame has a tangible, handcrafted quality that feels authentic and captures attention. In a feed saturated with the impossibly fluid, sometimes sterile motion of models like Runway's Gen-3, the slightly jerky, tactile nature of stop motion stands out. It’s an intentional artistic choice.
This style signals craftsmanship and patience, even when generated with AI. It’s perfect for showcasing product details, telling a simple story, or creating a whimsical brand moment. But to be effective, that handcrafted feel must be paired with visual consistency. The charm is lost the moment your hero product melts into a different object entirely. That’s why controlling object permanence is the most critical part of the process.
The workflow: from a single product photo to an animated sequence
Instead of feeding a single prompt to a video model and hoping for the best, a professional workflow breaks the process down into a sequence of controlled steps. You generate a series of still images, one for each frame of your animation, ensuring each one is perfect before moving to the next. MyUP handles the production; you validate the creative direction.
Step 1: Establish your base frame
Start with a clear, high-quality image of your subject. This could be a product photo, an illustration, or an initial AI-generated scene. This image will be the foundation for your entire animation, the visual anchor that the workflow returns to.
Step 2: Generate frames iteratively
This is where the control happens. Instead of one video prompt, you use a series of small, iterative image prompts. Use your base image as an input and write a prompt for the next logical frame of motion.
- Frame 1 Prompt: `A bottle of luxury perfume on a marble slab, surrounded by fresh jasmine flowers.`
- Generate Frame 1. Once you approve it, use it as the input for the next step.
- Frame 2 Prompt: `Same scene, but one of the jasmine flowers has bloomed slightly more.`
- Generate Frame 2. Approve it, then use it as the input for Frame 3.
By building the animation frame by frame, you maintain total control over the subject's integrity. Your MyUP Brandkit is active throughout this process, automatically ensuring that your brand colors, lighting style, and overall aesthetic remain locked-in across every single image.
Step 3: Compile the frames into a video
Once you have your sequence of 10, 20, or 50+ still images, you can use an image-to-video tool to stitch them together. The key here is adjusting the frame rate. A standard video is 24 or 30 frames per second (fps). For a classic stop motion feel, you’ll want to set it much lower, typically between 8 and 12 fps. This creates the characteristic, charming stutter that defines the style.
How to control the action, frame by frame
The success of your AI stop motion depends entirely on your prompting strategy during the iterative image generation stage. Your goal is to describe a minimal, logical change from the previous frame. Think like a traditional animator moving a physical object by a tiny increment for each shot.
Example: A product assembling itself
- Base Image: A single, elegant watch face on a dark background.
- Frame 2 Prompt: `(Using base image as input) The leather strap appears to the left of the watch face.`
- Frame 3 Prompt: `(Using Frame 2 as input) The top part of the leather strap moves to connect with the top lug of the watch case.`
- Frame 4 Prompt: `(Using Frame 3 as input) The strap is now fully connected at the top.`
Example: A character animation
- Base Image: A brand mascot illustration, facing forward and smiling.
- Frame 2 Prompt: `(Using base image as input) The character's head is turned slightly to the right.`
- Frame 3 Prompt: `(Using Frame 2 as input) The character's eyes are now looking fully to the right.`
- Frame 4 Prompt: `(Using Frame 3 as input) The character begins to raise its left hand to wave.`
This method turns you into a director. You approve each frame, ensuring the story unfolds exactly as you envision it, a level of control that's simply impossible with single-prompt video generation. This is also the exact process used to create consistent scenes for an AI storyboard, just applied to motion.
Beyond the product shot: animating a full campaign
This frame-by-frame technique isn't just for animating a single object. It's for directing entire visual narratives. You can apply the same logic to produce a multi-shot campaign where every asset shares a consistent, on-brand aesthetic. Imagine creating a series of short, animated clips for a luxury jewelry launch—each one a different scene, but all unified by the same lighting, mood, and brand identity. This workflow lets you build that campaign, shot by shot, with full creative oversight.
Workflow code: #myup-40pt-v0sm
Luxury Jewelry Editorial Campaign
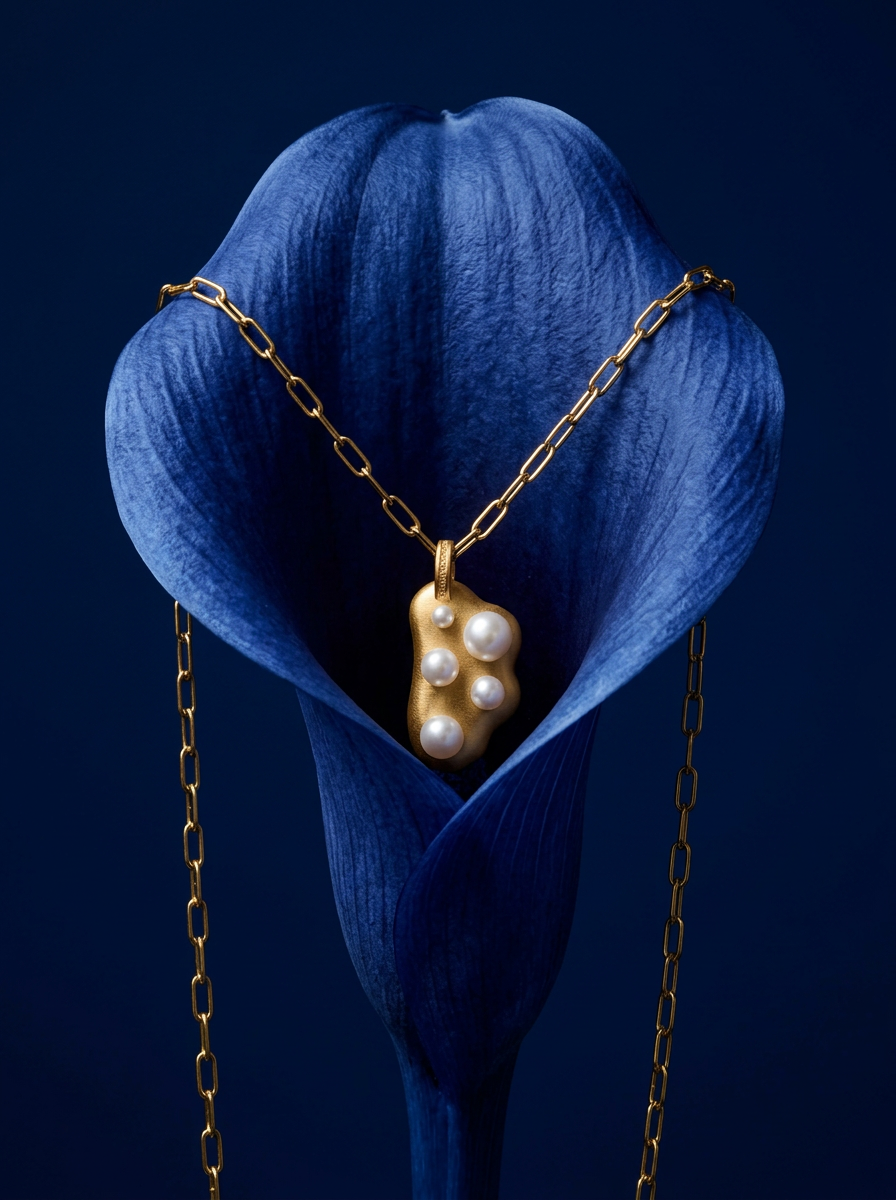
Drop your product into a moody, deep navy studio environment. It wraps your item in a seamless royal blue backdrop with high-contrast lighting and clean organic props, giving everything a premium, high-end editorial look.
Regenerate using your own assets.
A workflow gives you memory. A single prompt gives you a lottery.
The viral AI stop motion trend proves that creators want more stylized, artistic video formats. But the 'hack' of using a tool like Luma Dream Machine reveals the core weakness of most generative video: a lack of memory. The model doesn't remember the object from your first frame when it's creating the last. It just re-interprets the prompt over and over, leading to inconsistency.
A MyUP workflow solves this by design. It treats each frame as a distinct step, using the previous output as a direct reference for the next. This creates object permanence. Your Brandkit acts as the stylistic memory, locking in your visual identity. The result is a professional, repeatable process, not a one-in-a-million lucky generation. You move from playing the prompt lottery to directing a creative production, which is exactly how you create other unique formats like high-quality branded GIFs or authentic-looking UGC-style ads.
