Canva's new AI animates your posts with one click. Here's what brands give up.
On July 3, 2026, Canva rolled out 'Layout to Video,' a feature that promises to turn any static design into an animated video with a single click. The appeal is obvious: speed. For social media managers under pressure to produce more video, it feels like a magic button.
But for anyone managing a brand, that magic comes at a cost: control. When you hand over creative decisions to a fully automated tool, you're also handing over your brand's visual voice. The output is often generic, with bouncy, templated animations that might grab attention but don't align with a specific brand identity. The text swoops in with a standard ease-out curve, the images slide on screen with a default transition — it's fast, but it looks like everyone else's content. This is the hidden tax on one-click convenience: your brand's uniqueness is eroded for the sake of efficiency.
The workflow approach: how to get speed and brand control
There is a better way. Instead of a 'magic button,' professionals need a smart workflow. A workflow provides the structure to be efficient and repeatable, but keeps the critical creative decisions in your hands. In MyUP, turning a static image into a video isn't a one-click gamble; it's a deliberate, three-step process that ensures the final product is both dynamic and distinctly yours.
The process is simple:
- Start with a strong static post. The foundation of your video is the original design.
- Add simple, intentional motion. You, not an algorithm, decide how the camera moves.
- Layer on-brand animated text. Your typography, your colors, automatically applied.
This isn't about becoming a video editor. It's about using a system that gives you just enough control to maintain brand integrity. MyUP executes the production; you validate the creative choices.
Step 1: Start with a strong static post
You can't create a great video from a weak image. The best candidates for animation are static posts with a clear visual hierarchy, a defined focal point, and some breathing room (negative space) for text and motion to work. A cluttered design will only look more chaotic once animated.
If you're starting from scratch, you can use a MyUP workflow to generate a high-quality, well-composed static image that's primed for animation. This ensures your layout, typography, and imagery are solid before you even think about motion. The goal is to create a post that would work perfectly well on its own, so the animation simply enhances it.
You can create a compelling static post in minutes using a dedicated workflow. This one is perfect for creating a clean, modern design with a clear message.
Workflow code: #myup-6hp6-zwh2
Minimalist Hand-Lettered Food Brand Poster
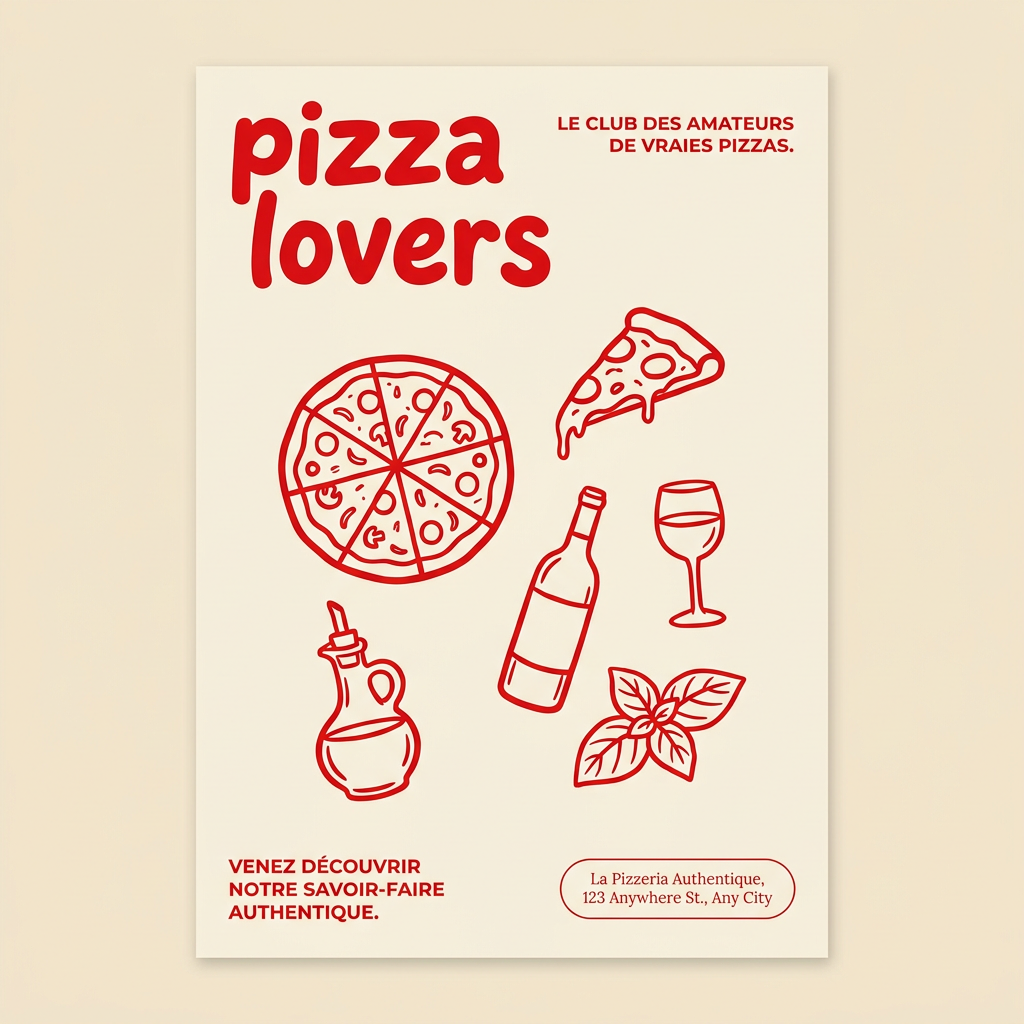
Generate clean, minimal posters for your food brand or cafe. It sets up a soft cream background with tons of breathing room, contrasted by a bold, chunky handwritten title in vivid red. It's a gorgeous editorial layout that makes your brand look instantly high-end.
Regenerate using your own assets.
Step 2: Add simple, intentional motion in MyUP
Once you have your static image, bring it into MyUP's AI Video generator. This is where you reclaim control. Instead of random, jarring animations, you can apply subtle, purposeful camera movements that direct the viewer's eye and add a touch of sophistication.
Think about what serves the content best:
- A slow, gentle zoom-in can build focus on a key product or headline.
- A subtle pan across a wider image can create a sense of discovery or reveal information sequentially.
- A slight rotation can add a touch of energy without being distracting.
This is different from tools like Stability AI's Motion Brush, which are designed to create cinemagraphs by animating specific parts of an image (like steam rising from coffee). Our goal here is simpler and often more useful for brand content: animating the entire post as a single, cohesive unit. In MyUP, you define the motion's direction and intensity, ensuring the movement feels like a deliberate part of your brand's storytelling, not an automated effect. You can learn more about creating controlled motion in our guide to making on-brand animated GIFs.
Step 3: Layer on-brand animated text from your Brandkit
This is the step where one-click tools completely fail brands. A generic animation might get the text on screen, but it won't be in your brand's font or color palette. MyUP solves this with its integrated Brandkit.
When you add a text overlay in a MyUP video workflow, it automatically pulls from your saved Brandkit. Your specific headline font, body copy font, brand colors, and even your logo are applied instantly and correctly. The text can be animated to fade in, slide, or appear with simple, clean effects that you control. This guarantees that every single video you produce, no matter how simple, is perfectly consistent with your established visual identity. There's no need to manually select fonts or hex codes; the system handles it for you, based on the brand rules you set up once.
To see how a Brandkit can anchor a visual, try this workflow for creating a branded social post.
Workflow code: #myup-3sro-edbt
Brand Clothes Post
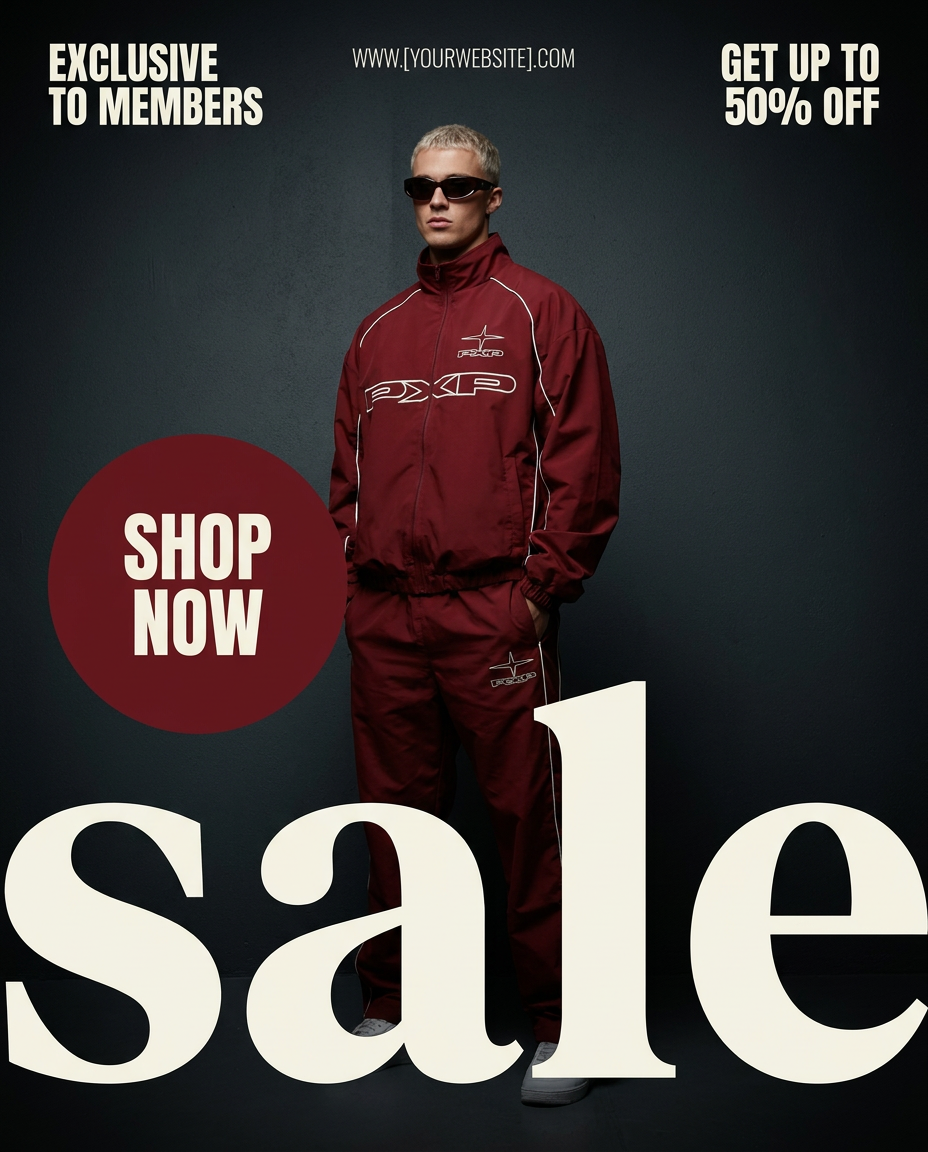
Turn any outfit photo into a high-end fashion promo poster. It centers your subject in a full-body shot against a dark, dramatic studio backdrop, perfectly cropped for social feeds. It gives your apparel a moody, editorial look instantly.
Regenerate using your own assets.
Turn your entire content library into on-brand video
The real power of this workflow isn't just making one video; it's creating a scalable content system. Once you've defined your preferred motion (e.g., a slow 1.1x zoom) and text animation style, you can save that entire process as a reusable workflow in MyUP.
Now, you can take your entire back-catalog of static blog headers, social media graphics, and event announcements and run them through this workflow. In a few hours, you can convert hundreds of static assets into a library of on-brand, lightly animated videos ready for social media. This is how you meet the demand for video content without hiring a video team or sacrificing brand consistency. You're not just animating an image; you're industrializing the production of your brand's video content, a process you can also apply to turning articles into videos.
This template for a complex visual layout shows how a repeatable structure can produce sophisticated results every time.
Workflow code: #myup-aktp-7jq0
Food Magazine Mosaic Cover
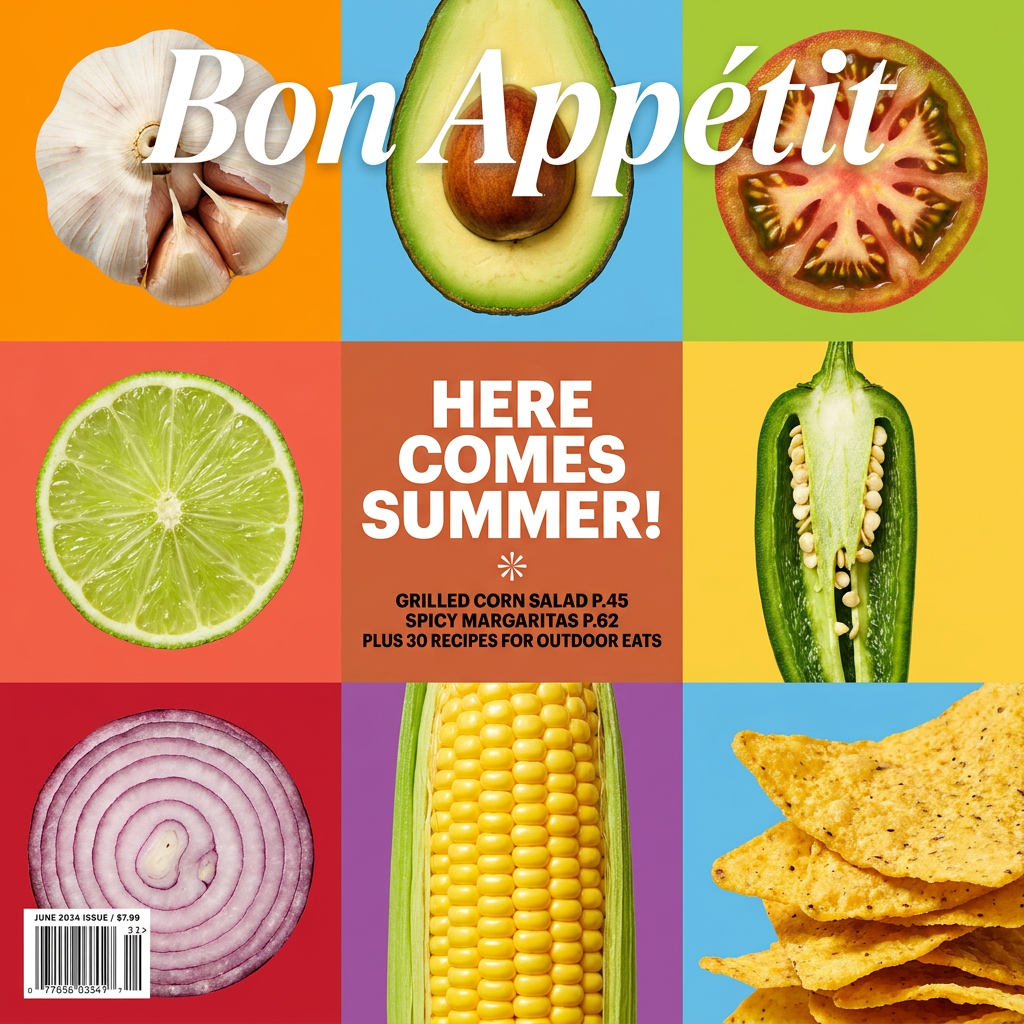
Turn your food shots into a bold, high-end editorial cover. It takes extreme close-ups of your dishes or ingredients and arranges them into a vibrant 3x3 grid that looks straight out of a premium food magazine.
Regenerate using your own assets.
