If you’ve been on Reddit or X in the last few days, you’ve seen them: QR codes that look like detailed illustrations, photorealistic scenes, or abstract art. As of July 21, 2026, this trend is everywhere. The 'wow' factor is undeniable, but so is the technical barrier. The typical workflow involves juggling a standard QR code generator, a local installation of Stable Diffusion, and a complex controller model like ControlNet, followed by lots of trial and error.
That process is fine for technical hobbyists, but it's a non-starter for marketers and designers who just need a beautiful, scannable code for a campaign that launches tomorrow. Every brand touchpoint is an opportunity, and a generic black-and-white box is a wasted one. This tutorial skips the complex setup and shows you the integrated workflow inside MyUP.ai to create stunning, on-brand QR codes in a few clicks.
You’ve seen the viral AI QR codes. Here’s how they actually work.
The magic behind these artistic QR codes is a technique called 'controlled image generation'. In simple terms, the AI is given two instructions at once: a text prompt describing the desired image (e.g., 'a detailed, vibrant Japanese village scene') and a structural image to follow (the black-and-white pattern of your QR code).
Tools like ControlNet for Stable Diffusion are brilliant at this. They guide the AI image generator, forcing it to embed the QR code's data pattern into the final artwork. The AI learns to render the art in a way that the dark and light areas of the image correspond to the functional parts of the QR code. The result is a hybrid: a beautiful image that a phone camera can still read as data.
The problem? The manual process is a huge time sink. It requires technical knowledge, specific hardware, and a lot of patience to balance artistic quality with scannability. For a busy creative team, it's simply not a viable production workflow. This is where an integrated platform changes the game.
The simple, on-brand workflow in MyUP
MyUP.ai integrates this entire complex process into a simple, repeatable workflow. You don't need to install anything or fine-tune models. The platform handles the technical blending of the QR code and the art prompt, while your Brandkit ensures the output feels like it belongs to you. The user's job is to provide the creative direction and validate the results; MyUP handles the production.
Here is the step-by-step process:
- Generate your basic QR code: Use any free online QR code generator to create a standard black-and-white code for your URL. Save it as a PNG or JPG file.
- Start in MyUP.ai: Inside MyUP, open the AI Image Generator. You'll see an option to upload a 'Control Image' or 'Structural Reference'.
- Upload your QR code: Upload the QR code you just saved. This tells the AI what pattern to preserve.
- Apply your Brandkit: This is the most important step for brand consistency. Select your saved Brandkit. MyUP will automatically pull your brand's color palette and stylistic attributes, influencing the final generation. This is how you get results that feel unique to your brand, not just a generic AI style. It's a faster, more integrated way to achieve a consistent aesthetic than trying to manually fine-tune a model.
- Write your prompt: Describe the visual you want to merge with the code. Be descriptive. For example: 'A lush, overgrown secret garden with stone pathways, rendered in a painterly, impressionistic style.'
- Generate and test: Click generate. MyUP will create several options. The final, critical step is to test them. Open your phone's camera app and try to scan each one directly from your screen. Pick the one that is both visually appealing and instantly scannable.
Use case: Turn your event poster into a piece of art
Imagine you're promoting a summer music festival. Instead of slapping a jarring QR code at the bottom of your beautiful poster, you can integrate it into the artwork itself. A QR code leading to the ticket page could be blended into a sunburst over the main stage, a pattern on a vintage bus, or a stylized soundwave.
This transforms a functional element into a creative one, encouraging engagement and making the entire design more cohesive. Once you've generated your artistic QR code in MyUP, you can immediately drop it into a poster template and finish the design.
To get started, use this workflow to create a complete, on-brand event poster featuring your new artistic QR code.
Workflow code: #myup-xbur-hzoi
Bold Retro Yellow Event Poster
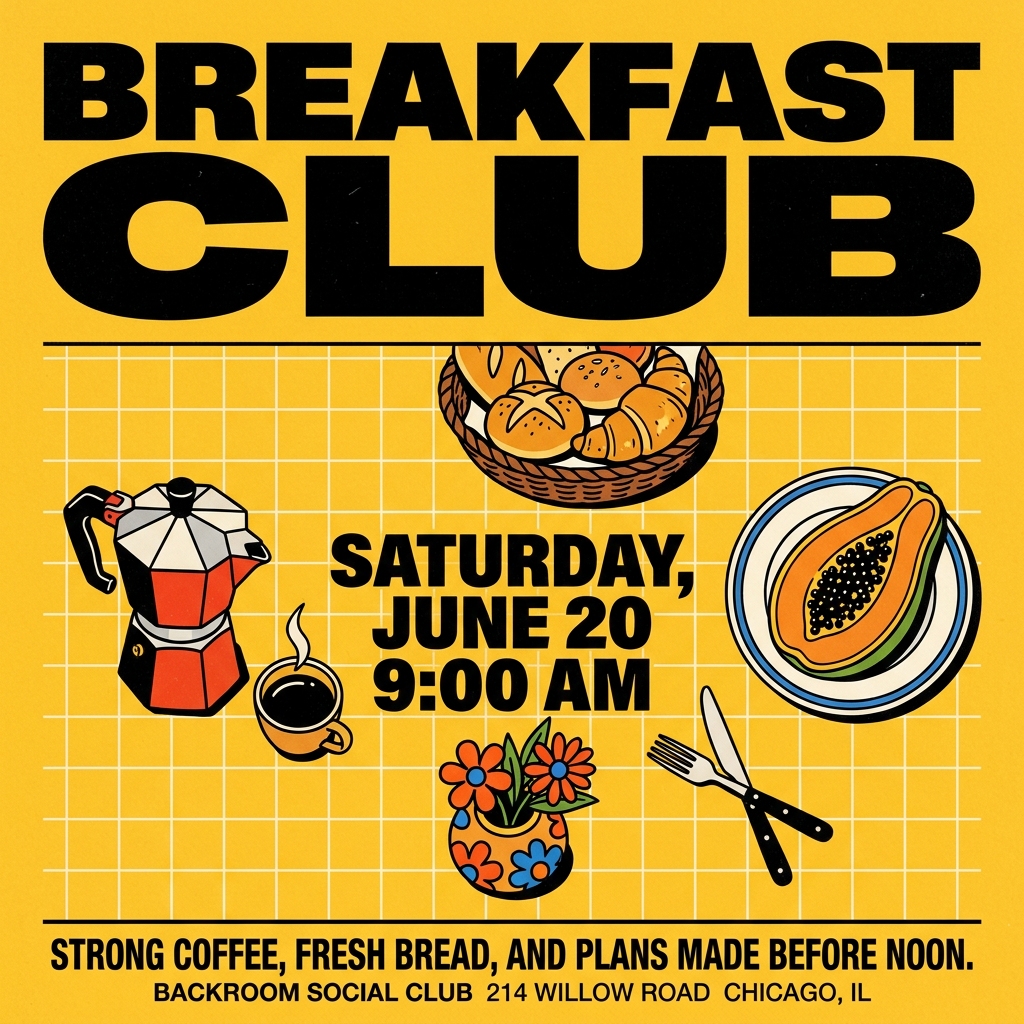
Turn your branding or event details into bold, nostalgic posters. It blends vibrant warm backdrops with a clean, retro square grid pattern to make any announcement look like a classic piece of mid-century graphic design.
Regenerate using your own assets.
Use case: Create scannable product ads and packaging
For e-commerce brands, artistic QR codes are a powerful tool for bridging the physical and digital. A code on a coffee bag could link to a video of the farm where the beans were sourced. A code on a cosmetic box could lead to a video tutorial for that specific product.
When the QR code is a beautiful part of the design—perhaps mimicking the texture of the product or the pattern of the packaging—it feels like a deliberate, high-end touchpoint, not a logistical afterthought. This elevates the customer experience and drives valuable traffic to your site. You can build an entire product ad around this concept in minutes.
Use the workflow below to design a minimalist, elegant product ad that integrates your artistic QR code seamlessly.
Workflow code: #myup-sygb-rhnt
Minimalist Vertical Product Advertising Poster
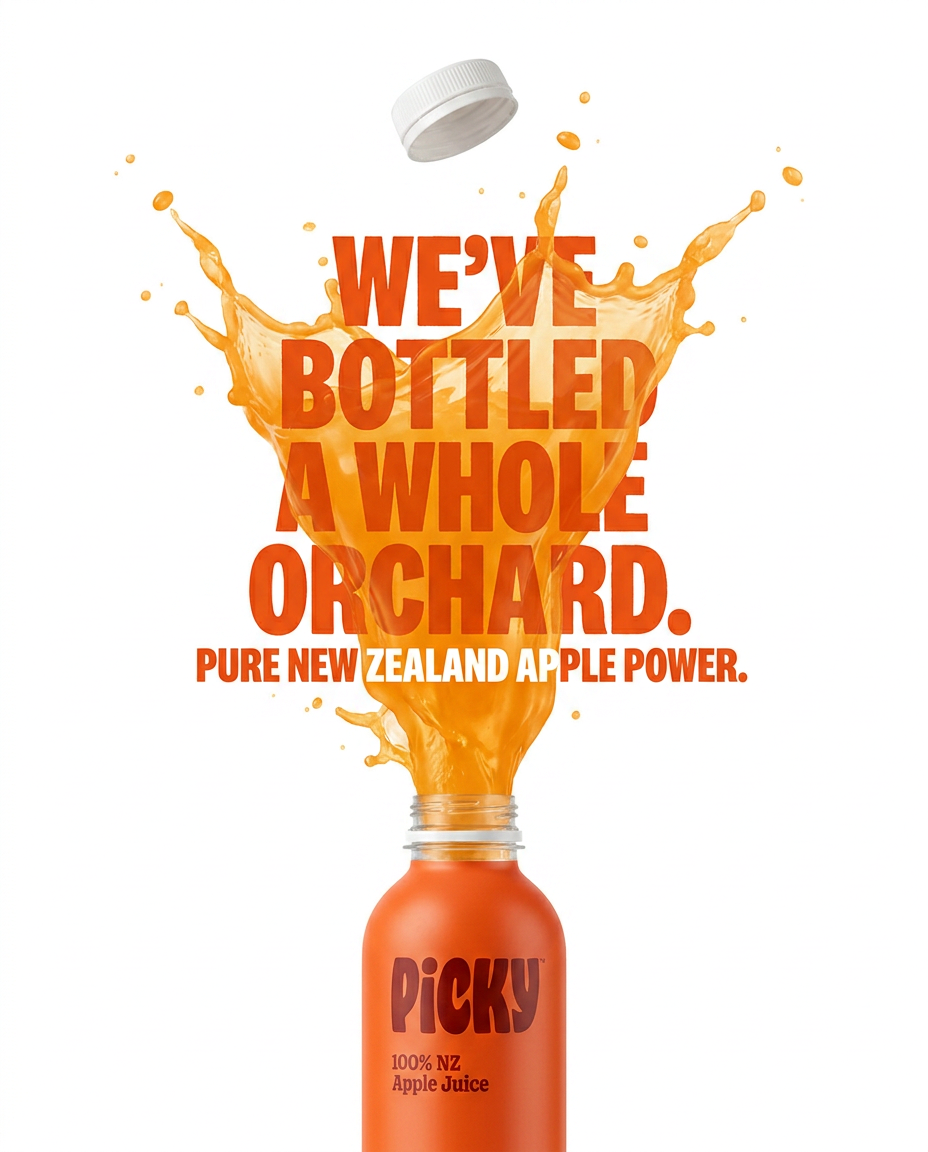
Drop the clutter and put your product in the spotlight. This setup places your item against a pure, seamless white background with a striking vertical flow that draws the eye straight up. It's perfect for creating clean, high-end studio posters.
Regenerate using your own assets.
Use case: Drive traffic from your social posts
On social media, visual appeal is everything. A standard QR code in an Instagram post is an immediate pattern-interrupt, and not in a good way. It screams 'marketing' and can cheapen an otherwise polished feed. An artistic QR code, however, can be the centerpiece of the creative.
A fashion brand could embed a QR code linking to their new collection within a photo of the fabric's pattern. A restaurant could blend a code for their reservation page into a flat-lay photo of their signature dish. It's a far more elegant way to direct followers, just like you might use AI to create a whole series of on-brand Reels.
This workflow helps you build a social post for a clothing brand, perfect for integrating a scannable piece of art.
Workflow code: #myup-3sro-edbt
Brand Clothes Post
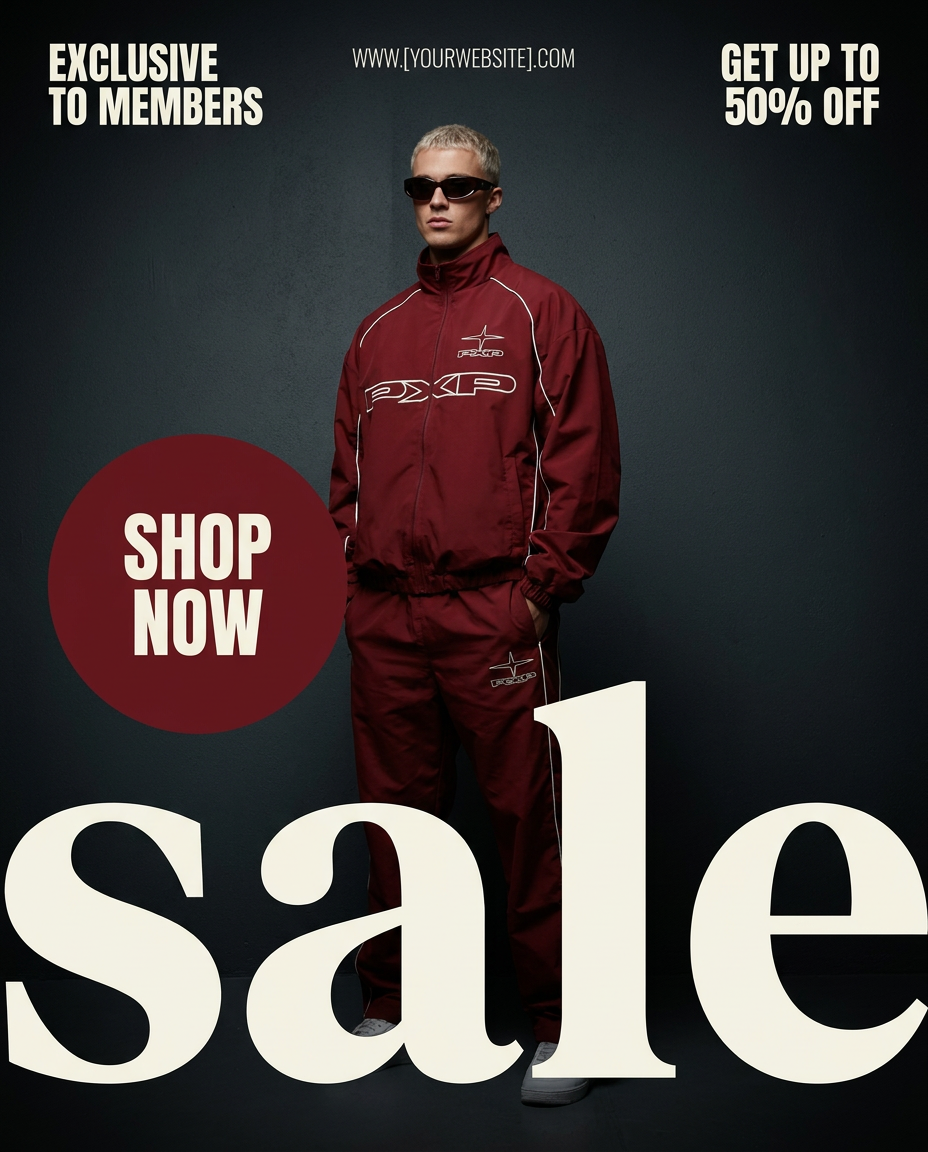
Turn any outfit photo into a high-end fashion promo poster. It centers your subject in a full-body shot against a dark, dramatic studio backdrop, perfectly cropped for social feeds. It gives your apparel a moody, editorial look instantly.
Regenerate using your own assets.
Best practices for QR codes that are both beautiful and scannable
While the AI does the heavy lifting, a few best practices will ensure your final design works flawlessly in the real world. The user's role is to validate the output, and that means testing.
- Maintain Contrast: The AI needs enough light and dark distinction to embed the code. A prompt for 'a dark, moody charcoal drawing' might struggle more than 'a bright, colorful floral pattern'. If your first attempt isn't scannable, try increasing the contrast in your prompt.
- Keep It Simple (At First): Highly detailed or chaotic prompts can sometimes obscure the QR code's data points. Start with a slightly simpler concept and add complexity once you confirm it's working.
- Protect the Corners: QR codes rely on the three large squares in the corners for orientation. Your prompt should ideally describe a scene or pattern that doesn't place a single, distracting object right on top of one of those corners. The AI is good at working around them, but a little help from the prompt goes a long way.
- Test, Test, Test: This is the most important rule. Before you send anything to print or post it live, test the QR code with multiple phones (both iPhone and Android) and from different distances and angles. What scans perfectly on your screen might not work when printed on a glossy flyer in a dimly lit bar.
