
You’ve probably seen the threads on X this month. The ones with a dozen steps showing how to stitch together three different AI apps to get one decent headshot. You use one tool for the face, another for the background, a third to upscale, and a fourth to composite them without weird artifacts. It’s a technical showcase, but it’s not a professional workflow. It’s a hack.
On the other end, you have the one-click apps that promise professional results but deliver a lottery. You upload 20 photos and get back three usable images, seven that look like a distant cousin, and ten that are pure nightmare fuel. For one person, it’s a gamble. For a whole team, it’s a guarantee of inconsistency.
Your brand’s visual identity can't be a lottery or a hack. You need a system. This is the professional workflow for generating an entire set of on-brand, consistent headshots for your team, all within a single platform.
Why your AI headshots are a lottery (and why viral workflows are overkill)
The core problem isn't just about getting a good picture; it's about getting the *right* picture, repeatedly. One-off AI headshot generators fail because they lack brand context. They don't know your company's color palette, your preferred lighting style, or the specific tone you want to convey. The AI is guessing.
The complex, multi-tool workflows are a reaction to this failure. They try to force control by breaking the task into pieces. While clever, this approach introduces massive inefficiencies and new points of failure:
- Time Sink: Juggling multiple subscriptions, UIs, and file formats for each team member is not scalable. What takes an hour for one person becomes a week-long project for a team of ten.
- Inconsistent Style: Even with the same prompts, different tools (or even different sessions in the same tool) can produce wildly different aesthetics in lighting, color, and composition. Replicating a look precisely is nearly impossible.
- Hidden Costs: Each tool in the chain comes with its own subscription and credit system. The cost to produce a full team set can quickly spiral.
This is the production reality: you either get low control and high speed, or high control and crippling complexity. Neither is a viable option for a brand that values its time and image.
The professional alternative: a repeatable system, not a one-off trick
The professional solution is to stop treating headshot generation as a series of one-off tasks and start treating it as a production system. In MyUP, this system is built on two core components: your Brandkit and a reusable workflow.
Instead of feeding a generic prompt into a generator and hoping for the best, you first define your visual standards. Your Brandkit isn't just a folder with a logo and some hex codes; it's a set of active instructions for the AI. It tells the generator what your brand’s photographic style is, which background colors are approved, and what the overall mood should be. For a deeper dive on this, see our guide on the difference between fine-tuning an AI model vs. using a Brandkit.
Once the Brandkit is set, you build a workflow. This is a sequence of steps that takes a team member's reference photos and applies the Brandkit's rules to them. The result? Every headshot for every person is generated against the exact same set of standards. MyUP executes the production; you validate the results. This is how you get consistency at scale.
Step 1: Define your team's headshot style in your Brandkit
Before you generate a single image, you need to make your creative decisions. This is the most critical step, and it’s what most other tools skip entirely. In MyUP, navigate to your Brandkit and define the key elements of your headshot style.
Establish the environment
Instead of just prompting for 'an office background', define it with precision. Use your brand colors for a solid background or specify the environment in your style prompts. For example:
- Background: 'Solid background using Brand Color #1 (#1A2B3C)' or 'Subtly blurred modern office with warm wood tones and green plants'.
- Lighting: 'Clean, soft studio lighting from a large softbox key light, with a gentle fill light to soften shadows. No harsh lighting.'
- Composition: 'Professional head and shoulders corporate portrait, subject looking at the camera.'
Set the attire
Ensure everyone looks like they belong to the same company by standardizing the dress code. Add a prompt to your Brandkit style like:
- 'Attire is professional business casual: a dark navy blue blazer and a crisp white button-down shirt.'
By setting these rules once in the Brandkit, you ensure every subsequent generation adheres to them, creating a unified look for the entire team.
Step 2: Generate a consistent batch for each team member
With your visual rules established, the generation process becomes simple and repeatable. For your first team member, you'll upload a set of 5-10 clear, well-lit reference photos. These photos teach the AI what the person looks like; your Brandkit tells the AI how to style them.
In MyUP, you can start a new creation and use a pre-built workflow as your foundation. This saves you from having to write complex prompts from scratch. The workflow will automatically pull in the style rules from your Brandkit and apply them to the reference photos you provided.
For a sophisticated, polished look suitable for a leadership page or press kit, a great starting point is the High-End Editorial Fashion Magazine Cover workflow. It's tuned for high-quality lighting and professional results that you can easily adapt.
Workflow code: #myup-yk1h-uqy8
High-End Editorial Fashion Magazine Cover
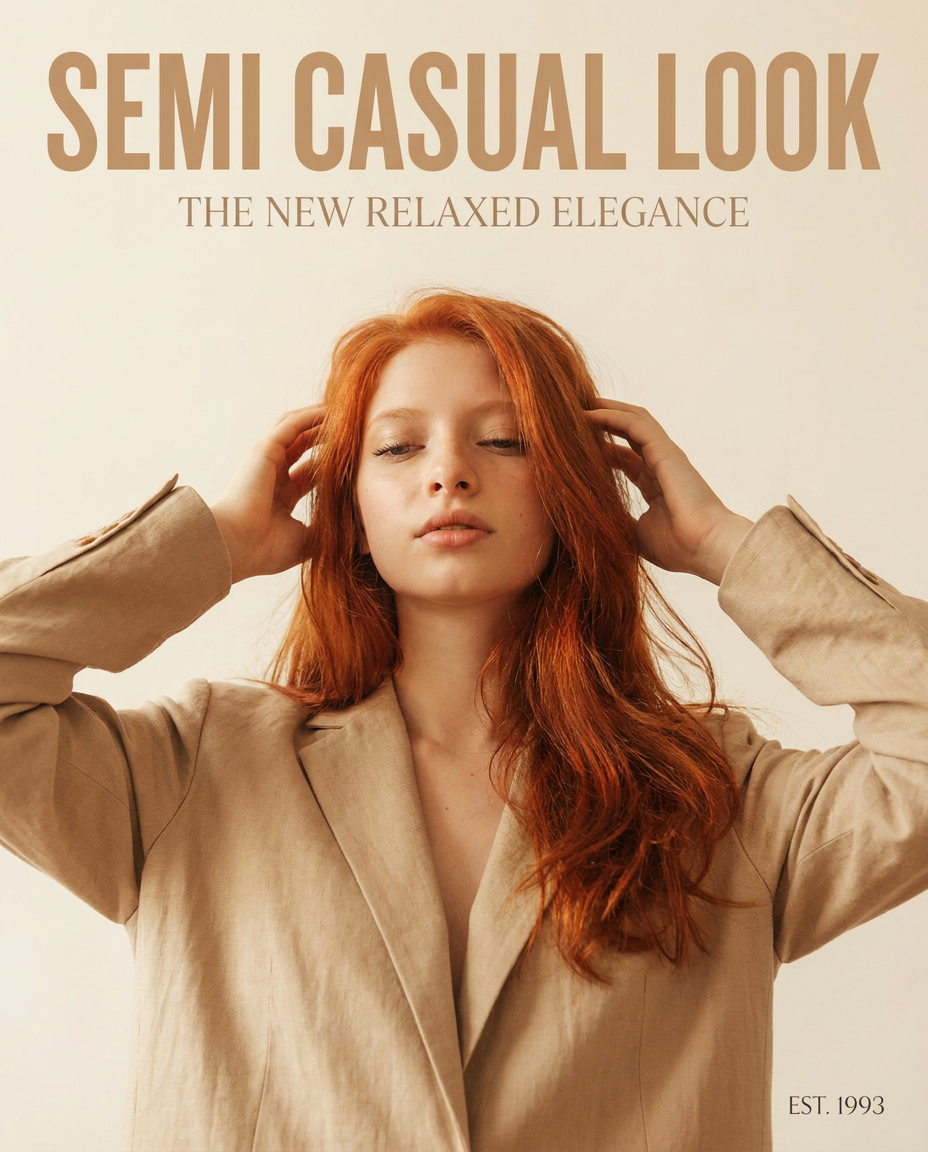
Drop in any portrait and turn it into a high-end editorial magazine cover. It frames your subject beautifully with relaxed, high-fashion posing and soft styling for a polished print aesthetic.
Regenerate using your own assets.
Run the workflow. MyUP will generate a batch of headshots that match the person's likeness while adhering strictly to the style, lighting, and background you defined in your Brandkit.
Step 3: Review, refine, and repeat
AI handles the heavy lifting, but you have the final say. From the batch of generated images, select the 3-4 strongest options that best capture the team member's likeness and professional demeanor. If needed, you can run the workflow again with slight variations to get more options, but the core style will remain consistent.
Once you're satisfied with the results for the first person, the process for the rest of the team is simple repetition. You don't have to re-enter prompts or try to remember the exact settings you used. Just start the same workflow, upload the next team member's reference photos, and run it. The Brandkit ensures the background, lighting, and attire will be a perfect match to the first person's headshots.
If your brand requires a cleaner, more direct commercial look, perhaps for a sales team or product-focused roles, you can swap in a different workflow while still using the same Brandkit. The Photo Product Ad workflow provides a crisp, studio-lit aesthetic.
Workflow code: #myup-seli-mtp0
Photo Product Ad
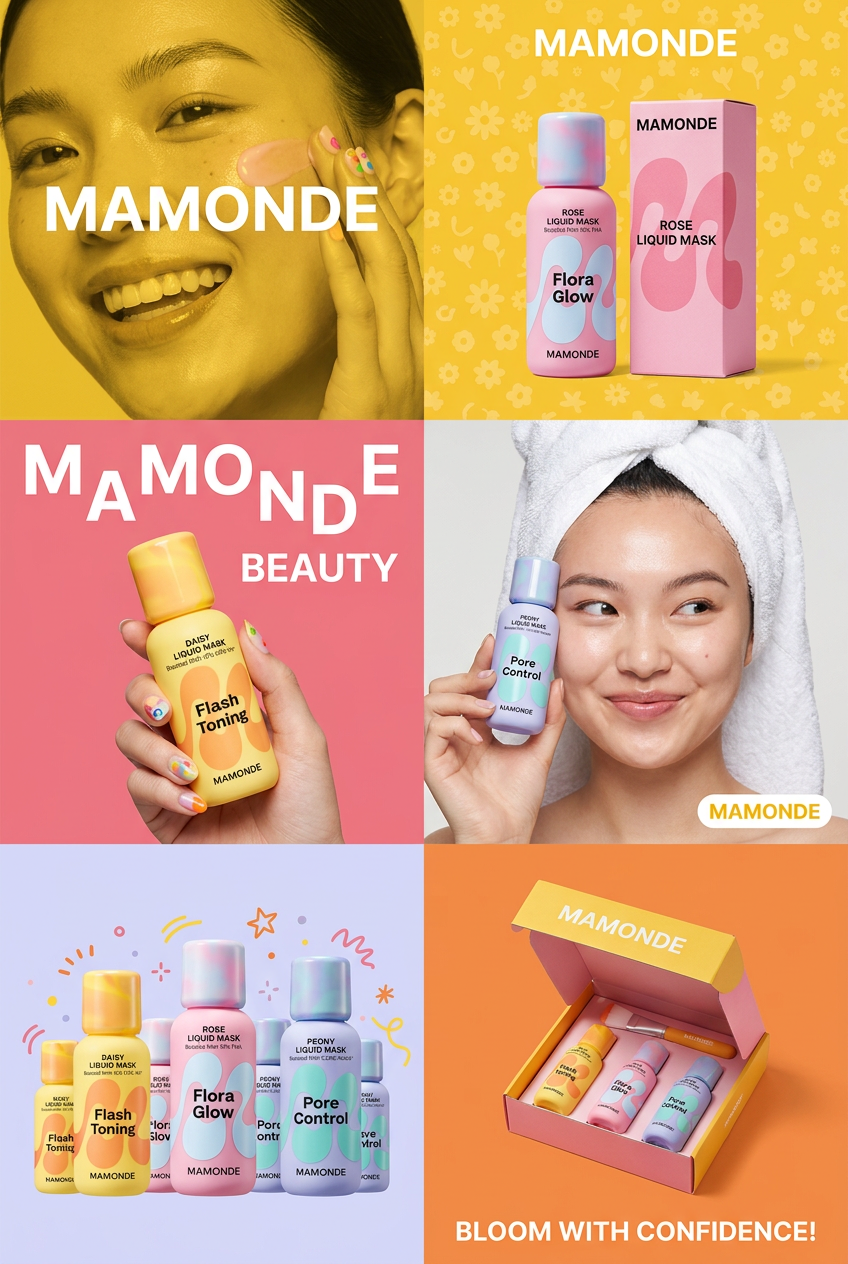
Get that high-end editorial look with a stacked, multi-panel campaign layout. It slices your brand visuals into a bold three-tier grid, pairing tight product close-ups right next to lifestyle shots for a cohesive, modern beauty poster.
Regenerate using your own assets.
This is the power of a system: you change one variable (the person) while the system (the Brandkit and workflow) guarantees consistency.
From headshot to marketing asset: putting your new visuals to work
Professional headshots are foundational assets, not just profile pictures. Because you've created them within the MyUP ecosystem, they are immediately available to be used in hundreds of other on-brand marketing materials.
There's no need to download the image, open another app, and re-import it. You can directly pull the approved headshot into a new workflow. For example, you can create a 'Meet the Team' social media carousel, update the visuals on your pitch deck, or generate assets for a hiring announcement.
To immediately turn a new headshot into a recruiting asset, use the Modern Hiring Poster workflow. It will take the headshot and seamlessly integrate it into a branded template, ready to be published in minutes.
Workflow code: #myup-eiob-7tbc
Modern Hiring Poster
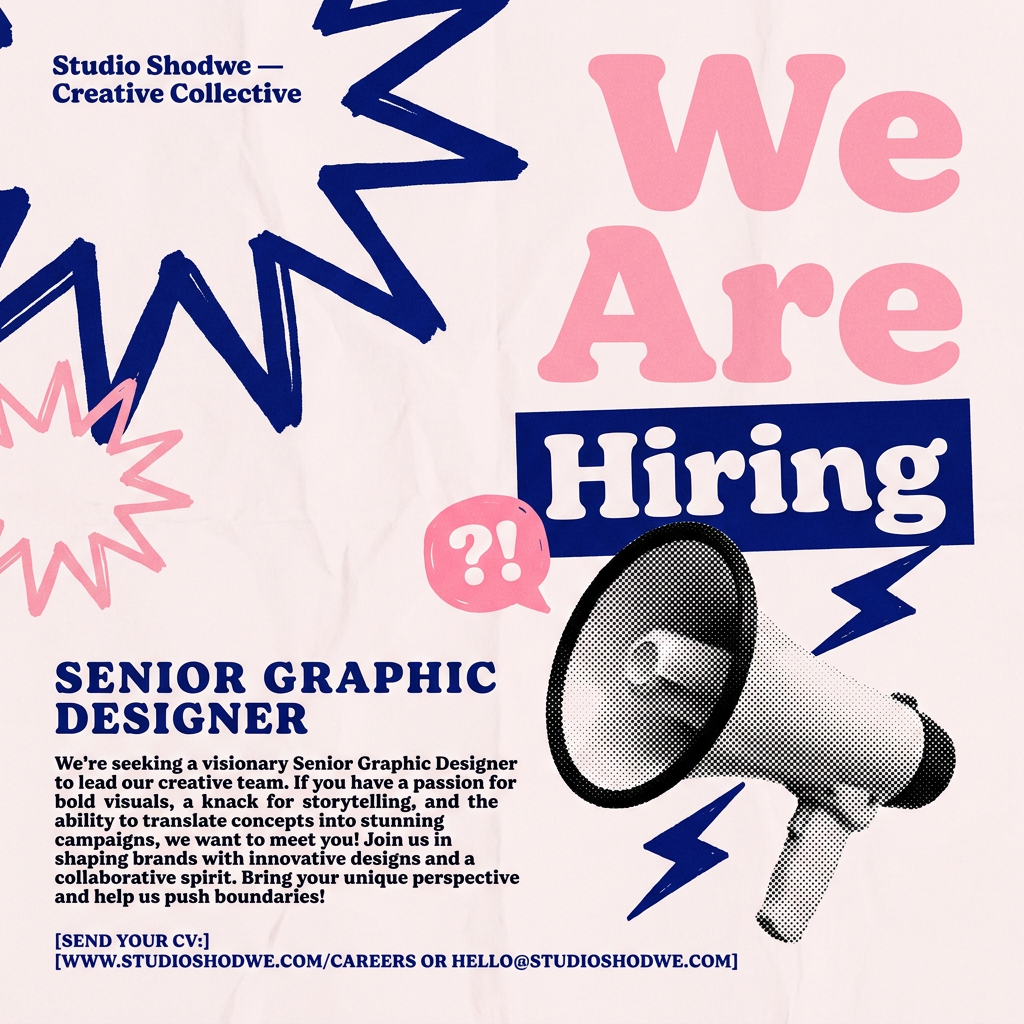
Turn your open roles into stylish social announcements. It sets your hiring details against a soft, textured paper background with clean, editorial typography. Perfect for giving your brand a polished, modern look when you're looking to hire.
Regenerate using your own assets.
By managing the entire lifecycle of your brand visuals on one platform, you eliminate the friction that slows down content production and creates brand inconsistencies. You get speed and control, without compromise.
