You can now generate an entire luxury product photography campaign—from hero shots to social media assets—without booking a studio or hiring a photographer. The secret isn't a single magic prompt, but a structured workflow that puts you in the creative director's seat. This guide provides that exact workflow.
Instead of wrestling with prompts to get one perfect image, you will learn to define a campaign's visual identity first, then use that blueprint to generate a complete, cohesive set of images that feel like they were all captured in a single, high-end photoshoot.
Workflow code: #myup-i7tv-whrn
Think like a virtual set director, not a prompter
The biggest mistake brands make with AI image generation is focusing on the product first. They write prompts like, "a bottle of luxury serum on a marble slab." This approach produces inconsistent, often generic results that don't feel like a cohesive campaign. Professional creators are adopting a more sophisticated technique, sometimes called 'Virtual Set Design', that flips the script.
You start by defining the entire scene: the lighting, the camera, the mood, and the environment. You become the art director, building the virtual studio before the product even enters the frame. This method gives you editorial control and ensures every image shares the same visual DNA. It's the difference between a random snapshot and a deliberate, art-directed campaign. MyUP templates are built around this principle, turning this expert technique into a simple, guided process.
A 4-step workflow for your AI-powered campaign
This workflow breaks down the virtual set design process into four manageable steps. Follow them to move from a creative brief to a full suite of on-brand, campaign-ready product visuals.
Step 1: Define your campaign's visual DNA
Before you generate a single pixel, you must codify your campaign's aesthetic. This is your creative blueprint for consistency. Document these elements so you can apply them systematically across every shot:
- Lighting Style: Is it soft and diffused morning light, or dramatic, hard-edged studio light? Be specific. Examples: "soft golden hour backlighting," "dramatic single-source spotlight," "bright, clean commercial lighting."
- Color Palette: Define 3-4 core colors. Include neutrals. Example: "earthy tones of terracotta, beige, and deep forest green with cream highlights."
- Mood & Atmosphere: What feeling should the images evoke? Examples: "serene and minimalist," "energetic and bold," "mysterious and opulent."
- Prop & Texture Themes: What objects and surfaces will surround your product? Keep it consistent. Examples: "raw materials like stone and wood," "silky fabrics and reflective surfaces," "minimalist geometric blocks."
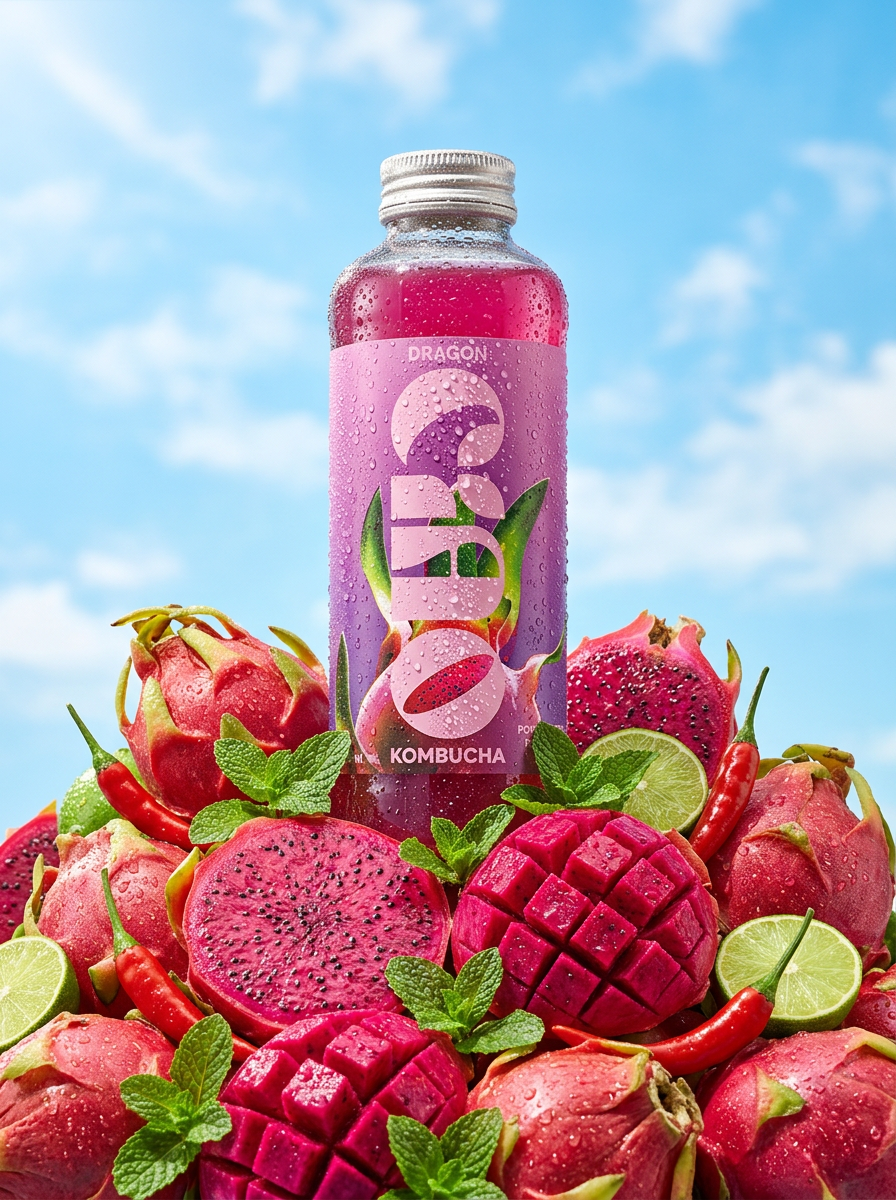
Step 2: Generate your hero shots with a campaign workflow
With your visual DNA defined, it's time to create your core product images—the hero shots for your website and product pages. This is where a structured workflow is critical. Instead of a blank prompt box, a guided template ensures you apply your visual DNA correctly every time.
The MyUP Product Photography Campaign template is designed for this exact task. Workflow code: #myup-i7tv-whrn. It prompts you for the key elements of your virtual set—the lighting, environment, and mood you defined in Step 1. By feeding it your consistent visual DNA for each product, you ensure the resulting images of your perfume bottle, skincare jar, and watch all look like they belong to the same high-end campaign.
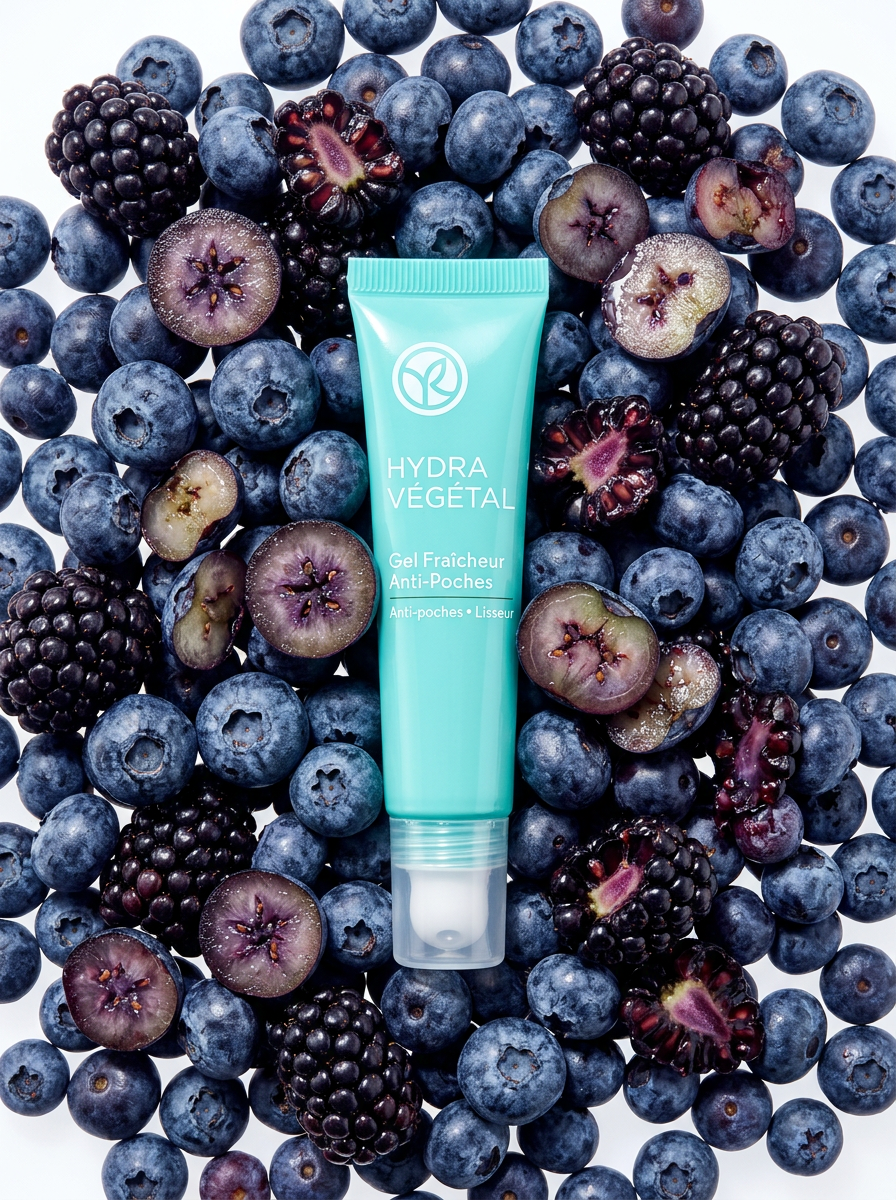
Step 3: Create supporting lifestyle and conceptual shots
A modern campaign needs more than just product-on-background shots. You also need conceptual images, ingredient close-ups, and abstract textures for social media and advertising. The goal is to create these supporting assets using the *same* visual DNA.
For example, a beauty brand might need to visualize the feeling of hydration. Using the Luxury Beauty Ingredient template (Workflow code: #myup-wlmb-vqli), you can apply your campaign's lighting style and color palette to generate an abstract shot of a water splash or a close-up of a botanical element. Because the core creative direction remains the same, these conceptual images will feel perfectly integrated with your main product shots. This is how you build a complete visual world around your product, which is a key part of creating a compelling e-commerce product listing.
Regenerate using your own assets.
Step 4: Review and refine for perfect consistency
Treat your first batch of AI generations as a contact sheet, not the final delivery. Assemble your best 5-10 images and review them as a single collection. Pay close attention to the details that create a sense of unity.
Are the shadows falling in the same direction? Is the color temperature consistent? Does the mood feel the same from one shot to the next?
If one image feels slightly off—perhaps the lighting is too harsh or a color is too saturated—go back to the workflow. Make a small, specific tweak to that one input (e.g., changing "hard studio light" to "soft studio light") and regenerate. This iterative process of refining is what elevates a set of good images into a truly cohesive and professional campaign.
AI vs. traditional photoshoots: when to choose a virtual studio
Businesses are increasingly evaluating AI as a direct alternative to traditional photography. The decision comes down to a trade-off between control, cost, and speed.
- Choose AI for Speed and Iteration. A virtual photoshoot allows you to test dozens of concepts, lighting setups, and backgrounds in a single afternoon. A traditional shoot locks you into the decisions you made weeks in advance. If you need a high volume of creative assets for social media, AI is unbeatable.
- Choose AI for Budget Efficiency. The cost of a single professional photoshoot—including studio rental, photographer fees, styling, and retouching—can run into thousands of dollars. An entire AI campaign can be generated for a fraction of that cost, freeing up budget for other marketing activities.
- Choose AI for Creative Exploration. Want to shoot your product on a glacier, in a surreal desert, or floating in a cloudscape? With AI, fantastical concepts that would be logistically impossible or prohibitively expensive are just a few clicks away. For a deeper dive into this, see our guide on how to create luxury product photography with AI.
Where AI still falls short (and when to hire a photographer)
To build a smart creative strategy, it's crucial to understand the current limitations of AI. A virtual studio is not the right choice for every project. You should still hire a professional photographer for specific scenarios.
If your product is a one-of-a-kind item, like a unique piece of vintage jewelry or a specific work of art, you need a photo of the actual object. AI generates new images based on descriptions; it cannot photograph a specific physical item. Similarly, if your campaign requires a specific celebrity or human model interacting with the product in a complex way, the control and nuance offered by a real photographer are currently irreplaceable. For everything else, a structured AI workflow offers a powerful new way to produce commercial-grade visuals.
Start building your virtual studio
The barrier to creating high-end, campaign-level product photography has collapsed. By adopting a director's mindset and using a structured workflow, any brand can produce a wealth of on-brand visuals without the traditional costs and complexities. Ready to try it for yourself? Create an account and start building your first AI-powered campaign today.
