
On June 24, 2026, the biggest frustration with using AI for mockups — the complete lack of compositional control — was finally solved. Adobe released 'Structure Reference' for its Firefly Image 3 model, a feature that lets you dictate the exact layout of a generated image using a reference sketch or photo. This changes everything.
For years, creating a custom mockup meant either endlessly scrolling through template libraries hoping for a match, or wrestling with prompts in Midjourney, praying the AI would place your product correctly. That era of guesswork is over. The new frontier isn't just generating images; it's directing them.
This guide provides the practical, step-by-step workflow to use this new level of control. Stop hunting for templates and start creating the exact scene your product deserves. This workflow for a luxury editorial shot is the perfect place to start.
Workflow code: #myup-5q78-bln0
Luxury Floral Product Editorial
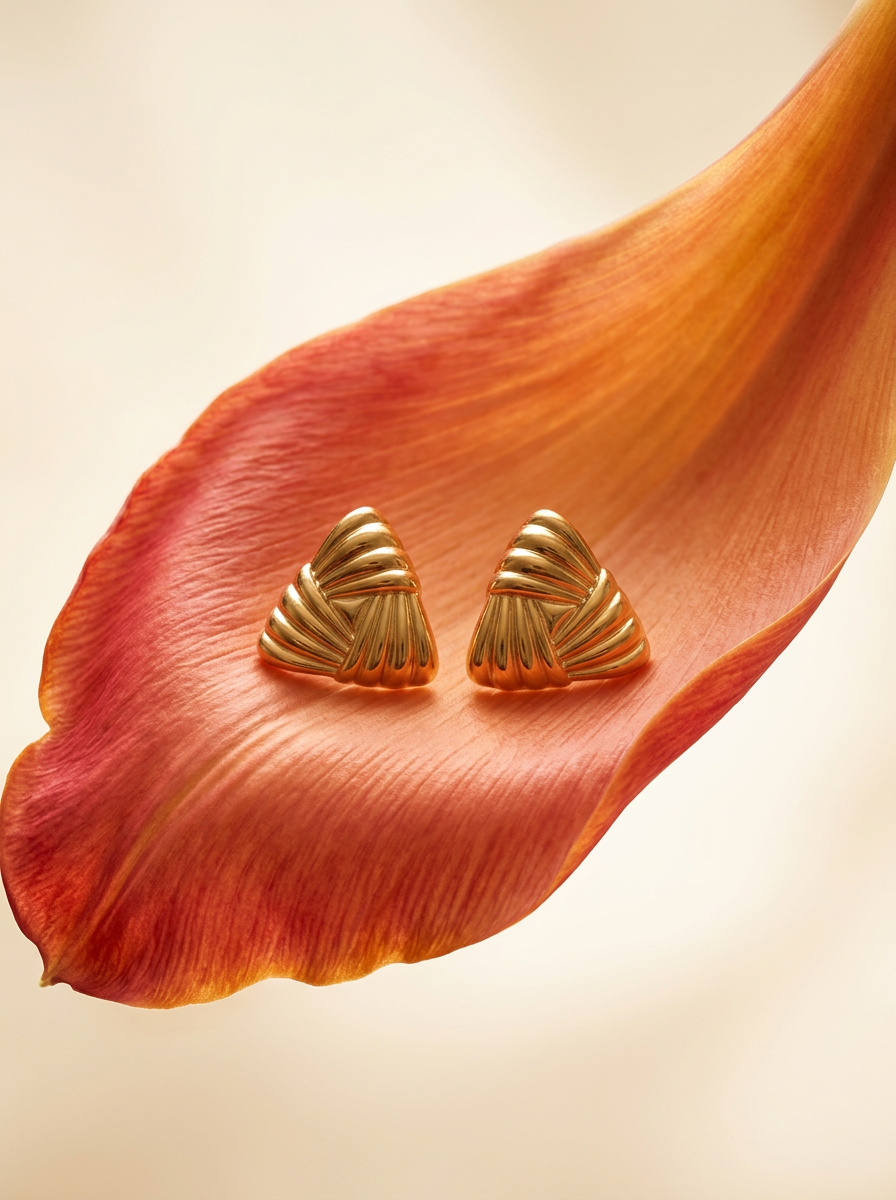
Place any product in an ultra-minimalist, warm studio space. It wraps your item in a seamless cream and beige backdrop with a super soft bokeh that melts away, making the details pop. It’s perfect for giving goods a clean, high-end look.
Regenerate using your own assets.
The 4-step workflow for any mockup you can imagine
The core idea is to separate the *layout* from the *style*. You define the structure first, then let the AI handle the photorealistic rendering. This gives you art director-level control without needing to be a 3D artist or Photoshop expert. The entire process can be built into a repeatable MyUP workflow.
- Define the scene with a structure reference: Use a simple sketch or photo to lock in the exact composition.
- Generate the background scene: Prompt the AI to create a photorealistic environment that matches your structure.
- Place your product with AI inpainting: Seamlessly add your product into the generated scene, matching lighting and perspective.
- Save and repeat for a full campaign: Turn the one-off mockup into a reusable workflow for an entire AI virtual photoshoot.
Step 1: Define your scene with a structure reference
A structure reference is an image that tells the AI *where* to put things, not *what* they should look like. This is your blueprint. It can be surprisingly simple:
- A basic digital sketch: Open any drawing app and create a simple line drawing. A rectangle for your product box, a circle for a plate, a line for the horizon. This is enough to guide the AI.
- A 'graybox' 3D render: For more complex scenes, use simple 3D software to arrange basic, untextured shapes (cubes, spheres, cylinders). The resulting render gives the AI perfect information on perspective, scale, and placement.
- An existing photograph: If you like the composition of a photo you've seen, you can use it as a structural guide. The AI will adopt its layout without copying its content or style.
The key is that you are now in control of the composition. The product will be exactly where you want it, at the size you want it, every single time.
Step 2: Generate the scene and place your product with AI inpainting
Once you have your structure reference, the creation process happens in two main phases inside a MyUP workflow.
First, you generate the background. You upload your structure reference image and combine it with a descriptive text prompt. For example, using a sketch of a bottle on a flat surface, you might prompt: 'Luxury cosmetic product scene, on a wet black slate countertop with scattered dewdrops, soft overhead studio lighting, minimalist, macro shot.' The AI will generate an image that follows your sketch's layout but with the rich, photorealistic details from your prompt.
Second, you place your product. This is where a multi-step workflow becomes essential. In the next step, you upload your actual product photo (ideally with a transparent background). You place it over the generated scene where your placeholder was. Then, using an AI inpainting tool, you can mask the area around your product to generate realistic shadows, contact points, and reflections, seamlessly blending it into the AI-generated environment. The user validates the result, and MyUP handles the production.
Pro-tip: How to get realistic lighting and reflections
Getting the final 10% of realism often comes down to mastering materials and light. This is a common failure point for many AI generators, leading to 'plasticky' or fake-looking results. Here are some specific prompts and techniques to use in your workflow:
- Be specific about light: Don't just say 'good lighting'. Describe it. Use phrases like 'soft morning light from a window on the left', 'dramatic single-source spotlight from above', or 'dappled sunlight filtering through leaves'.
- Describe materials and surfaces: The AI needs to know how light should interact with the scene. Add terms like 'matte concrete surface', 'highly reflective polished marble', or 'rough, porous wood grain'.
- Use inpainting for reflections: To solve the common problem of poor reflections on surfaces, use the inpainting tool. After placing your product, select the area on the surface directly beneath it and run a new prompt like 'add a subtle, distorted reflection of the object above'. This gives you granular control over the final details.
- Use negative prompts: To avoid common AI mistakes, add negative prompts to your workflow steps, such as '--no text, logos, blurry, distorted, watermark'.
From one-off mockup to a full campaign
Creating a single perfect mockup is a huge step forward. But the real value for a brand is creating a dozen consistent visuals for a full campaign. This is the foundation of the 'AI Virtual Photoshoot' trend, and it's where a workflow-based tool excels over a simple generator.
Because the entire process—from structure reference to scene generation to product inpainting—is a series of steps, it can be saved in MyUP as a single, reusable workflow. You can then run the entire sequence again with minor changes to generate a whole set of visuals. You could change the prompt from 'morning light' to 'golden hour' for a different mood, or swap out the product image to create mockups for your entire catalog, all while maintaining the same core art direction. This is how you scale production without sacrificing brand consistency. Trying to achieve this same level of control and repeatability in a tool like Midjourney or Firefly alone is a manual, time-consuming process. MyUP connects the steps and makes them repeatable.
This is especially powerful when combined with a Brandkit, which automatically applies your brand's fonts and colors to any text overlays added in the final steps. For brands that need to create entire campaigns of infinite product mockups, this is the only scalable way forward. You can start with a workflow designed for a complete studio setup.
Workflow code: #myup-xjaq-qhgx
Luxury Product Photography Studio
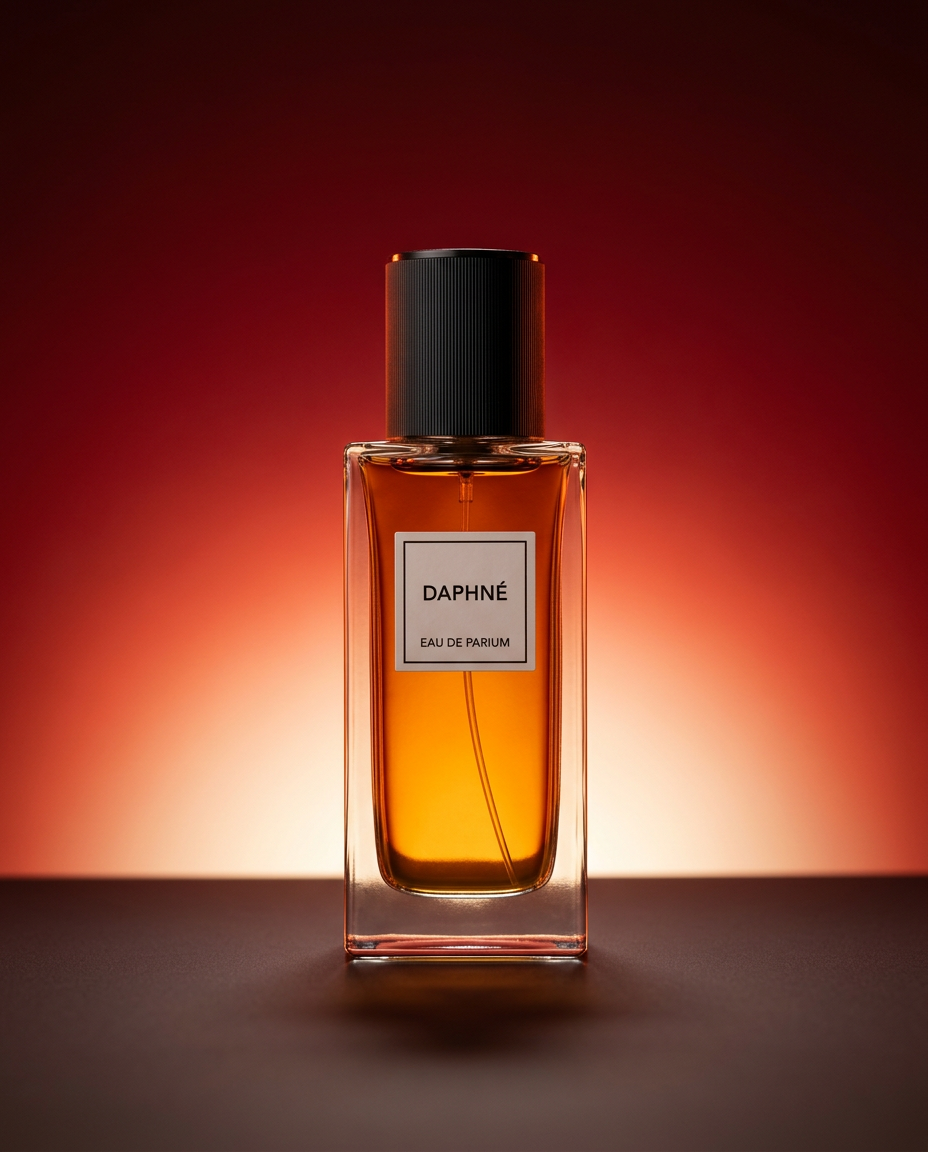
Drop your product into a dramatic, high-end studio setup. It places your item on a sleek flat surface against a rich crimson and orange cinematic gradient background. It's an easy way to get that moody, premium commercial look for any bottle, tech, or cosmetic.
Regenerate using your own assets.
Stop searching, start directing
The technology to create any product scene you can imagine now exists. The barrier is no longer the AI's capability, but having the right workflow to control it. Template libraries served their purpose when options were limited, but they force your brand into a pre-defined box. By embracing a workflow that separates composition from style, you can escape that box and generate limitless, on-brand mockups that are truly your own.
