
If you’ve searched for an “AI mockup generator” in June 2026, you're part of a breakout trend. The demand for turning a single product photo into a library of campaign assets is exploding. Tools like Pebblely have shown it's possible, but the real challenge isn't just creating a mockup—it's creating hundreds of them that all feel like they belong to your brand.
A random assortment of AI-generated backgrounds creates visual chaos, not a cohesive campaign. The modern approach is a workflow that gives you infinite variety with absolute brand control. It starts with one clean product photo and lets you generate an entire world around it, on demand. This is the one-photo workflow, and you can run your first batch right now.
Workflow code: #myup-u4lt-o0ho
Studio Product Ad
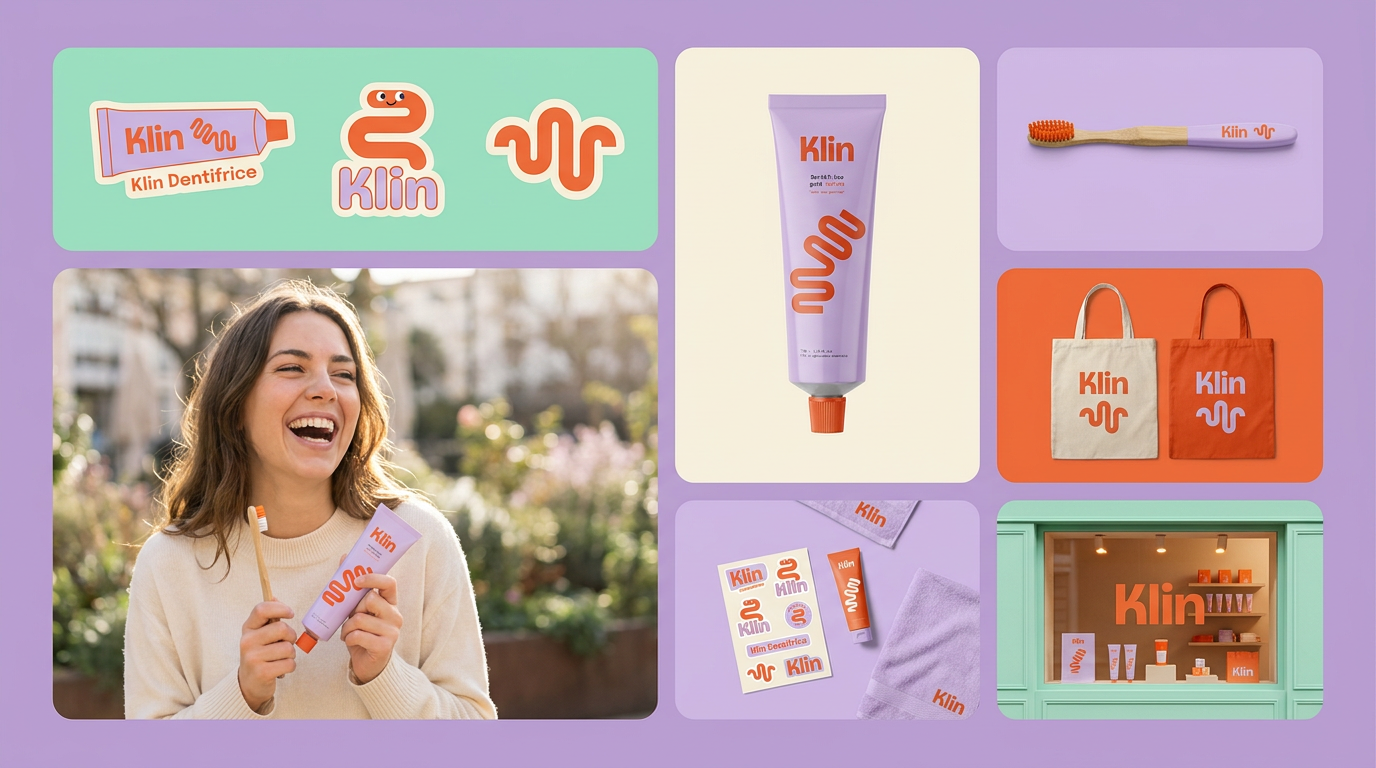
Drop in a single product photo to instantly build a cohesive visual identity. It automatically samples your item's dominant colors to generate a beautifully matched mosaic moodboard, giving your brand an instant, polished aesthetic.
Regenerate using your own assets.
How it works: separating your product from its world
The magic of this workflow lies in separating the constant (your product) from the variable (its environment). Instead of uploading your product and hoping the AI understands it, you provide it as a fixed element and instruct the AI to build the scene around it. Think of it like a stencil; the shape is locked, but you can paint anything you want inside it.
This concept of compositional control is becoming the standard for professional AI image generation. Adobe just launched 'Structure Reference' in Firefly for this exact reason: to lock in the layout of an image while generating new content. In MyUP, workflows use control layers to achieve the same professional-grade result. You upload your product as a transparent PNG, and it becomes a protected layer. The AI then generates the lighting, shadows, surfaces, and props to create a photorealistic scene that respects the position and form of your product.
The 4-step workflow to generate your first mockup batch
Running this workflow is straightforward. You provide the creative direction, and MyUP handles the production. The goal is to get a batch of diverse options you can then validate and refine.
1. Prepare your master asset
You need one high-quality photo of your product on a transparent background, saved as a PNG file. This is non-negotiable. The cleaner the cutout, the more seamless the integration into the generated scene will be. This single PNG will become the source for every mockup you create from here on.
2. Launch the workflow and upload your product
Inside MyUP, you'll start a product ad workflow like the Studio Product Ad (Workflow code: #myup-u4lt-o0ho). The first step will prompt you to upload your master asset—your product PNG. This places your product onto the canvas.
3. Write prompts for the scene, not the product
This is the most critical step. You are not describing your product; the AI can already see it. You are describing the world you want to place it in. Your prompt should focus entirely on the background, surface, lighting, and mood. For example, instead of “a bottle of serum on a marble counter,” you would simply prompt: “A white marble bathroom counter with soft, diffused morning light coming from a window on the left. A small, out-of-focus green plant is in the background.”
4. Generate and validate
Execute the workflow to generate a batch of mockups. Review the results. Do the shadows look natural? Is the scale correct? Does the lighting interact with your product convincingly? Because this is a workflow, you can easily adjust the prompt and regenerate, giving you full control to fine-tune the output until it’s perfect for your campaign.
Workflow code: #myup-aon6-zvop
Studio Product Ad
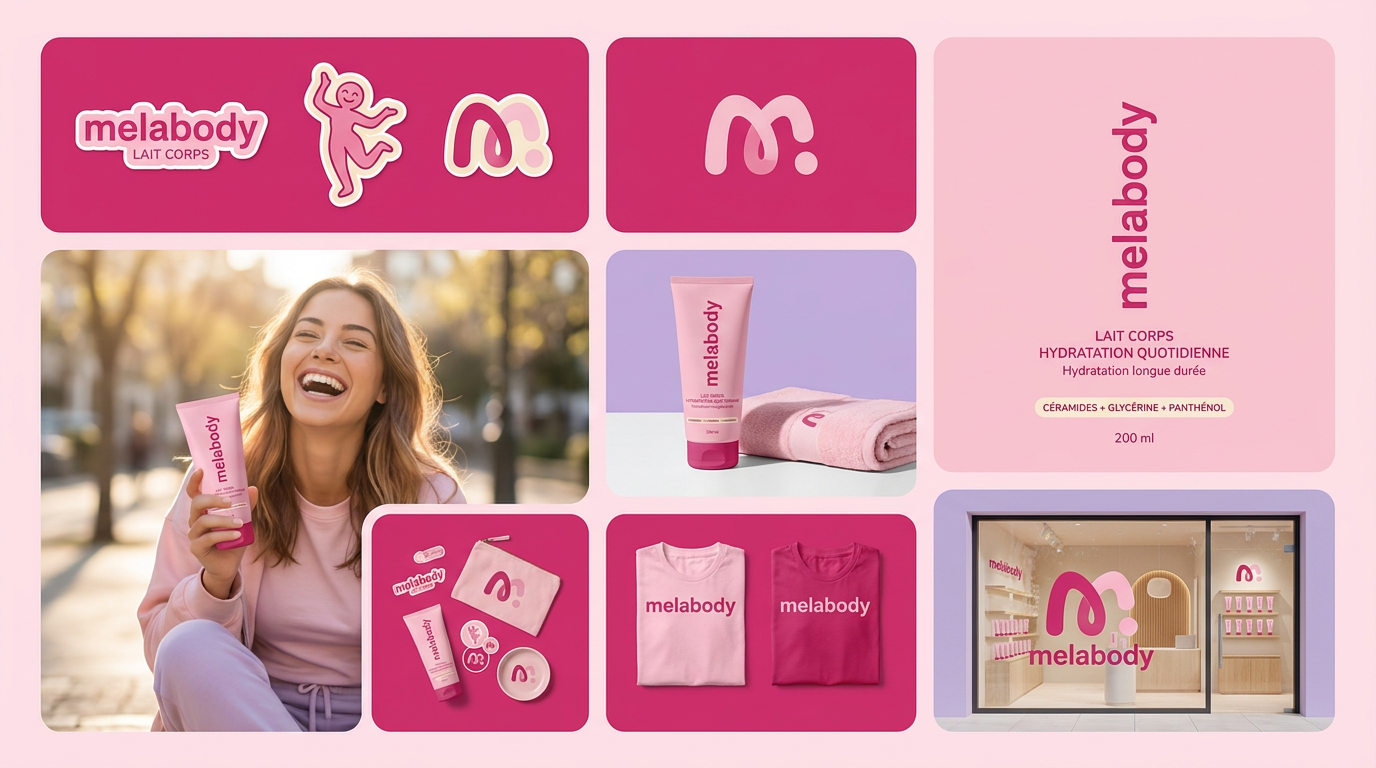
Turn any product photo into a cohesive brand moodboard. It automatically extracts the dominant color from your image to style the background, framing everything in a clean mosaic layout that perfectly matches your aesthetic.
Regenerate using your own assets.
Prompting for scenes: a practical guide
The quality of your mockups depends almost entirely on the quality of your scene prompts. Be specific, and focus on sensory details. Here are a few examples to get you started:
- For a minimalist, clean aesthetic:“A smooth, matte white surface extending into a seamless background of the same color. A single, sharp, long shadow is cast from the product to the right. Bright, gallery-style lighting.”
- For a warm, rustic feel:“A weathered, dark oak wood table with a visible grain. Warm, low-key lighting from a single source, creating a cozy, intimate atmosphere. A sprig of dried lavender is placed nearby, slightly out of focus.”
- For a vibrant, energetic look:“A flat, solid background in a bold poppy red color. Hard, direct lighting creating a crisp, circular shadow directly beneath the product. No other props or elements.”
Each prompt creates a completely different world for the exact same product photo. For a bold, graphic style, you can use a workflow designed for it. The Minimal Vibrant Product Advertising Poster is a great starting point.
Workflow code: #myup-zpby-tzie
Minimal Vibrant Product Advertising Poster
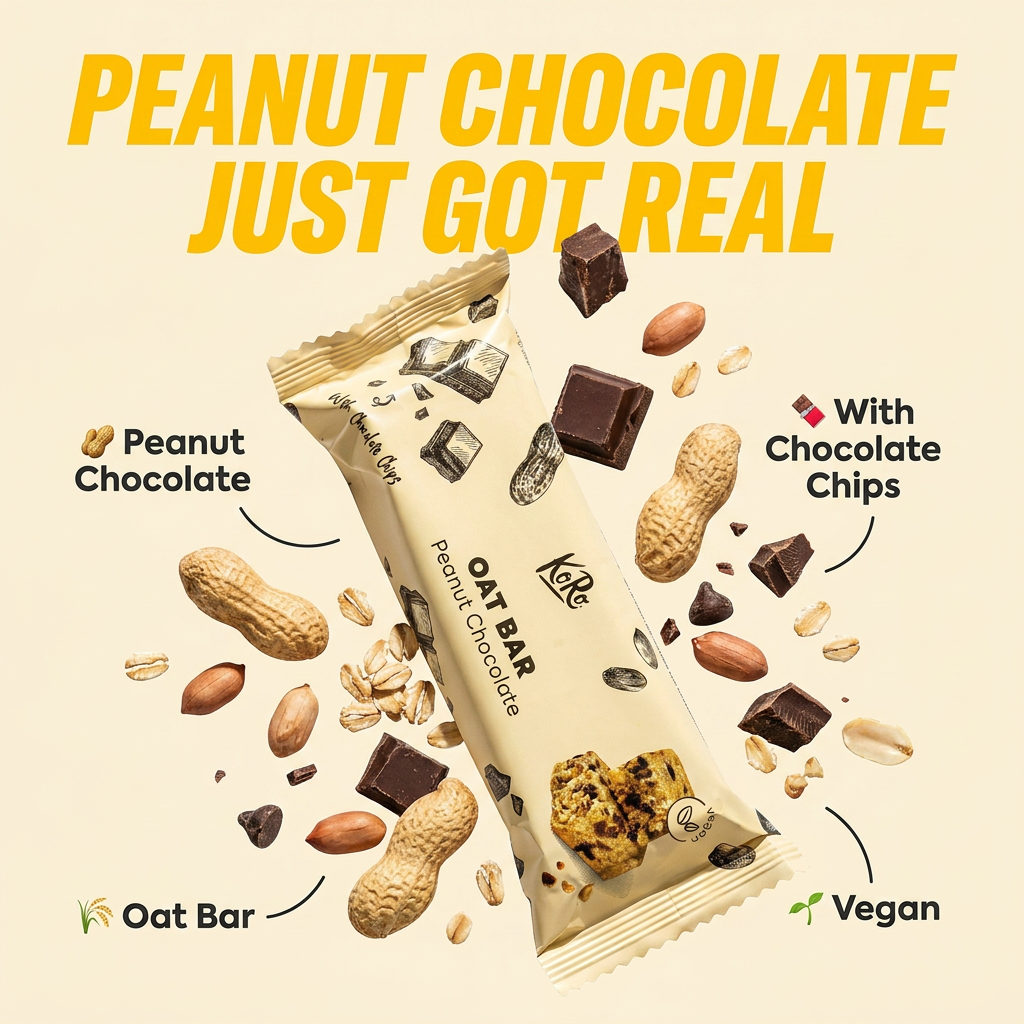
Drop in any product shot and watch it turn into a bold, high-energy square ad. It automatically reads your packaging to pull out the dominant colors and text, then builds a vibrant poster styled perfectly around your brand.
Regenerate using your own assets.
Beyond backgrounds: creating a consistent brand world
Generating a single great mockup is easy. The real value comes from generating hundreds of mockups that all feel like they belong to the same brand. This is where a simple background remover falls short. A workflow-based approach, combined with a MyUP Brandkit, solves this.
Your Brandkit stores your brand’s core visual identity—colors, fonts, and overall style. When you run a mockup workflow, MyUP automatically references your Brandkit to influence the generated scenes. The result is that the “warm, rustic” scene for one campaign has the same tonal quality as the “minimalist, clean” scene for the next. This ensures that even with infinite variety, your visuals never become inconsistent. You can learn more about building a start-to-finish production system in our guide to a complete AI product photography workflow for e-commerce brands.
Common pitfalls and how to fix them
AI isn't perfect, and you'll occasionally get results that look slightly off. The key is knowing how to guide the model with prompt adjustments. Here are a few common issues and their fixes:
- Unrealistic Shadows: If shadows look painted on or don't match the lighting, add more specific lighting cues to your prompt. Phrases like “soft, diffused shadows,” “a single, sharp shadow cast to the left,” or “no visible shadows, flat lighting” give the AI precise instructions.
- Incorrect Scale: If your product looks too big or small for the scene, add a real-world reference to the prompt. For example, “a marble countertop with the product placed next to a small, 5cm tall ceramic dish.” This helps the AI understand the relative size.
- Lighting Mismatch: If the lighting on your product doesn't match the generated scene, ensure your source PNG is lit neutrally. A product shot with dramatic, hard-coded shadows will be difficult to place in a softly lit scene. A clean, evenly lit photo is the most flexible asset.
The time spent iterating on a prompt is minimal compared to the cost of a physical reshoot. This iterative control is a core advantage of an AI workflow over traditional methods, fundamentally changing the cost and time equation for content production.
