You’ve seen the workflow taking over your X and TikTok feeds this week. Someone takes a single, basic photo of a product on their desk, and a few clicks later, they have a dozen professional, studio-quality images ready for their online store. It looks like magic, and for e-commerce brands tired of expensive, time-consuming photoshoots, it’s a massive opportunity.
But when you try it with generic AI tools, the results are often a letdown: the lighting is wrong, the style doesn't match your brand, and every image looks like it came from a different company. The viral trick is real, but turning it into a reliable asset for your business requires a proper workflow.
This guide walks you through that professional workflow, step-by-step. We'll go from a single smartphone picture to a full set of on-brand product shots you can actually use for listings, ads, and social posts. This is how you build a virtual photo studio that works for your brand every single time. Let's start with the first, most common use case: a clean studio shot. The workflow below is the direct tool for it.
Workflow code: #myup-u4lt-o0ho
Studio Product Ad
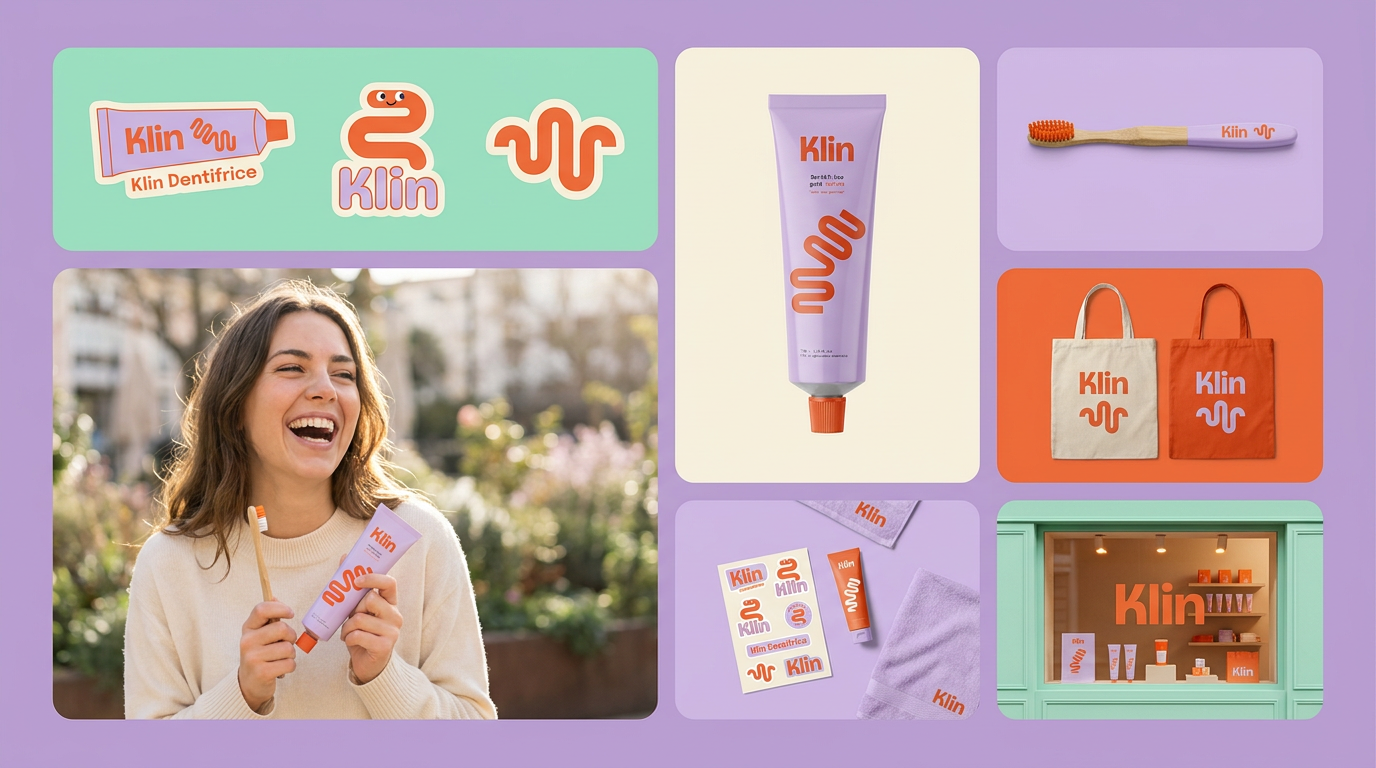
Drop in a single product photo to instantly build a cohesive visual identity. It automatically samples your item's dominant colors to generate a beautifully matched mosaic moodboard, giving your brand an instant, polished aesthetic.
Regenerate using your own assets.
Step 1: Capture your 'one shot' (the source image matters)
Garbage in, garbage out. The quality of your AI-generated photos depends entirely on the quality of your source image. You don't need a professional DSLR, but you do need a clean, well-lit shot of your product. Your smartphone is more than capable.
- Lighting is everything. Take the photo in a space with bright, diffused, natural light. Near a window is perfect. Avoid harsh, direct sunlight that creates hard shadows, and turn off warm indoor lights that can mess with the color balance.
- Focus on the product. Tap your phone screen to ensure the product itself is in sharp focus. A blurry source image will result in blurry, unusable AI generations.
- Use a simple background. Place your product on a plain, neutral surface like a white poster board, a clean desk, or a simple fabric sheet. This makes it much easier for the AI to automatically isolate the product in the next step.
The goal is a clear, isolated shot that accurately represents the product's shape, texture, and color. Don't worry about the environment; we're about to replace it completely.
Step 2: Isolate the product and build your virtual studio
With your source image ready, the next step isn't to jump straight into prompting. The secret to professional, consistent results lies in two preparation stages: background removal and building your Brandkit.
First, the product needs to be cleanly cut out from its original background. MyUP's workflow handles this automatically when you upload your image. It identifies the subject and removes the background, leaving you with a clean asset ready to be placed in new scenes.
Second, and most importantly, you need to define your visual identity. This is the step most people using generic tools miss, and it's why their results look random. In MyUP, you build a Brandkit by simply entering your website URL. The system automatically pulls your brand's colors, fonts, and logo, and analyzes the overall aesthetic to create a unique style profile. This Brandkit becomes your 'virtual studio'—it ensures every image the AI generates feels like it belongs to your brand, not some generic AI template.
Step 3: Generate your first set of on-brand scenes
Now you can generate your core product shots. Using the workflow from the introduction, you combine your isolated product image with your saved Brandkit. The AI doesn't just guess at a style; it uses your specific brand identity as its guide.
You'll get back a set of variations almost instantly. This is where your control comes in. MyUP executes the heavy lifting of production, but you are the creative director. Your job is to validate the results. Review the generated scenes—some will be perfect for your main product listings, others might have a slightly different angle that's better for a social media post. Select the strongest options and discard the rest. You can then re-run the workflow with a slightly modified prompt, like "on a marble surface with soft morning light," to explore more specific concepts while staying perfectly on-brand.
Step 4: Scale from a single shot to a full campaign
A clean studio shot is essential, but a full campaign needs variety. You need lifestyle images, ad creative, and social media posts. Because you've already built your Brandkit, scaling up is simple. You're not starting from scratch for each new asset.
Instead of the basic studio shot, you can now run a more stylized workflow. For example, if you want to create a vibrant, graphic-style ad for Instagram, you can use a workflow designed for that. It will still use your core product image and apply your Brandkit, but the output will be tailored for a different marketing channel. This is how you move from just replacing a product listing photo to generating an entire campaign's worth of visuals. For a more eye-catching poster, this is the perfect next step.
Workflow code: #myup-zpby-tzie
Minimal Vibrant Product Advertising Poster
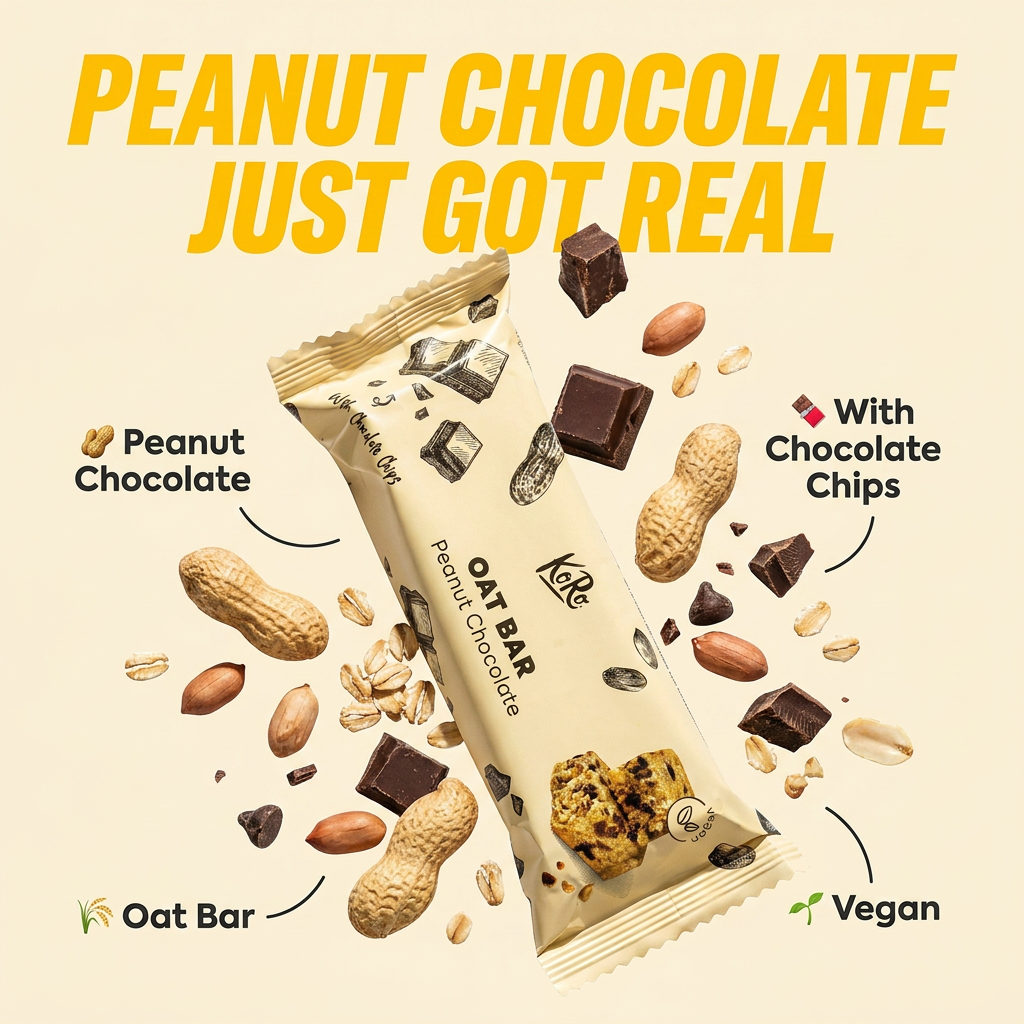
Drop in any product shot and watch it turn into a bold, high-energy square ad. It automatically reads your packaging to pull out the dominant colors and text, then builds a vibrant poster styled perfectly around your brand.
Regenerate using your own assets.
This repeatable process is also invaluable for creating product mockups. Instead of just placing your product in a scene, you can generate images of it on packaging, apparel, or in print. You can learn more about this in our guide to creating infinite product mockups with a one-photo workflow.
Common pitfalls (and how to fix them)
As you experiment with AI product photography, you'll run into common issues. Here’s how a workflow-based approach solves them systemically.
- Problem: Weird shadows and reflections. Generic AI often adds unnatural shadows or reflects non-existent objects onto your product. Solution: A Brandkit-driven workflow understands your aesthetic. If your brand is clean and minimal, it will generate scenes with soft, natural lighting, not dramatic, misplaced shadows. You are guiding the context.
- Problem: Distorted product details. Sometimes the AI can warp logos, text, or small details on the product itself. Solution: Start with a high-resolution source image. Furthermore, use prompts that specify what to preserve, like "maintaining the crisp logo on the bottle." A workflow allows you to lock in these instructions so you don't have to repeat them.
- Problem: Generic, boring backgrounds. Without guidance, AI defaults to stock-photo-style backgrounds. Solution: Your Brandkit is the guidance. It tells the AI your style—whether it's warm and rustic, futuristic and sleek, or colorful and playful. This is the difference between asking for "a product on a table" and getting a scene that actually matches your brand's world.
Your product photoshoot is now a repeatable workflow
The viral 'one-shot' trend is more than just a clever trick. When executed through a structured workflow, it fundamentally changes how e-commerce brands create visual content. You're not just saving money on one photoshoot. You're building a permanent, scalable asset for your brand.
Every time you launch a new product, you don't need to book a studio. You just need one clean photo. Every time you run a seasonal campaign, you don't need to start from zero. You run your new concepts through your established, on-brand virtual studio. This is how you end the content treadmill and build a system that generates on-brand assets forever.
