
If you’re in e-commerce, your social feeds have probably been flooded with tutorials for placing products into AI-generated scenes. They look amazing, but the workflows are brutal: a dizzying combination of Photoshop Beta for masking, Stable Diffusion with a custom ControlNet model for placement, and endless manual adjustments to fix lighting and shadows. It’s a powerful result locked behind a high wall of technical skill and time investment.
This isn't that workflow. This is the simple, one-platform method. Your product photos aren't finished assets; they're the starting point. This tutorial shows you how to turn a single, clean product shot into an infinite library of on-brand lifestyle images, on demand, without touching a single complex tool.
The hard way: why your feed is full of complex product photo workflows
The viral trend you’re seeing is a reaction to a real, expensive problem: the constant need for fresh visual content. A single product needs to be shown in a dozen different contexts to fuel ads, social posts, and product pages. A traditional photoshoot for all those variations is prohibitively expensive. AI offers a solution, but the popular methods are built by and for technical experts.
Getting a convincing result requires compositing—merging your product photo with a generated background. The hard way involves multiple steps across different software:
- Masking in Photoshop: Carefully cutting out your product.
- ControlNet Setup: Using a secondary AI model to try and lock your product's position within a Stable Diffusion prompt.
- Prompt Engineering: Writing complex prompts to generate a scene that matches the product's perspective and lighting.
- Post-Production: Returning to Photoshop to manually paint in realistic shadows, reflections, and color grading.
The result is hours of work for a single image. It doesn’t scale. For marketers and brand owners, this isn't a viable production system.
The one-click workflow: placing your product in any scene
The modern content engine doesn't require juggling three different applications. It's an integrated workflow designed for creation, not technical experimentation. The entire process in MyUP boils down to two simple steps:
- Upload your product image: A clean shot of your product on a transparent background.
- Describe the scene: Write a text prompt for the environment you want to place it in.
MyUP handles the complex compositing, lighting, and rendering. The user's job is to provide the core asset (the product) and the creative direction (the prompt). You validate the results and make adjustments, while the platform handles the heavy lifting of production. Let's walk through exactly how it's done.
Step 1: Prepare your master product image
The quality of your output depends entirely on the quality of your input. Before you start generating scenes, you need one high-quality “master” image of your product. This is the single most important step.
Your master image must be:
- High-resolution: The larger and clearer, the better the final composite will look.
- A PNG with a transparent background: This is non-negotiable. The AI needs a clean cutout to understand what the foreground object is. Use any background remover tool to create this.
- Well-lit and in focus: The lighting should be neutral and even. Avoid hard shadows or creative lighting on the product itself, as this will clash with the lighting of the generated scene.
Think of this PNG as your digital asset, ready to be dropped into any story you can imagine.
Step 2: Generate a simple studio backdrop
Let's start with a simple, foundational use case: taking your product off a blank background and placing it in a clean, professional studio setting. This is perfect for product detail pages, catalogs, or simple ads. You don't need a complex lifestyle scene yet; you just need a surface and a color-matched background.
Instead of writing a prompt from scratch, you can use a workflow designed for this exact task. It has the core prompt structure built-in; you just upload your product image and let it run. The workflow handles the prompt engineering to create a clean pedestal, matching background colors, and soft studio lighting.
Workflow code: #myup-u4lt-o0ho
Studio Product Ad
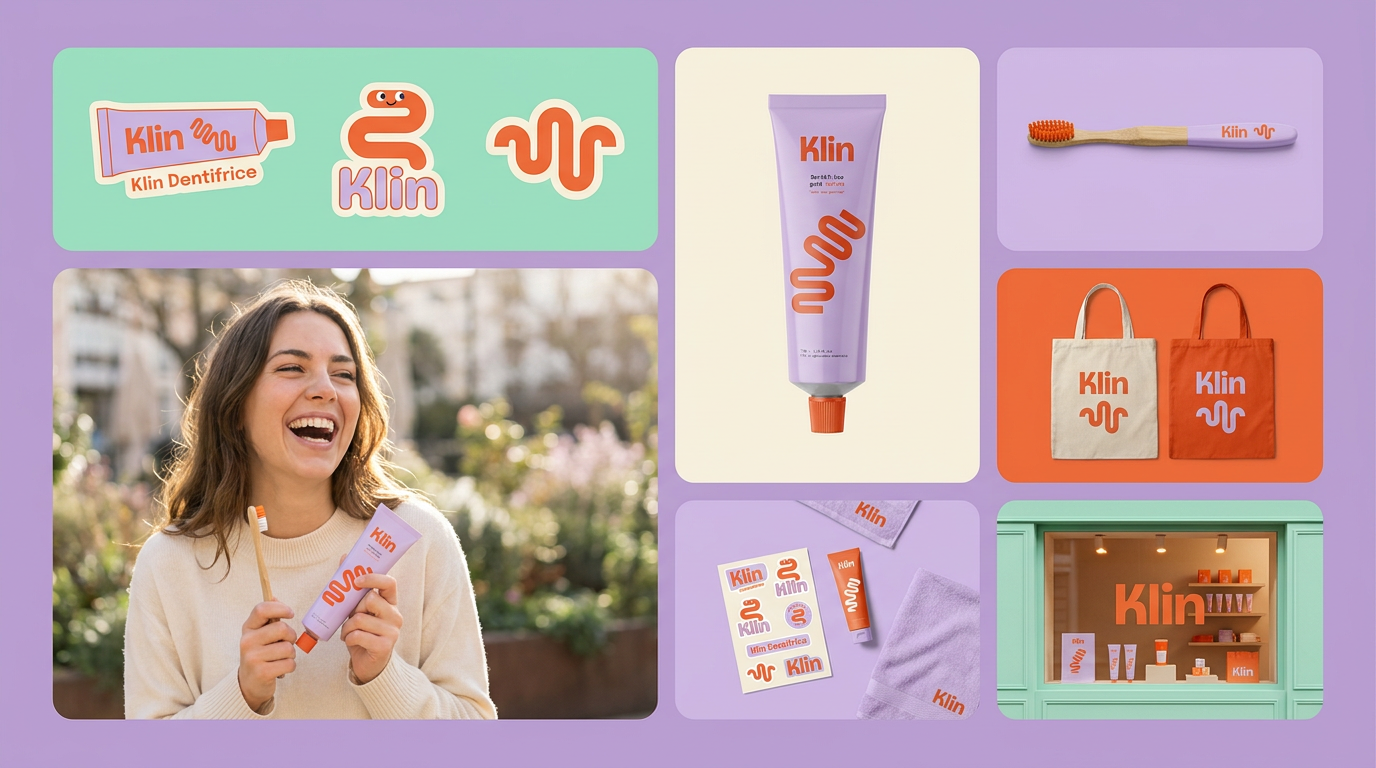
Drop in a single product photo to instantly build a cohesive visual identity. It automatically samples your item's dominant colors to generate a beautifully matched mosaic moodboard, giving your brand an instant, polished aesthetic.
Regenerate using your own assets.
Step 3: Prompting for realistic lifestyle scenes
Now for the creative part: placing your product in the real world. A great lifestyle prompt has four key components: the surface, the environment, the lighting, and the supporting props.
Here’s a simple formula: [Product] on a [surface], in a [environment], with [lighting], next to [supporting props].
Let’s see it in action for a bottle of skincare serum:
- Weak Prompt: “Skincare serum in a bathroom.”
- Strong Prompt: “A bottle of skincare serum on a white marble countertop, in a bright, modern bathroom with sunlight streaming from a window, next to a neatly folded white towel and a small green plant.”
The second prompt gives the AI specific details to work with, resulting in a much more realistic and compelling image. Don't be afraid to get specific about materials (rustic wooden table, polished concrete floor), lighting (soft morning light, golden hour glow, dramatic studio spotlight), and context. This level of control is how you move from generic AI images to believable scenes that tell a story.
Step 4: Create a vibrant, on-brand campaign visual
Realistic scenes are great, but sometimes you need a high-impact ad creative. This means moving beyond photorealism and into more stylized, brand-aligned visuals. Instead of describing a real-world environment, your prompt can describe an abstract or artistic concept that uses your brand's colors and aesthetic.
For this, you can use a workflow that’s tuned for bold, graphic compositions. It prompts the AI to create visuals that are less about realism and more about color, shape, and brand identity. This is perfect for creating a scroll-stopping hero image for a new campaign launch or a featured post on your social grid. You upload your product, and the workflow builds a vibrant, poster-style visual around it.
Workflow code: #myup-zpby-tzie
Minimal Vibrant Product Advertising Poster
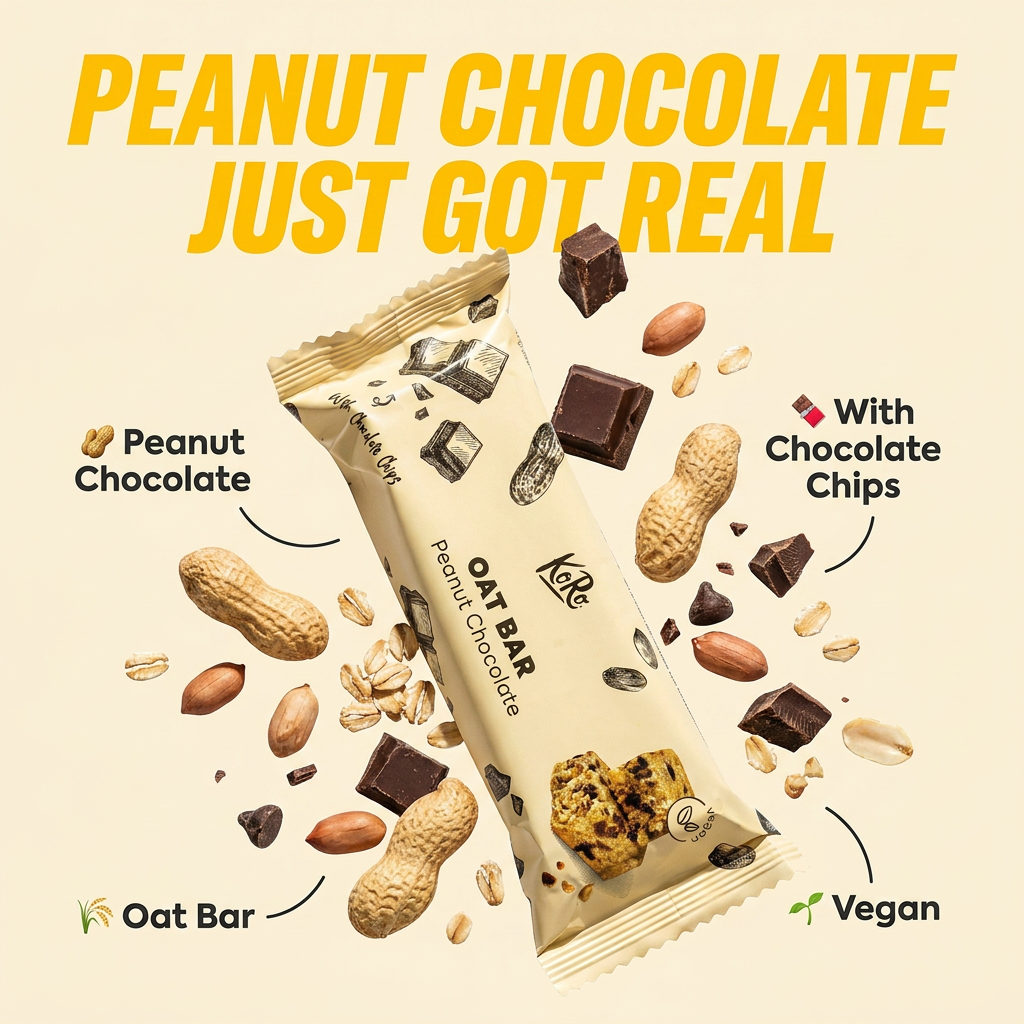
Drop in any product shot and watch it turn into a bold, high-energy square ad. It automatically reads your packaging to pull out the dominant colors and text, then builds a vibrant poster styled perfectly around your brand.
Regenerate using your own assets.
Step 5: Scale your content with variations and brand control
A single great image is a victory. A system for generating dozens of on-brand variations is a strategy. Once you have a prompt that works, the next step is to scale it. Generate multiple variations for A/B testing ad creative or for populating a full social media calendar without repetition.
This is where true brand control becomes critical. While tools like Midjourney are experimenting with parameters like `--style raw` to reduce their default aesthetic, this is a blunt instrument. True consistency comes from a system that understands your brand's specific visual identity. In MyUP, your Brandkit—your colors, fonts, and logo—is automatically applied to every generation. The AI doesn't just create a cool image; it creates an image that looks and feels like *your brand*. Whether it's a realistic lifestyle shot or a vibrant ad, the color palette and overall mood will remain consistent.
This allows you to create specialized, high-end visuals at scale. For example, placing a cosmetic product in an elegant, luxurious setting is a common but difficult task. A dedicated workflow makes it simple.
Workflow code: #myup-mgqi-hmi6
Luxury Beauty Product
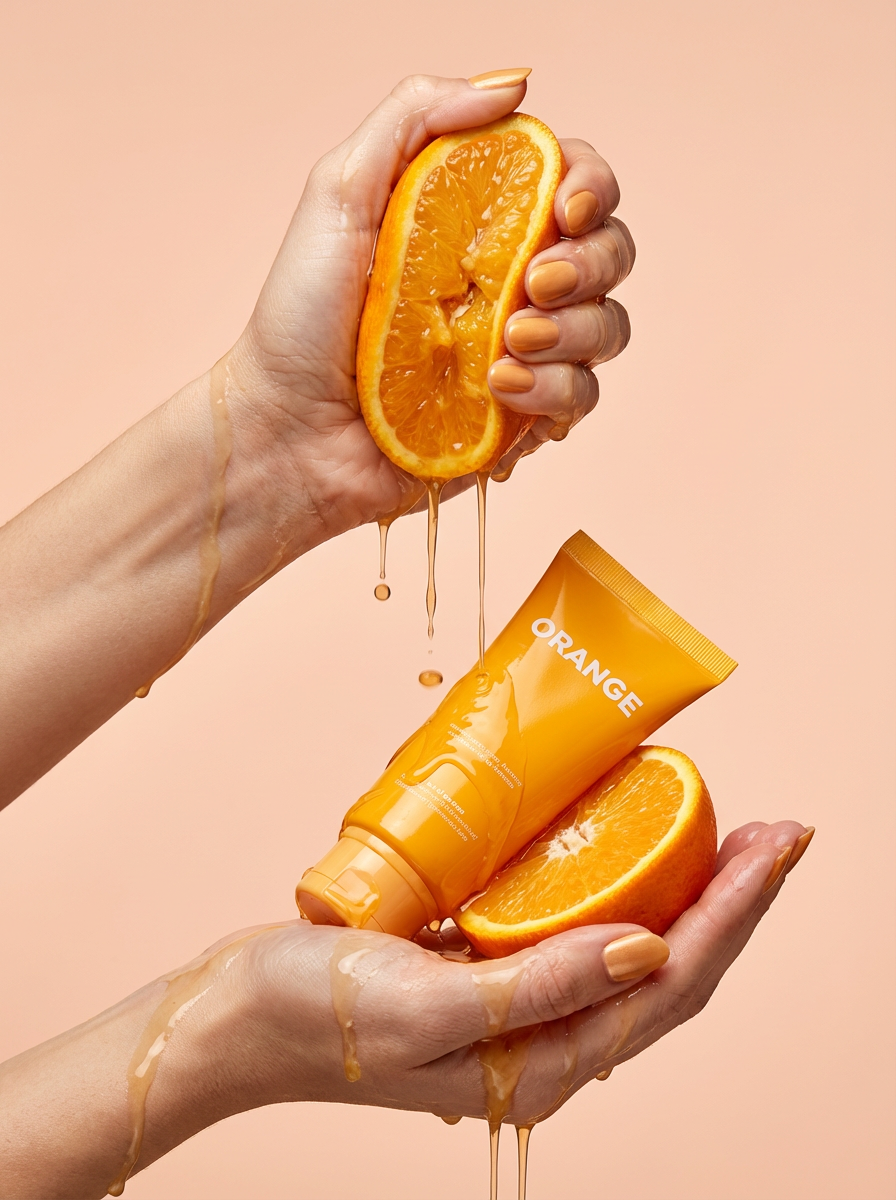
Get clean, hands-only luxury beauty editorials for your cosmetics or jewelry. It captures hyperrealistic skin textures and elegant hand posing, letting you customize the nail polish color to match your brand's exact palette.
Regenerate using your own assets.
Your product photo is now a content engine
Stop thinking of your product photography as a one-and-done asset. With the right workflow, that single, clean product shot is a key that unlocks an infinite number of stories, scenes, and campaigns. You no longer need to be a technical expert with a suite of complex tools to create the content your brand needs. By starting with your existing assets and layering on AI-driven scene generation, you can build a scalable, on-brand content engine that keeps your feeds full and your audience engaged.
