You’ve seen the viral threads on X: complex, multi-tool workflows to turn a single product photo into a lifestyle ad. The process usually involves one tool to remove the background, another for scene generation, a third for generative fill, and a fourth for branding. The result is a patchwork of inconsistent assets and hours of wasted production time. The core problem isn't generating one image; it's creating a cohesive campaign.
The industry is noticing. Adobe just launched a 'Brand Kit' for Firefly, and new 'one-click' tools like CampaignKit AI are emerging, all trying to solve this exact pain point. But a feature isn't a workflow. Your product photo shouldn't be the end of a complicated process; it should be the beginning of a simple one. On MyUP.ai, it is. This guide details the single, integrated workflow to turn one product photo into a multi-channel ad campaign, all on one platform.
Why your one-off AI product shots aren't a campaign
An ad campaign requires more than a single cool image. It demands consistency across dozens of assets, tailored for different channels, promotions, and audiences. When you hop between different AI generators, you lose control. The lighting changes, the product warps slightly, and the brand style gets lost. Each image becomes a one-off creative project instead of a scalable asset.
The real cost isn't just the subscription fees for three or four different tools. It's the production drag and the brand damage from inconsistent visuals. A successful campaign is built on a recognizable, repeatable visual identity. The goal is to make your product the hero, consistently, everywhere. This requires a workflow designed for production, not just generation.
The workflow: from a single photo to a full campaign in 4 steps
The MyUP.ai process is built around a simple, repeatable sequence that puts your product at the center and wraps a scalable campaign around it. It’s not about finding the perfect prompt once; it’s about building a system you can run every time you need new assets. Here’s the high-level view:
- 1. Anchor: Start with a single, clean product photo that acts as the non-negotiable constant in every image.
- 2. Generate: Create dozens of diverse scenes and backgrounds around your anchored product.
- 3. Theme: Adapt your scenes for specific campaigns, channels, or promotions with simple prompt adjustments.
- 4. Brand: Apply your logo, fonts, and color palette automatically across every generated asset with a saved Brandkit.
Step 1: Anchor your product with a clean reference image
The foundation of this entire workflow is a high-quality photo of your product. This isn't the image the AI will try to replicate; it's the exact image that will be placed into the new scenes. For this to work, you need one thing: your product isolated on a transparent background (.PNG format is ideal).
This 'anchor image' is your source of truth. By uploading it directly into your MyUP workflow, you ensure your product's shape, texture, labeling, and color remain 100% accurate in every single output. The AI's job is to build the world *around* your product, not to reinvent the product itself. This simple step eliminates the frustrating inconsistencies—the warped logos or strange new features—that plague other AI product photography methods.
Step 2: Generate endless scenes and backgrounds
With your product anchored, the creative work begins. This is where you instruct the AI on the environment you want to create. Your prompt no longer needs to describe the product itself, only the scene. This frees you to think like a creative director. Do you need a clean, minimalist studio shot? A vibrant lifestyle scene? An abstract, conceptual background?
In MyUP, you can write a prompt from scratch or use a template designed for this purpose. For example, a prompt like, "A sleek marble countertop with soft, morning light filtering in from a window" can instantly create a premium lifestyle setting for a bottle of skincare. To get started immediately with a professional studio look, this workflow is the perfect starting point.
Workflow code: #myup-u4lt-o0ho
Studio Product Ad
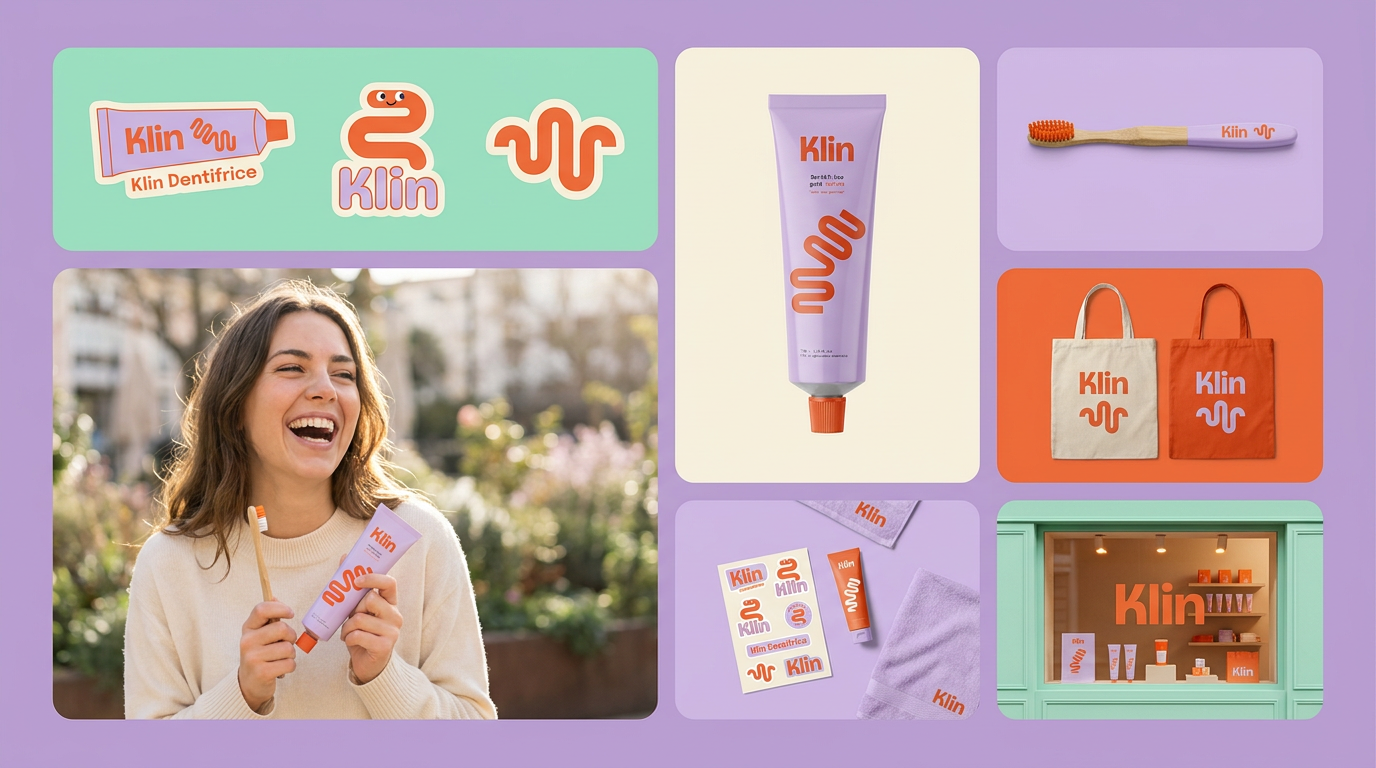
Drop in a single product photo to instantly build a cohesive visual identity. It automatically samples your item's dominant colors to generate a beautifully matched mosaic moodboard, giving your brand an instant, polished aesthetic.
Regenerate using your own assets.
Step 3: Create themed variations for different channels
A single scene is good, but a campaign needs variety. The power of this workflow is how easily you can create themed asset packs from the same anchored product. Simply adjust your scene prompt to match the campaign's objective.
For example:
- Summer Sale: "On a beach towel next to sunglasses and a palm leaf shadow, with a bright, sunny atmosphere."
- Holiday Promotion: "On a dark wooden table surrounded by pine cones, cinnamon sticks, and soft, festive bokeh lights in the background."
- Luxury Social Post: "Placed on a floating geometric pedestal made of polished chrome, against a soft gradient background in shades of lilac and cream."
Each prompt creates a new mini-collection of assets, perfectly tailored for a specific ad set or social media post, while the product remains identical. For a clean, high-end look that works across multiple platforms, the following template provides an excellent foundation.
Workflow code: #myup-fy77-jljs
Minimalist Elegant Product Advertising Poster
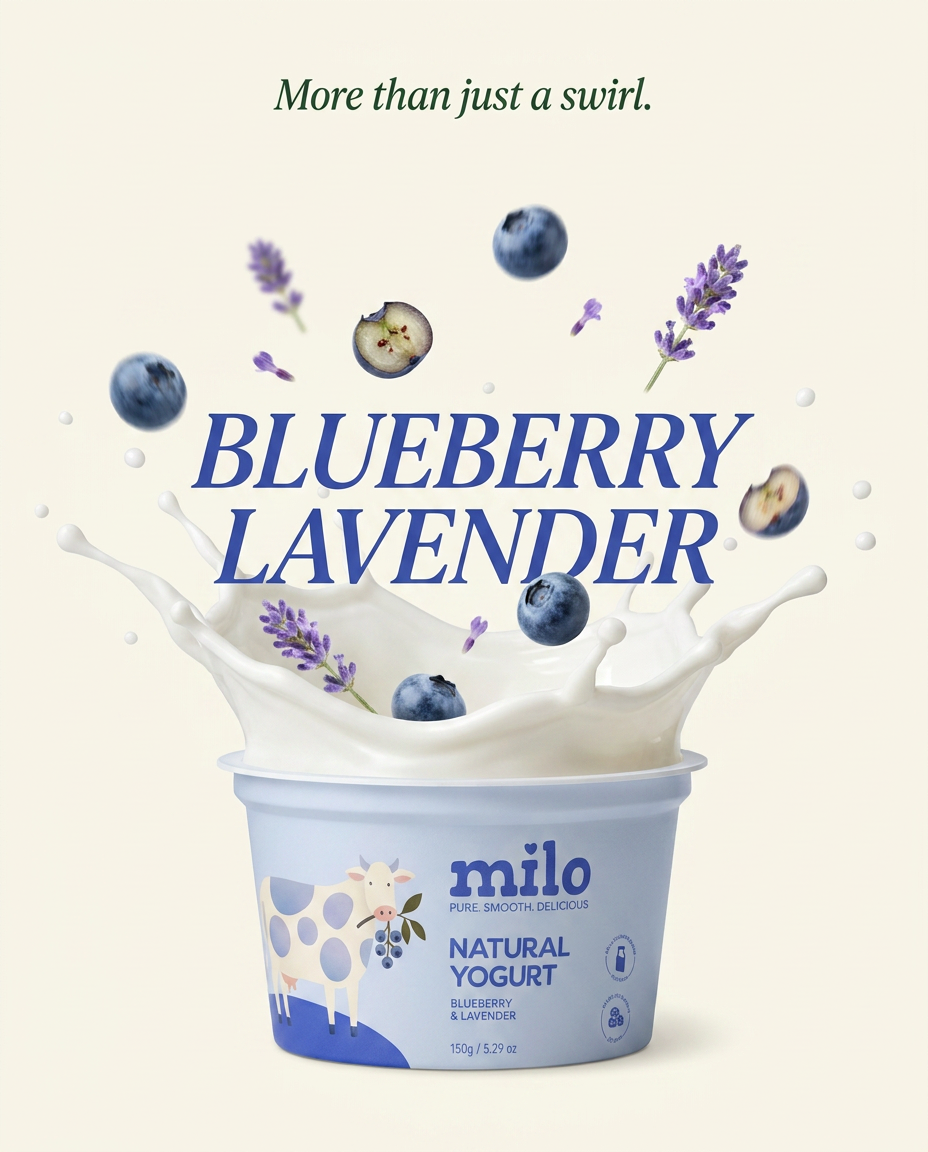
Turn any product shot into a high-end editorial ad. It places your item against a soft cream background with airy spacing and adds elegant, small serif typography at the top. Great for wellness or luxury brands wanting a calm, minimal aesthetic.
Regenerate using your own assets.
Step 4: Unify your campaign with an automated Brandkit
A folder of AI-generated scenes is not a campaign. A campaign has a unified visual language. This is the step where most multi-tool workflows break down, forcing you into Photoshop or Canva to manually add logos, headlines, and calls-to-action to every single image. MyUP automates this critical step with the Brandkit.
A Brandkit is your visual identity, saved once. You upload your logo, define your brand fonts, and set your color palette. Once it's saved, you can apply it to any or all of your generated product scenes in a single action. The AI handles the production; you handle the approval. This turns your collection of images into a finished, cohesive, and professional campaign in minutes, not hours. It's the final, crucial link that ensures every asset feels like it came from your brand. Many MyUP workflows, like this one for a beverage ad, have Brandkit application built directly into the final steps.
Workflow code: #myup-cqnu-i50m
Drink Product Ad
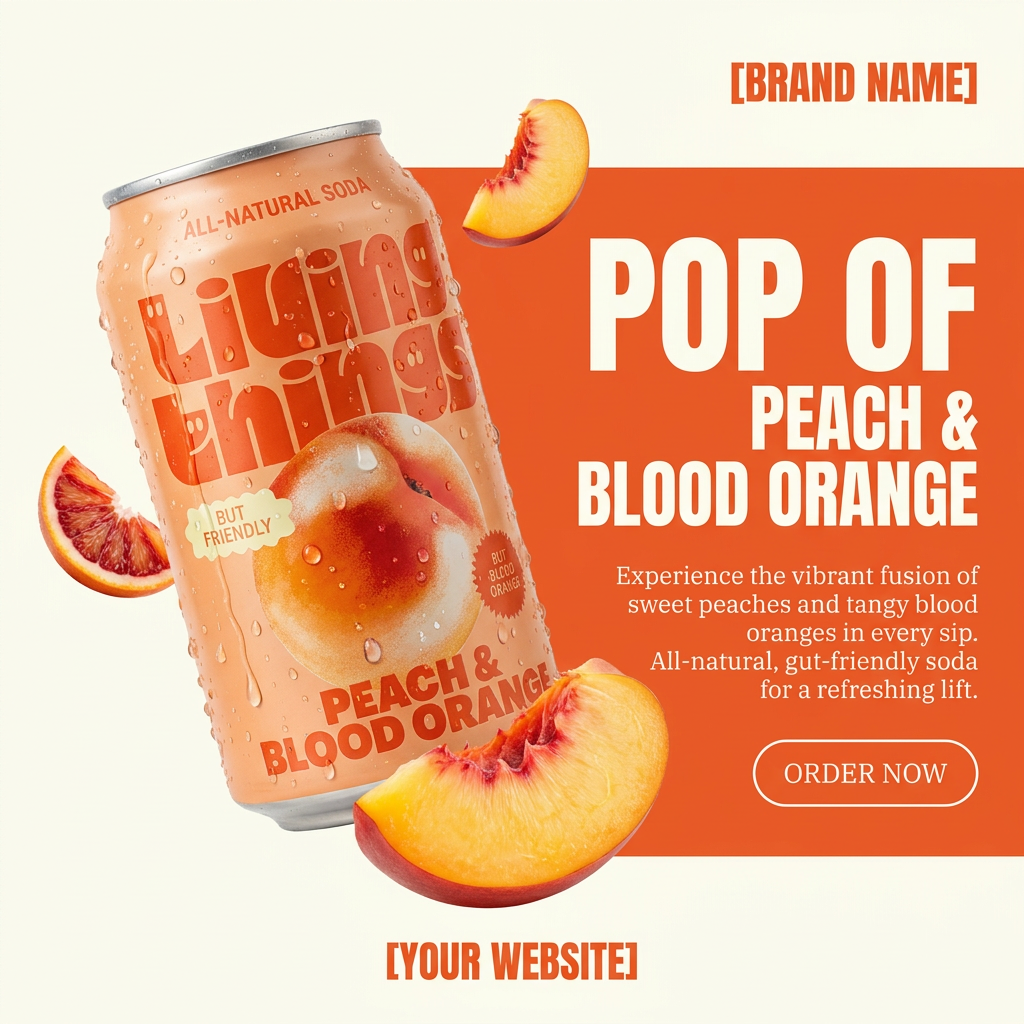
Turn any product photo into a bold, modern ad poster. It automatically frames your item against a split-color background, pairing a clean cream tone with a solid block of your product's dominant color. Super clean, minimal, and ready for social feeds.
Regenerate using your own assets.
You're in control: from AI execution to human validation
Your product photo is the start of the conversation, not the end. This workflow transforms it from a static asset into a flexible foundation for endless creative campaigns. With MyUP, you're not just prompting an image generator; you're directing an automated production system. The AI executes the repetitive tasks—generating scenes, placing the product, applying brand elements—while you provide the critical human validation at every step.
You approve the scenes, you adjust the copy, and you decide which variations make the cut. The result is speed, scale, and consistency without ever sacrificing creative control. You can finally stop wrestling with a dozen different tools and focus on what matters: building a campaign that works.
