If you’ve been online in the last week, you’ve seen them: charming, tactile claymation characters popping up everywhere, thanks to a new style in Midjourney. The static images are incredible. The problem starts when you try to bring them to life. You take your perfect clay character, drop it into a text-to-video generator with a prompt like “make him wave,” and get back a flickering, morphing mess. The face boils, the clothes change color, and the character loses all consistency. It’s a common frustration that makes the stop motion aesthetic feel impossible with AI.
The issue isn't your prompt. It's that you're fighting the tool. AI video models are designed for smooth, fluid motion—the exact opposite of the jerky, frame-by-frame cadence that makes stop motion work. To get the look you want, you have to think like an animator, not a prompter. The secret is to build your animation from a sequence of still images, giving you total control over every frame. This guide shows you the exact process to do it right on MyUP.ai.
Why your AI stop motion videos look like a flickering mess
When you ask a standard AI video generator for “stop motion style,” you’re asking it to intentionally degrade its own output. These models are trained to predict the next logical frame in a sequence to create seamless motion. The result is often a video that feels like a sped-up, wobbly dream sequence, not a deliberate animation. The AI struggles to maintain object permanence, leading to the dreaded “flicker” or “boiling” effect where a character’s identity shifts from one frame to the next.
This is especially true for stylized characters. The AI has no persistent memory of your clay knight’s specific helmet or your paper cutout fox’s unique texture. With each new frame it generates, it re-interprets the prompt, causing subtle (and sometimes major) inconsistencies. You lose creative control. The final output is a lottery, not a production.
The secret: build it frame by frame, not clip by clip
Professional animators don’t just hit a button and hope for the best. They build motion one piece at a time. The same logic applies to AI. Instead of trying to force a video model to create a choppy animation in one step, a much more reliable method is to use an image model to generate a series of still frames and then compile them into a video. This is the core of the MyUP workflow approach.
This multi-step process solves the two biggest problems at once:
- Consistency: By starting with a single “hero” image and generating slight variations, you can lock in your character’s appearance. The face, clothes, and style stay the same because you’re iterating on a consistent asset, not re-generating from scratch every time.
- Control: You decide the motion. You control the pacing. By setting a low frame rate during the final compilation step—say, 12 frames per second—you create that classic, stuttering stop motion effect deliberately. MyUP handles the production; you validate the creative choices.
Step 1: Generate your hero asset in a consistent style
Everything starts with a single, high-quality image of your character or product. This is your anchor. For the claymation style that’s currently trending, you need an AI image tool that can produce that tactile, slightly imperfect look reliably. You define the character, the lighting, and the composition here, and this first image will guide the rest of the animation.
On MyUP, you don’t have to guess the complex prompt needed to achieve this. You can start with a template designed specifically for the style you want. The D Clay Style Character Portrait template, for example, is built to generate that charming, plasticine look with soft lighting and rounded features. You just provide the character description, and the system handles the rest, giving you a perfect starting frame.
Workflow code: #myup-79ca-rzwg
D Clay Style Character Portrait
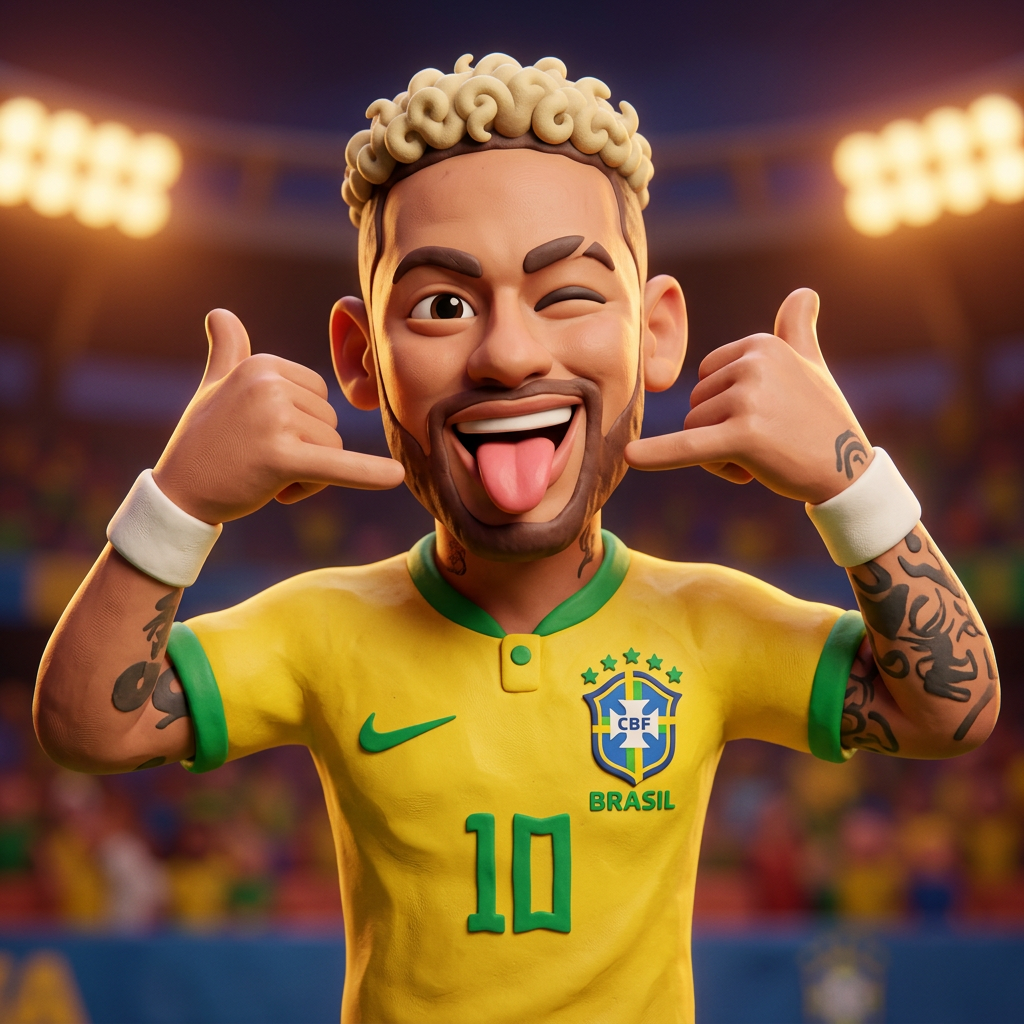
Transform any portrait into a charming, clay-modeled 3D character with soft, rounded features. It adds a playful plasticine texture and warm, vibrant lighting to your subjects while keeping their unique expressions intact.
Regenerate using your own assets.
Step 2: Create sequential frames automatically with a workflow
With your hero asset ready, the next step is to generate the sequence of images that will create the illusion of movement. This is where a MyUP workflow becomes essential. Manually prompting for each frame (“character turns head 5 degrees,” “character turns head 10 degrees”) is tedious and prone to error.
Instead, you can set up a workflow in MyUP that takes your initial character as a reference and automates the generation of subsequent frames. You can feed the workflow a series of simple action prompts, like:
- Frame 1: A claymation knight stands facing forward.
- Frame 2: He turns his head slightly to the left.
- Frame 3: He raises his left arm.
- Frame 4: He raises his left arm higher.
Because the workflow maintains the context of the original character and style, you get a sequence of images that are perfectly consistent. The knight’s armor doesn’t change material, and his face doesn't morph. This is how you defeat the flicker problem for good.
Step 3: Compile and control the final animation
Once your image sequence is generated, the final step is to stitch them together into a video. Inside the same MyUP workflow, you can add a final step that compiles all the generated frames into a single video clip. This is where you get to be the director and dial in the classic stop motion feel.
The key setting is the frame rate. A standard video is 24 or 30 frames per second (fps). For stop motion, you want something much lower, typically between 8 and 15 fps. Setting the frame rate to 12 fps in MyUP will give your animation that characteristic, slightly jerky movement that our brains instantly recognize as stop motion. You’re not hoping the AI adds this effect; you are commanding it. This level of control ensures the final output matches your creative vision.
Put it to work: styles you can create today
This frame-by-frame technique isn't just for claymation characters. It’s a versatile production method for any stylized animation. Here are a couple of other popular styles you can create on MyUP right now.
Product and food stop motion ads
Want to make a can of soda dance or a burger assemble itself? The same principle applies. Start with a clean shot of your product and generate a sequence of it moving, rotating, or interacting with other elements. This is perfect for creating eye-catching social media ads that don't require a complex photoshoot. For creating the initial high-impact visuals, you can use a template like the Food Brand Poster to establish a bold, graphic look for your campaign.
Workflow code: #myup-tbky-nciq
Food Brand Poster
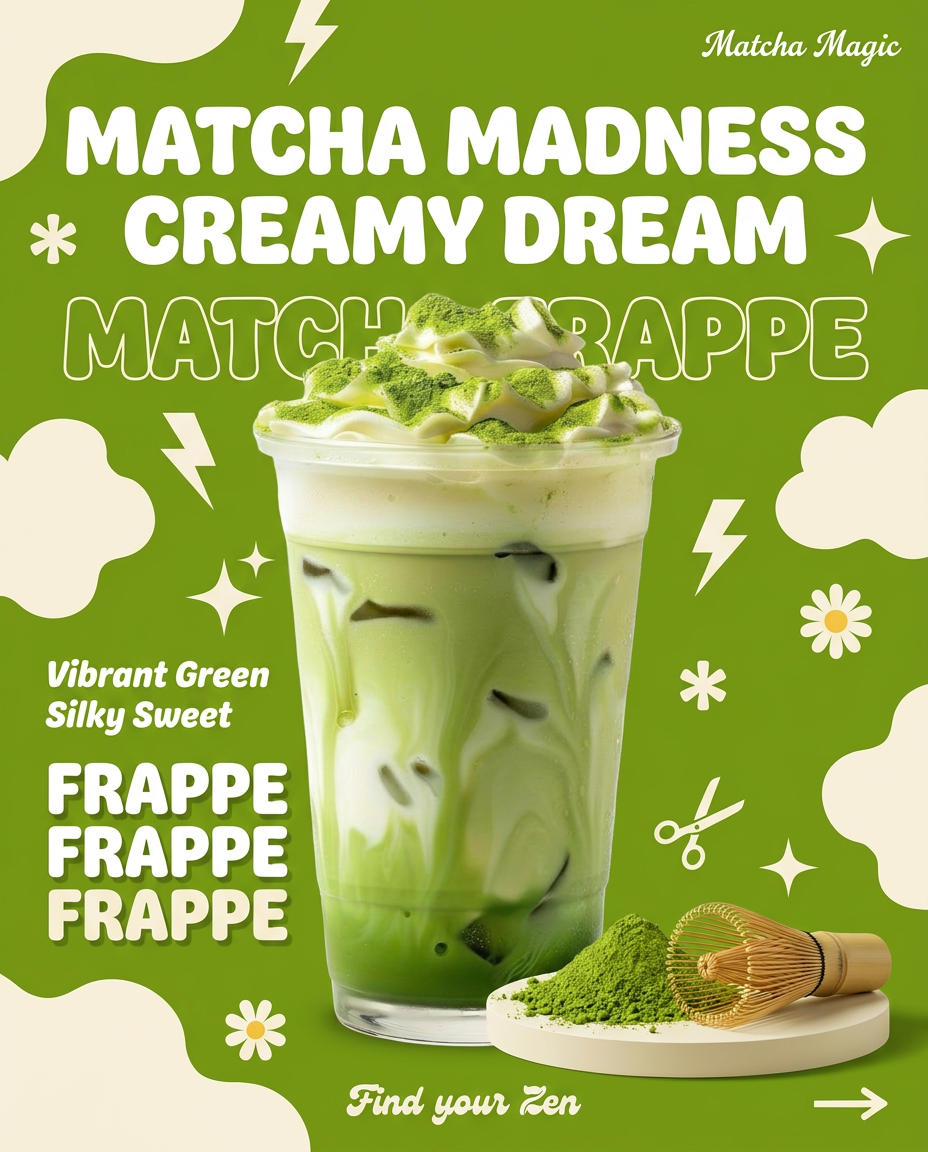
Instantly turn any food or drink product packaging into a bold, vibrant retro poster. The system automatically reads your bottle or box to grab its exact colors and ingredients, then crafts a perfectly coordinated vintage background around it.
Regenerate using your own assets.
Paper cutout and collage animation
The paper cutout aesthetic is another huge trend. You can use MyUP to generate assets like “flat paper cutout of a fox, side view” and “paper cutout of a tree.” Then, you can create sequences where you slightly change the position of the fox in each frame to make it look like it’s walking across the screen. For product-focused animations in this style, the Minimal Vibrant Product Advertising Poster can generate bold, graphic assets that are perfect for this kind of animation.
Workflow code: #myup-zpby-tzie
Minimal Vibrant Product Advertising Poster
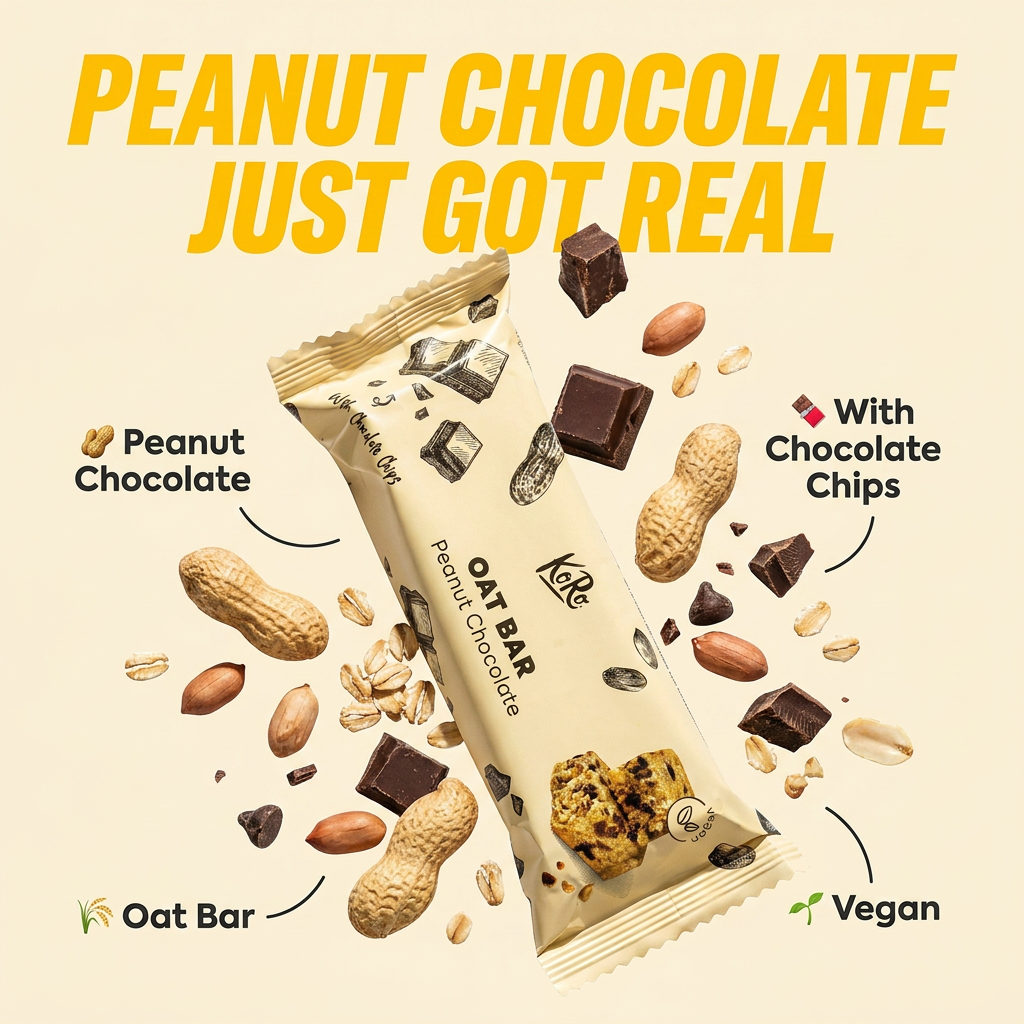
Drop in any product shot and watch it turn into a bold, high-energy square ad. It automatically reads your packaging to pull out the dominant colors and text, then builds a vibrant poster styled perfectly around your brand.
Regenerate using your own assets.
Pro-tip: adding the human touch with intentional imperfections
What makes classic stop motion so charming are the subtle imperfections—the thumbprint on a clay character’s face, the slightly frayed edge of a piece of paper. AI-generated assets can sometimes feel too perfect, too sterile. To get a more authentic result, you can prompt for these details directly.
When generating your initial frames, try adding phrases like:
- “Subtle thumbprints and tool marks in the clay”
- “Slightly uneven, deckled paper edges”
- “Visible paper texture and grain”
These small details break the digital perfection and add a layer of handmade authenticity that will make your final animation stand out. It’s the final layer of human control, where you direct the AI to create not just a style, but a feeling.
