The risograph aesthetic is everywhere. That perfectly imperfect look—with its grainy textures, limited color palettes, and slight misalignments—has become a go-to style for creators wanting to escape the sterile perfection of digital design. As of August 2026, the demand for AI tools that can replicate this analog vibe is surging. The problem? Most tutorials send you on a frustrating, multi-step journey: generate a base image in one tool, export it, then spend hours in Photoshop manually creating color separations, applying halftone textures, and faking misregistration. It’s slow, tedious, and requires significant design skill.
This is a production bottleneck, not a creative process. True creative control isn't about mastering five different apps; it's about designing a repeatable system. This guide shows you how to get the complete risograph effect in a single, integrated process on MyUP.ai, no Photoshop required.
The problem with the multi-tool shuffle
If you’ve tried to create a risograph-style image with AI, you know the routine. You start in an image generator like Midjourney or Stable Diffusion, wrestling with prompts to get a composition that feels right. Then the real work begins. You have to export that image and bring it into a design tool like Photoshop or Affinity Photo to manually simulate the printing process. This involves:
- Manual Color Separation: Painstakingly separating your image into two or three color channels to mimic the separate ink drums of a Risograph printer.
- Applying Textures: Finding or creating grain and halftone dot patterns and carefully layering them onto each color channel.
- Faking Misregistration: Nudging each color layer slightly off-center to create the signature overlapping effect.
Each step is a manual adjustment that takes time and a trained eye. If the client wants a small change to the base image, you have to start the entire process over. This isn't scalable, and it keeps you bogged down in production instead of focusing on creative direction.
MyUP's integrated approach: one process, one platform
MyUP.ai replaces that entire multi-tool chain with a single, intelligent process. Instead of just generating an image, MyUP’s engine runs a complete production sequence based on your prompt. It understands that creating a “risograph effect” involves more than just a visual style; it’s a series of technical steps that need to be automated in the right order.
This is where the MyUP philosophy comes in: the user validates, MyUP executes. You provide the creative direction with a prompt and approve the results. MyUP handles the complex production steps—color separation, texturing, layering—automatically in the background. You get the final, stylized asset in a fraction of the time, ready to use or refine.
Step 1: Generate a base image with risograph intent
The process starts with a base image, but not just any image. A good risograph print uses simple shapes, bold compositions, and a limited color palette. MyUP’s templates are designed to guide the AI toward this aesthetic from the very first step. Instead of a generic prompt, you use a tool built specifically for the look you want.
For example, you can start with a simple description of your event or subject, and the AI will generate a composition that’s already optimized for the risograph treatment. This saves you the trial-and-error of prompt engineering and ensures the source image is a good fit for the textures and color effects that come next.
To get started instantly, this template creates a complete event poster with authentic paper textures and ink effects from a single prompt.
Workflow code: #myup-3xus-3l9x
Vintage Risograph Event Poster
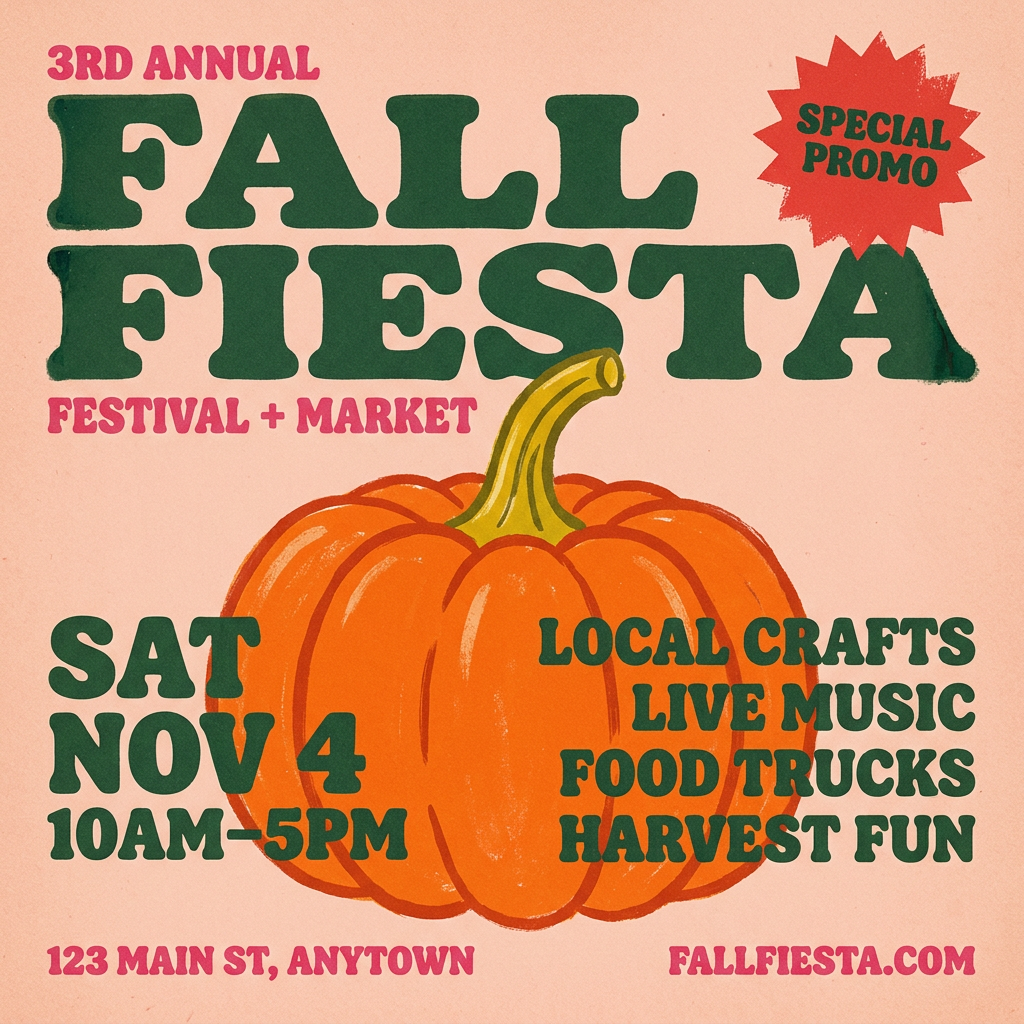
Turn any announcement into a gritty, tactile gig poster. It layers your text with an uneven letterpress ink texture over a dusty, warm pink risograph paper background. It’s perfect for giving social posts a real analog, screenprinted vibe.
Regenerate using your own assets.
Step 2: Automate color separation and palettes
A core element of the risograph look is the limited color palette—typically just two or three bold, overlapping inks. Manually separating an image into these layers is the most time-consuming part of the old process. MyUP automates this completely.
The workflow engine intelligently analyzes the base image and separates it into distinct color layers. More importantly, this is where your brand identity comes into play. With a MyUP Brandkit, you can ensure the process uses your specific brand colors. If your brand palette is #FF5733 (Orange) and #335BFF (Blue), the workflow can be configured to generate all risograph images using only those two colors, ensuring every asset remains perfectly on-brand. This transforms a purely aesthetic effect into a consistent part of your visual identity.
Step 3: Add authentic grain, halftone, and misregistration
This is where the magic happens. The subtle imperfections are what make a risograph print feel authentic. MyUP's process automatically applies these textures, simulating the physical printing process digitally.
- Halftone Dots: The AI applies a fine dot pattern to the color layers, mimicking how a risograph printer uses dots to create tones and shades.
- Grain & Paper Texture: A subtle grain is overlaid to replicate the texture of uncoated paper stock, giving the image a tactile, physical quality.
- Misregistration: The color layers are automatically shifted by a few pixels, creating the slight, imperfect overlap that defines the style.
You retain control to adjust the intensity of these effects, but the complex layering is handled for you. The result feels like a hand-printed zine or poster, not a sterile digital image. To achieve that specific photocopied zine look, this template is ideal.
Workflow code: #myup-msop-hlxf
Retro Zine Style Event Poster
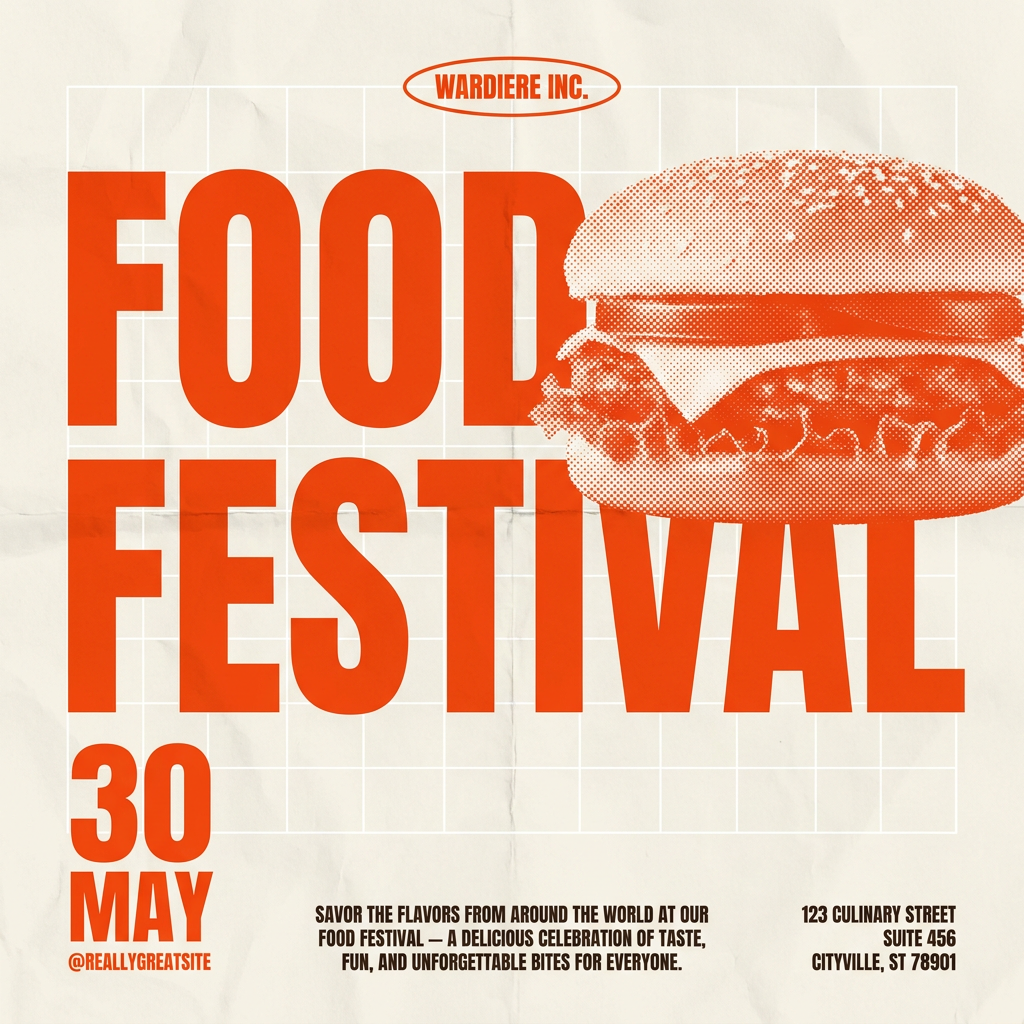
Give your social posts a gritty, analog zine aesthetic. It layers a crumpled paper texture and a subtle grid over a warm cream background to make any event graphic look like a tactile, photocopied flyer. Perfect for DIY gigs and bold promos.
Regenerate using your own assets.
Step 4: Refine your risograph output for brand consistency
An image is rarely finished after the first generation. You might need to add text, a logo, or other brand elements. Because you’re working inside the MyUP platform, you can continue to refine the image without exporting. Your Brandkit can automatically apply your brand's fonts and logo to the generated risograph image, ensuring that even highly stylized visuals meet brand guidelines.
This is crucial for creating campaign assets. You can run a template to generate ten different risograph-style background images for an event promotion, and each one will consistently use your brand's typography and color palette. This is how you scale a unique aesthetic without sacrificing brand control.
For a bold, branded event graphic that combines retro grids with your specific details, this template is a perfect fit.
Workflow code: #myup-xbur-hzoi
Bold Retro Yellow Event Poster
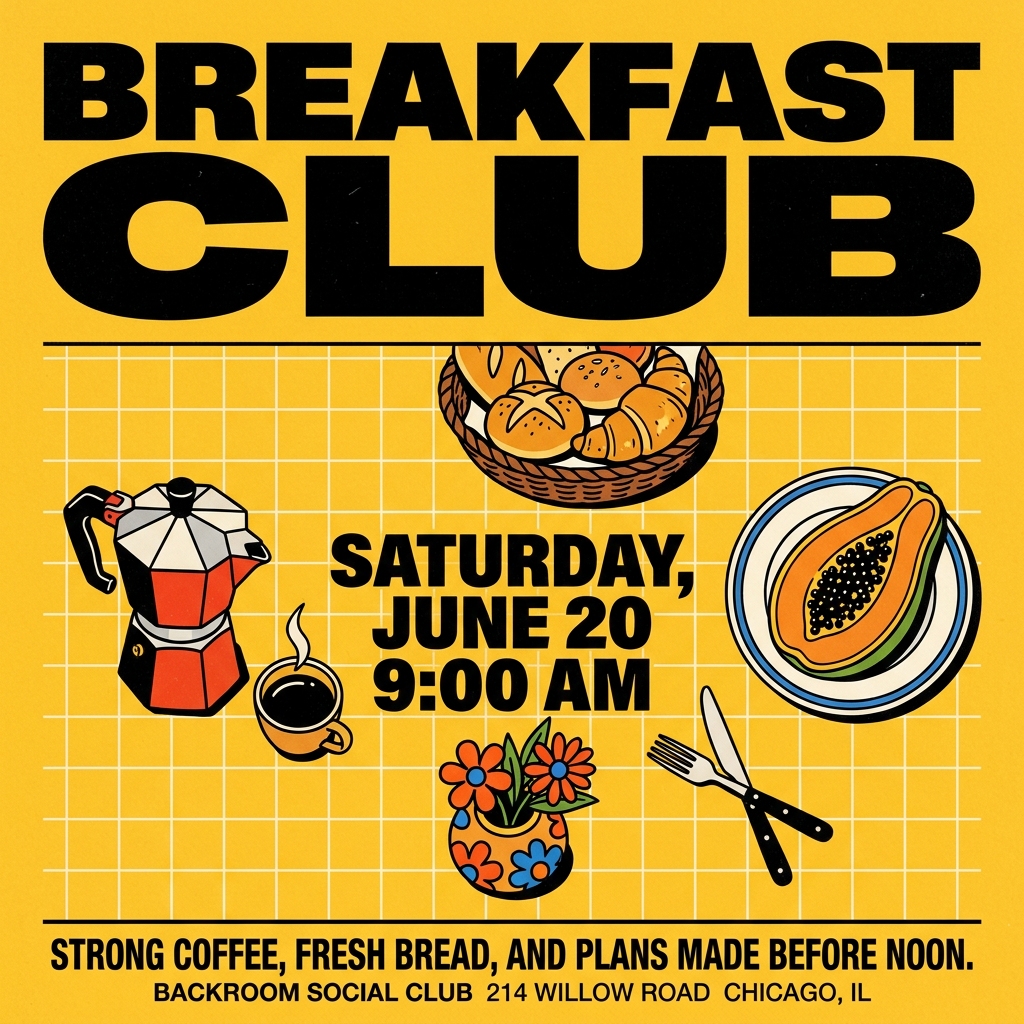
Turn your branding or event details into bold, nostalgic posters. It blends vibrant warm backdrops with a clean, retro square grid pattern to make any announcement look like a classic piece of mid-century graphic design.
Regenerate using your own assets.
Beyond static images: applying risograph to campaigns
Once you have a repeatable process for creating risograph visuals, you can apply it across all your content. This isn't just about making a single cool image; it's about building a scalable system for producing on-brand marketing assets. With MyUP, you can create:
- Social Media Graphics: Quickly generate a batch of risograph-style posts for Instagram or X.
- Event Posters: Design unique, eye-catching posters for concerts, webinars, or community events.
- Digital Ads: Create a set of visually consistent ads that stand out in a crowded feed.
- Zines and Ebooks: Use the aesthetic to design compelling digital publications.
Because the entire process is contained within one platform, you can go from idea to a full set of campaign assets in minutes, not days. For creating high-impact advertising visuals with this style, the Vintage Advertising Poster provides a powerful starting point.
Workflow code: #myup-sauf-5jod
Vintage Advertising Poster
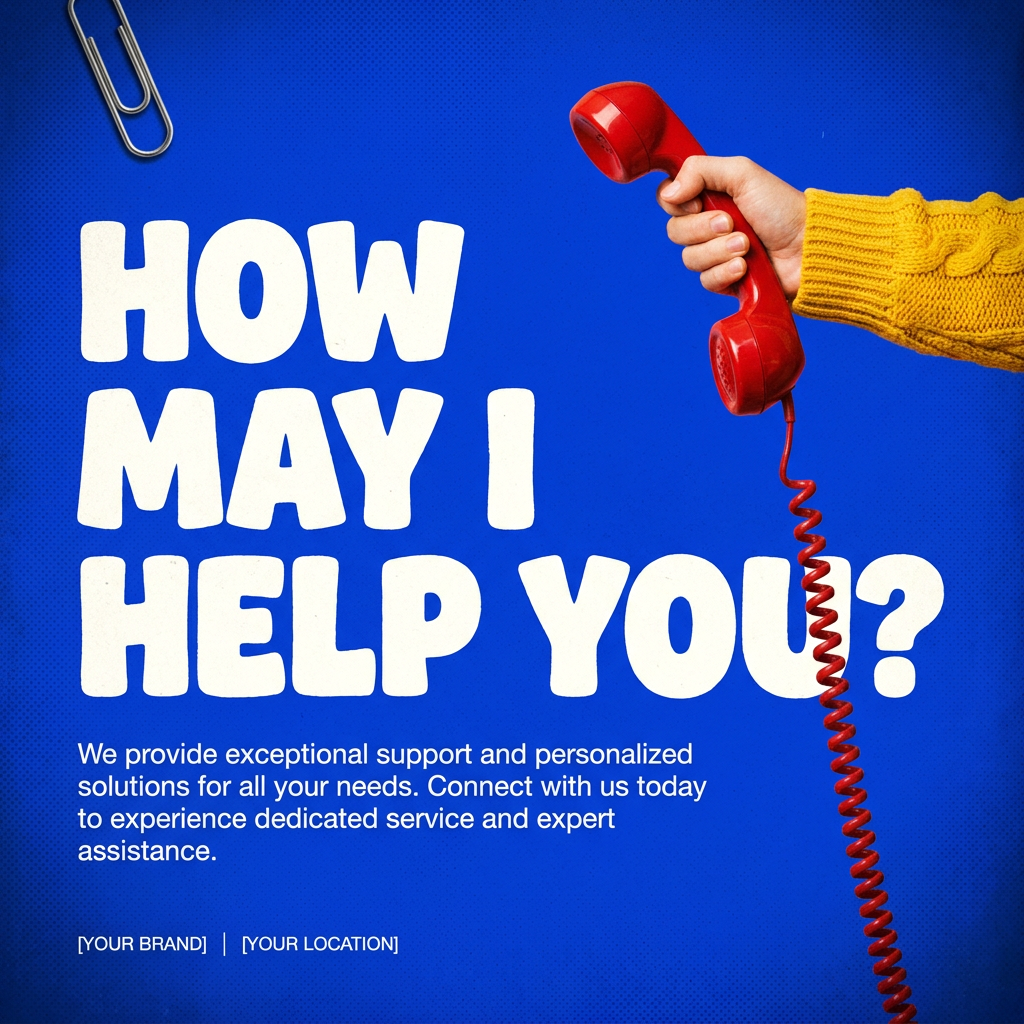
This creates high-impact graphic posters with a striking cobalt blue backdrop and subtle retro halftone textures. Just drop in your subject to get that bold, tactile look complete with realistic metallic accents and clean, modern framing.
Regenerate using your own assets.
Stop prompting, start producing
Achieving a specific, stylized effect like risograph shouldn't require a patchwork of different tools and manual techniques. The future of creative AI isn't just about writing a better prompt to get a single image; it's about designing a better process to produce a consistent volume of on-brand content. By integrating the entire risograph production chain into a single, automated process, MyUP.ai makes this iconic style accessible to any creator, regardless of their Photoshop skills. You get to focus on the creative idea, while the platform handles the execution.
