
You’ve seen them on social media: stunning, photorealistic interior designs, seemingly conjured from a simple text prompt. But when you try it yourself, the results feel… off. The lighting is strange, the textures look like plastic, and every image has a slightly different, inconsistent style. You're not alone. As of June 2026, breakout search interest in 'realistic AI interior design' shows that professionals are tired of generic results and are actively looking for a better way.
The problem isn't your prompts. It's the lack of a system. While new features like Adobe Firefly's 'Structure Reference' and specialized tools like Architex AI are raising the quality bar, they don't solve the core challenge for designers: maintaining a cohesive, unique aesthetic across an entire project. This isn't about one-off 'dream room' generation; it's about building a reliable production workflow for client work. Here is that workflow, built on MyUP.ai, that delivers the control and consistency you need.
Why most AI interior designs look unrealistic (and what to do about it)
The core reason for unrealistic AI renders is inconsistency. Without a central style guide, the AI is just guessing on every generation, leading to three common failures:
- Inconsistent Lighting: The AI might generate one image with soft morning light from the left, and the next with harsh overhead lighting, even if the prompt is identical. This immediately breaks the illusion of a real, cohesive space.
- Poor Materiality: This is the 'plastic' look. The AI fails to capture the subtle textures that make a space feel real—the grain of wood, the weave of a linen sofa, the cool reflection of brushed metal. Everything gets a generic, smooth finish.
- Stylistic Drift: When you generate multiple options for a client, they often look like they were designed by different people. A chair in one image is sleek and modern, while in the next, it's bulky and traditional. This undermines your design vision and confuses the client.
The solution isn't to write longer, more complex prompts. The solution is to stop prompting for style on a per-image basis and instead build a reusable design system that the AI can apply consistently every single time. In MyUP, this system is your Brandkit.
Step 1: Build your 'design DNA' in a MyUP Brandkit
Think of a MyUP Brandkit not as a logo repository, but as the single source of truth for a project's entire aesthetic. This is where you codify your design vision so the AI can execute it flawlessly. For an interior design project, this goes far beyond colors. You need to define the 'Design DNA' with specific, repeatable instructions.
In your MyUP Brandkit, create fields for:
- Material Prompts: Be specific. Instead of 'wood floor', use 'light-washed wide-plank oak flooring'. Instead of 'fabric sofa', use 'textured off-white boucle fabric sofa'. Other examples include 'limewash painted walls', 'honed marble countertop', or 'brushed brass fixtures'.
- Lighting Schemes: Define the mood. 'Soft, diffused natural light from a large, north-facing window on a slightly overcast day' will produce dramatically different—and more consistent—results than just 'natural light'. Try 'warm, layered ambient lighting with focused spotlights on artwork'.
- Style Keywords: This is your overall aesthetic. Keywords like 'Japandi style, wabi-sabi influence, minimalist, organic modern' create a clear set of instructions for the AI to follow.
By saving these elements in your Brandkit, you ensure that every single image you generate for that project—from a wide shot of the living room to a detailed shot of a fixture—adheres to the exact same visual rules. You define the style once, and MyUP applies it everywhere.
To get started defining a clean, minimalist aesthetic, you can use this workflow as a base and adapt the style prompts for your interior project.
Workflow code: #myup-fy77-jljs
Minimalist Elegant Product Advertising Poster

Turn any product shot into a high-end editorial ad. It places your item against a soft cream background with airy spacing and adds elegant, small serif typography at the top. Great for wellness or luxury brands wanting a calm, minimal aesthetic.
Regenerate using your own assets.
Step 2: The core workflow for restyling any room
Once your 'Design DNA' is locked in your Brandkit, the actual creation process becomes incredibly efficient. This is where you take a client's existing space and apply your vision to it, preserving the architecture while completely transforming the style. It's a process that replaces the complex, manual ControlNet workflows shared on Reddit with a streamlined, integrated system.
Here’s the core workflow in MyUP:
- Upload Your Base Image: Start with a clear photo of the client's room. A well-lit, empty or sparsely furnished space works best as it gives the AI a clean canvas.
- Apply Your Brandkit: Select the Brandkit you configured in Step 1. MyUP will automatically pull your defined materials, lighting, and style keywords to guide the generation.
- Generate the Redesign: With the base image providing the structure and the Brandkit providing the style, you can now run the generation. MyUP's AI will restyle the room—adding furniture, changing wall textures, adjusting lighting—all while respecting the original room's layout, windows, and doors.
The result is a high-fidelity mockup that looks like a plausible redesign of the actual space, not a generic fantasy room. The designer directs the vision through the Brandkit; MyUP handles the production.
To apply a sophisticated, high-end aesthetic to your space, this workflow for luxury photography provides an excellent starting point for defining premium materials and lighting.
Workflow code: #myup-tc2h-gy9g
Luxury Editorial Product Photography

Get striking, high-end editorial shots focusing entirely on hands against minimalist backdrops. It strips away the distraction of faces to deliver a moody, fine-art look that's perfect for showcasing rings, nail art, or dramatic poses.
Regenerate using your own assets.
Step 3: Generating client-ready variations and mood boards
The true power of this system is speed and scale. Your client doesn't want to see one option; they want to explore possibilities. With your Brandkit-driven workflow, you can generate a dozen compelling, stylistically consistent variations for a concept presentation in the time it used to take to create one manual render.
You can rapidly iterate on key FF&E (Furniture, Fixtures, and Equipment) elements:
- Generate three versions with different sofa styles or colors.
- Show the space with and without a rug.
- Present different artwork or lighting fixture options.
Because every variation is guided by the same Brandkit, they all feel like they belong to the same cohesive project. This allows your client to make clear decisions based on specific elements, rather than being distracted by inconsistent styles. You can even use this workflow to create supporting assets, like detailed close-ups of specific materials or full mood boards that incorporate your chosen textures and colors. This is crucial for building a complete and convincing client presentation, similar to the process for AI virtual staging.
For example, to quickly build a concept board around a 'Biophilic Design' theme, you can use a workflow focused on natural elements.
Workflow code: #myup-wk70-kxb1
Dark Botanical Product Photography
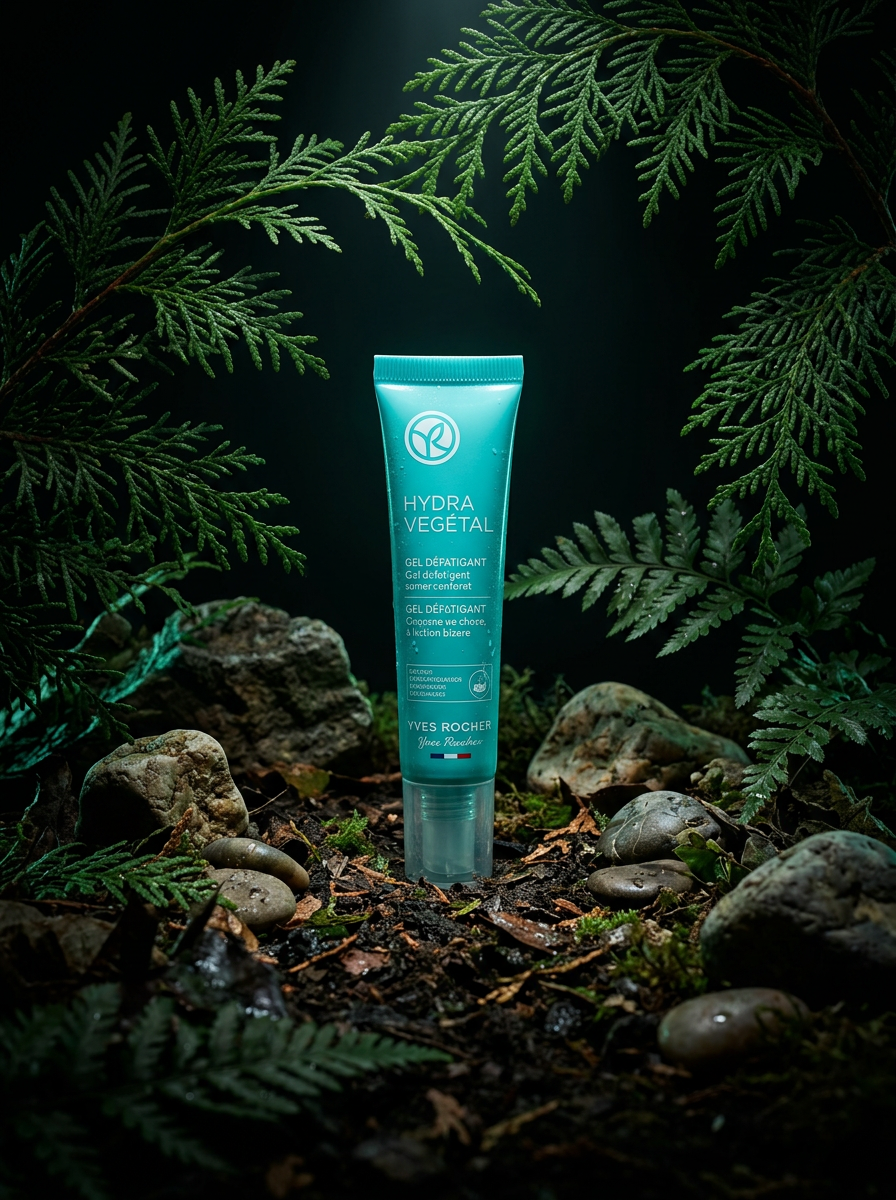
Drop your product shot straight onto a moody, damp forest floor. It blends your item seamlessly into a bed of weathered stones, dark soil, and fresh cedar branches to create a highly realistic, organic outdoor scene.
Regenerate using your own assets.
Step 4: Validating the details: from lighting to furniture scale
AI is an incredibly powerful production assistant, but your professional eye is non-negotiable. The final step of the workflow is always validation. The designer curates, adjusts, and approves; MyUP executes. This human-in-the-loop approach is what separates professional work from amateur renders.
As you review the AI-generated options, apply your expertise:
- Check the Scale: Does the sofa overpower the room? Is the coffee table comically small? You are the final judge of proportion and scale.
- Validate the Lighting: Does the direction and quality of the light make sense for the window placement and time of day you intended? Ensure shadows fall realistically.
- Assess Functionality: The AI might place a chair where a door needs to open. Your job is to ensure the proposed layout is not just beautiful but also livable and functional.
This curation process is where your value as a designer shines. You're using AI to handle the time-consuming rendering, freeing you up to focus on the high-level creative decisions that deliver real value to your client.
Is this the right AI workflow for your design business?
This workflow is designed for a specific professional need. It's important to know if it's the right fit for your tasks.
This workflow is perfect for:
- Interior designers, architects, and virtual stagers who need to quickly produce multiple, high-quality, and stylistically consistent design concepts for client presentations, mood boards, and initial visual exploration.
This workflow is not right for:
- Professionals who require engineering-grade 3D models with precise, to-the-millimeter dimensions for construction documents. This is a tool for rapid, realistic visualization, not a replacement for CAD or Revit software.
By understanding this distinction, you can integrate AI into your concepting phase to save hundreds of hours and present more creative options, while still relying on specialized software for technical drawings.
