If you've tried to create an apparel mockup with AI, you know the frustration. Your design looks like a flat sticker slapped onto a stock photo, completely ignoring the folds, wrinkles, and texture of the fabric. It screams 'fake'. This problem is so widespread that in August 2026, Adobe released a manual 'Puppet Warp' feature in Photoshop just to let designers painstakingly pull and push their designs into place.
That’s the wrong solution. Fixing a bad generation manually is a time-sink that kills the entire point of using AI for speed and scale. The real solution is a workflow that generates realistic mockups from the start. On MyUP, you don't just place a PNG on an image; you generate an entire branded scene where your design intelligently wraps around the fabric, creating mockups that look like a professional photoshoot, not a cheap composite.
Why your AI mockups look like cheap stickers
The 'flat sticker' problem happens because most simple AI mockup tools perform a 2D operation. They overlay your design onto an image without understanding the 3D geometry of the scene. A t-shirt isn't a flat canvas; it has shadows, highlights, and contours. A realistic mockup requires the AI to understand how light interacts with the fabric and how the graphic should distort across every fold.
Getting this right with complex tools like ComfyUI involves intricate node-based workflows using multiple ControlNets for pose, depth, and shape—a technical hurdle far too high for most e-commerce brands who just need to get a new collection live. The goal isn't to become a node wizard; it's to sell apparel. This is where a repeatable, brand-aware workflow becomes essential.
The 3-step workflow for mockups that sell
Instead of wrestling with prompts or post-production fixes, the MyUP workflow automates realism from the ground up. It’s a three-step process designed for commercial use: set your brand identity once, generate your core product shots, and then scale into a full campaign. This isn't about creating a single good image; it's about building a production system for all your apparel visuals.
Step 1: Define your look with a Brandkit
Consistency is the first casualty of one-off AI generations. When you create mockups one by one, you get different models, lighting, and color casts, resulting in a chaotic product grid. The foundation of this workflow is the MyUP Brandkit. You set it up once by providing your website URL or uploading your assets: logo, brand colors, fonts, and a description of your visual style (e.g., 'minimal and clean', 'gritty and urban').
From this point on, every mockup you generate will automatically inherit this DNA. The AI won't just use your logo; it will generate scenes, models, and lighting that align with your brand’s aesthetic. This solves the consistency problem before you even write a prompt.
Step 2: Generate your core on-model and flat-lay shots
With your Brandkit active, you can now generate the essential shots for any product listing. You need clean, clear images that show the product accurately. This is where you directly solve the 'flat sticker' problem. Instead of a generic prompt, you use a workflow designed for this exact task.
This is about more than just generating a background; it's a complete system for creating professional product photos. The workflow understands the context of studio photography, ensuring the lighting and shadows make your apparel look tangible and real. For clean, professional product shots that are perfect for your e-commerce store or catalog, the Studio Product Ad template is the direct tool for the job.
Workflow code: #myup-u4lt-o0ho
Studio Product Ad
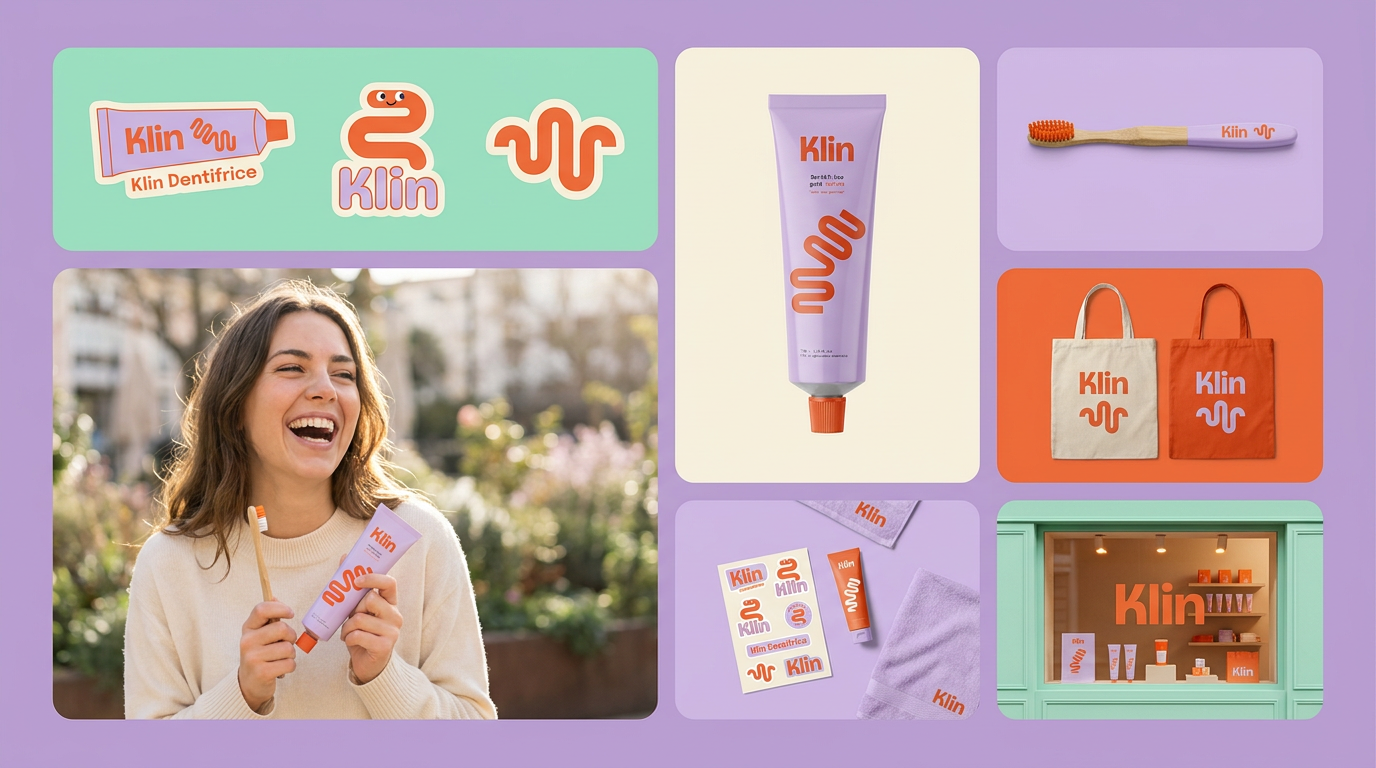
Drop in a single product photo to instantly build a cohesive visual identity. It automatically samples your item's dominant colors to generate a beautifully matched mosaic moodboard, giving your brand an instant, polished aesthetic.
Regenerate using your own assets.
Workflow code: #myup-aon6-zvop
Studio Product Ad
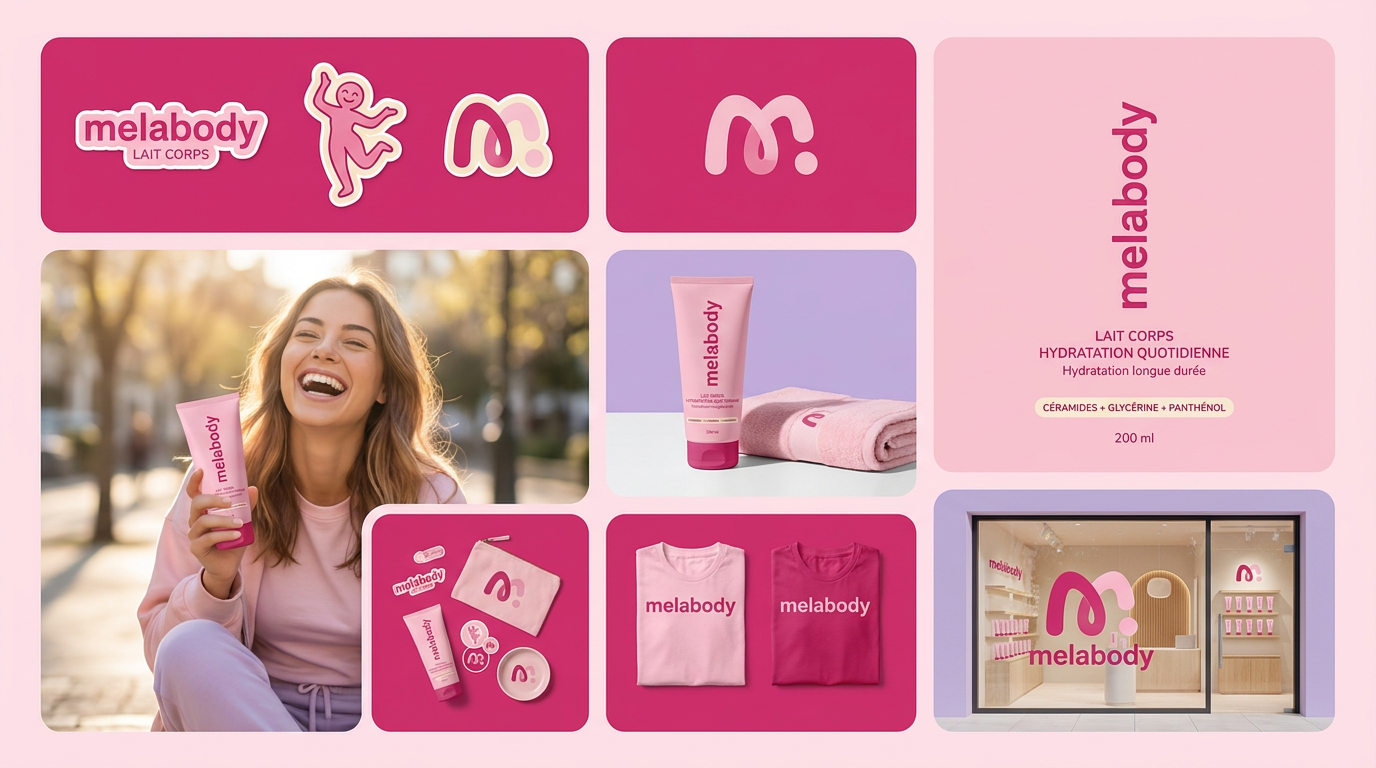
Turn any product photo into a cohesive brand moodboard. It automatically extracts the dominant color from your image to style the background, framing everything in a clean mosaic layout that perfectly matches your aesthetic.
Regenerate using your own assets.
Step 3: Scale your launch with a full campaign set
A product launch requires more than just catalog images. You need social media posts, ads, and story assets. Manually creating these variations is repetitive and slow. The MyUP workflow lets you scale your production instantly. Using your Brandkit and the initial design, you can generate an entire library of on-model shots in different settings and poses.
This is how you go from a single product to a full social campaign without losing brand consistency. The Brand Clothes Post workflow is built for creating these dynamic, on-model social assets. If you need something with more energy for a sportswear line, the Professional Sportswear Ad template generates high-impact, editorial-style shots.
Workflow code: #myup-3sro-edbt
Brand Clothes Post
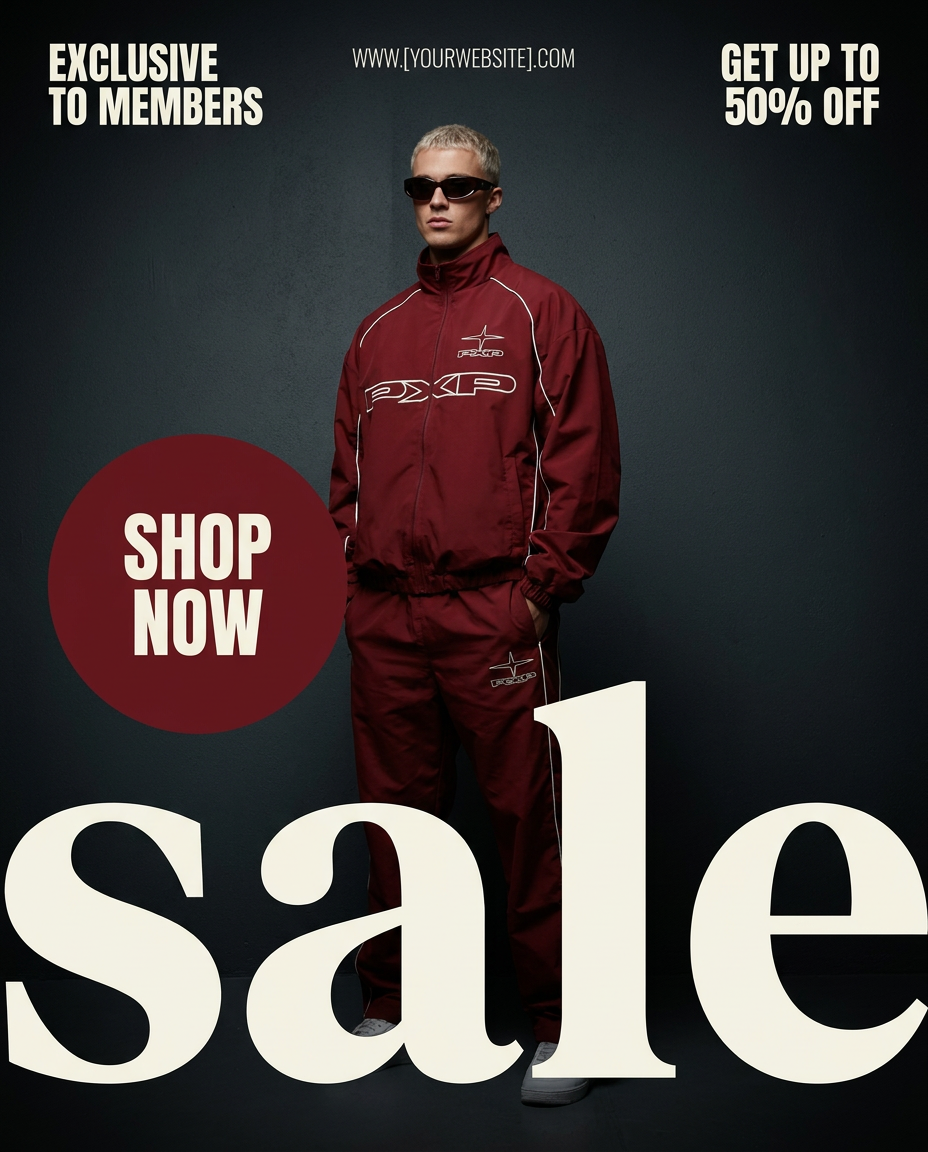
Turn any outfit photo into a high-end fashion promo poster. It centers your subject in a full-body shot against a dark, dramatic studio backdrop, perfectly cropped for social feeds. It gives your apparel a moody, editorial look instantly.
Regenerate using your own assets.
Workflow code: #myup-ywpr-rqz6
Professional Sportswear Ad
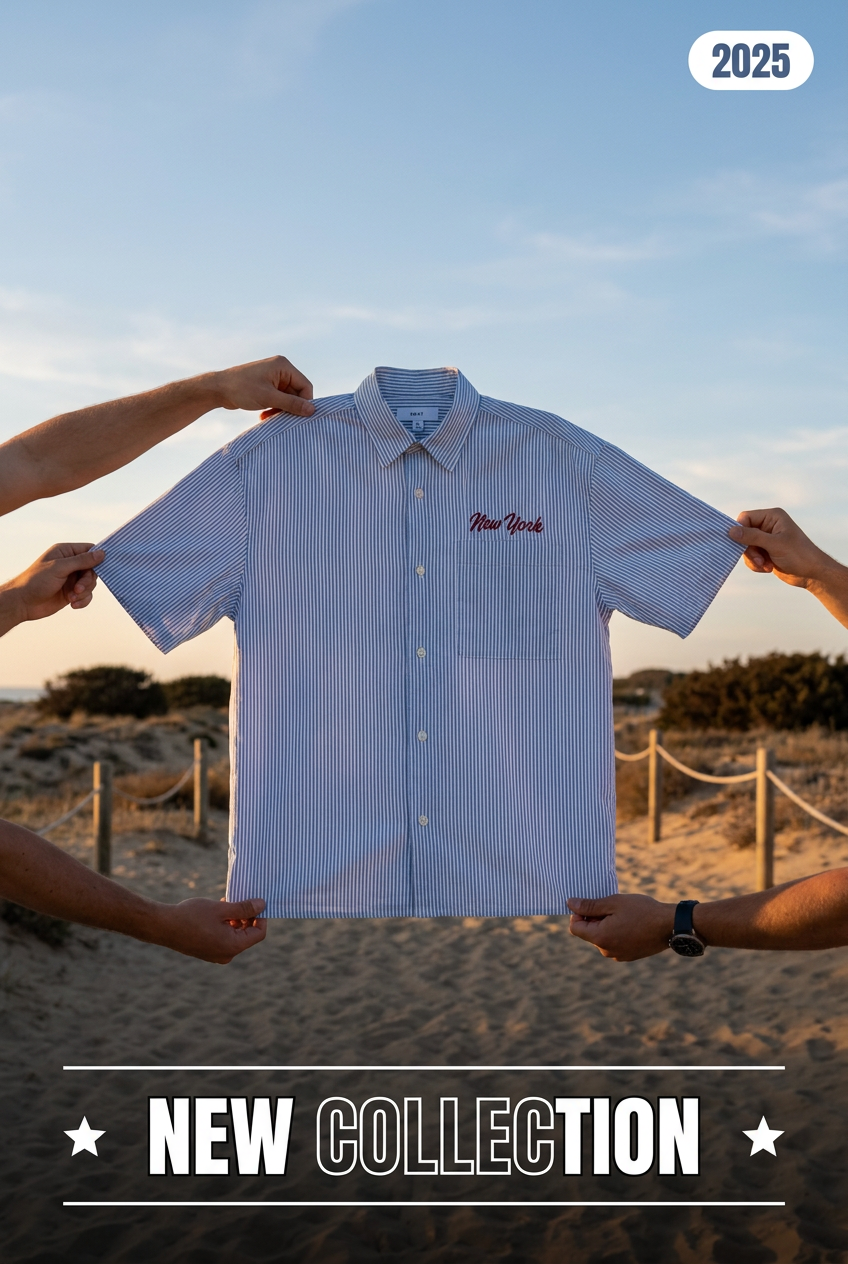
Suspends your apparel right in the center of a high-energy promo shot, held up by hands around the frame. It gives your shirts or jerseys a gritty, collaborative streetwear editorial look that feels alive and physical.
Regenerate using your own assets.
Advanced techniques: Creating textured and editorial mockups
Once you've mastered the core workflow, you can create more stylized visuals. A popular trend is the hyper-realistic 'embroidery on fabric' look, which requires the AI to render thread texture and the way it puckers the fabric. Instead of complex prompting, you can use a workflow tuned for this effect.
Similarly, for high-fashion or editorial campaigns, you might need a more artistic composition. The Fashion Poster workflow generates stylized images that feel like they belong in a magazine, moving beyond simple product representation to create a mood. The user—you—validates the output, while MyUP handles the complex production, giving you creative control without the technical overhead.
Workflow code: #myup-wtgs-4huq
Fashion Poster
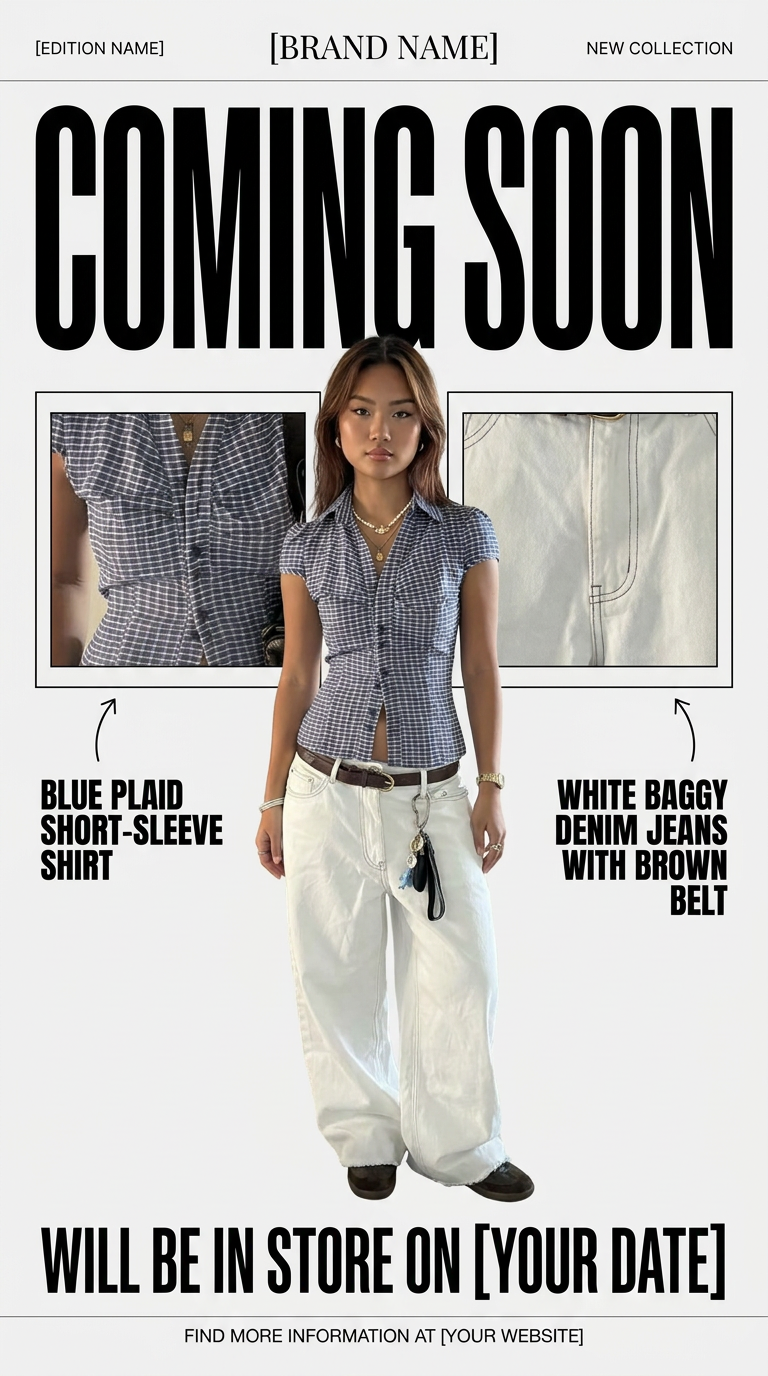
Turn your product shots into clean, high-end teaser posters. It frames your images in a minimalist off-white layout with editorial header text, giving your upcoming launches the look of a luxury fashion drop.
Regenerate using your own assets.
The final check: MyUP workflow vs. manual Photoshop editing
The choice for e-commerce brands is now clear. You can adopt a manual, hybrid process: generate a flat image with a basic AI tool, export it, import it into Photoshop, and then spend valuable time manually warping the design into place with the Puppet Warp tool for every single mockup.
Or, you can use the MyUP workflow. You define your brand once, then generate hundreds of realistic, on-brand, and varied mockups automatically. The first approach is a tedious, one-off fix. The second is a scalable production system. For any brand that values speed, scale, and consistency, the decision is simple. Don't fix flat images; generate realistic ones from the start.
