A July 4, 2026 TechCrunch report revealed Hollywood studios are using tools like Midjourney, and suddenly every creator wants to know how it's done. The problem is, when they try, the results are often disappointing. That's because the secret isn't a magic button; it's a specific vocabulary. Typing 'cinematic' into a prompt is a lottery ticket. Directing an AI with the language of cinematography is how you get intentional, powerful results.
This is not another guide on how to make AI video look less fake. This is a cinematographer's prompt book for AI. We'll translate classic filmmaking shots into concrete commands that give you control over the virtual camera. You'll learn to stop asking for a mood and start directing a shot, all within MyUP.ai.
Why your 'cinematic' prompts are failing
AI video models don't understand abstract concepts like 'drama' or 'epic feel'. They understand geometry, physics, and data. They know what a 35mm lens is, what a low angle looks like, and what 'dolly in' means as a motion vector. The gap between your creative vision and the AI's output is the language you use to describe it.
Consider the difference:
- Vague Prompt:'Cinematic shot of a sports car driving fast at night.' This might give you a generic, floaty video. The camera angle is random, the motion feels unnatural, and the 'cinematic' quality is interpreted as a simple color grade.
- Director's Prompt:'Low angle tracking shot, 35mm lens, of a red sports car speeding on a wet asphalt road at night, reflections from neon signs on the car body, anamorphic lens flare.'
The second prompt gives the AI specific, non-negotiable instructions. It defines the camera's position, its movement, the lens characteristics, and the lighting environment. This is the difference between being a passenger and being the director. MyUP is built for directors, allowing you to build these specific instructions into repeatable workflows.
The cinematographer's prompt book: From establishing shots to aerials
Every story needs a sense of place. Establishing shots, wide shots, and aerials are how you create that context. But as anyone who has tried to generate a 'drone shot' knows, AI can produce wobbly, distorted results without clear direction. This is a hot topic in creative communities right now, with creators on Reddit sharing complex workflows to achieve stability.
Here’s how to get it right with simple, clear language:
- Wide Shot / Establishing Shot: Use these terms to tell the AI to show the entire environment. Be specific about the subject's relationship to the background. Prompt: 'Extreme wide shot of a lone hiker looking up at a massive, futuristic cityscape.'
- Aerial / Drone Shot: To get a smooth, stable aerial shot, you need to specify the camera's path. Use terms like 'slowly flying forward,' 'circling,' or 'ascending.' Prompt: 'Smooth aerial drone shot, flying slowly forward over a dense jungle canopy at sunrise, morning mist rising.'
- Crane Shot: This is for vertical movement. It starts low and moves high, or vice versa, to reveal something. Prompt: 'Crane shot starting on a character's shoes and slowly ascending to reveal they are standing on the edge of a skyscraper.'
For a product campaign, you can structure these epic, scene-setting shots into a single, repeatable workflow in MyUP. This ensures that every establishing shot has the same mood, lighting, and cinematic quality. The workflow below is designed to create exactly that kind of high-impact visual.
Workflow code: #myup-4mva-7iki
Cinematic Space Product Campaign
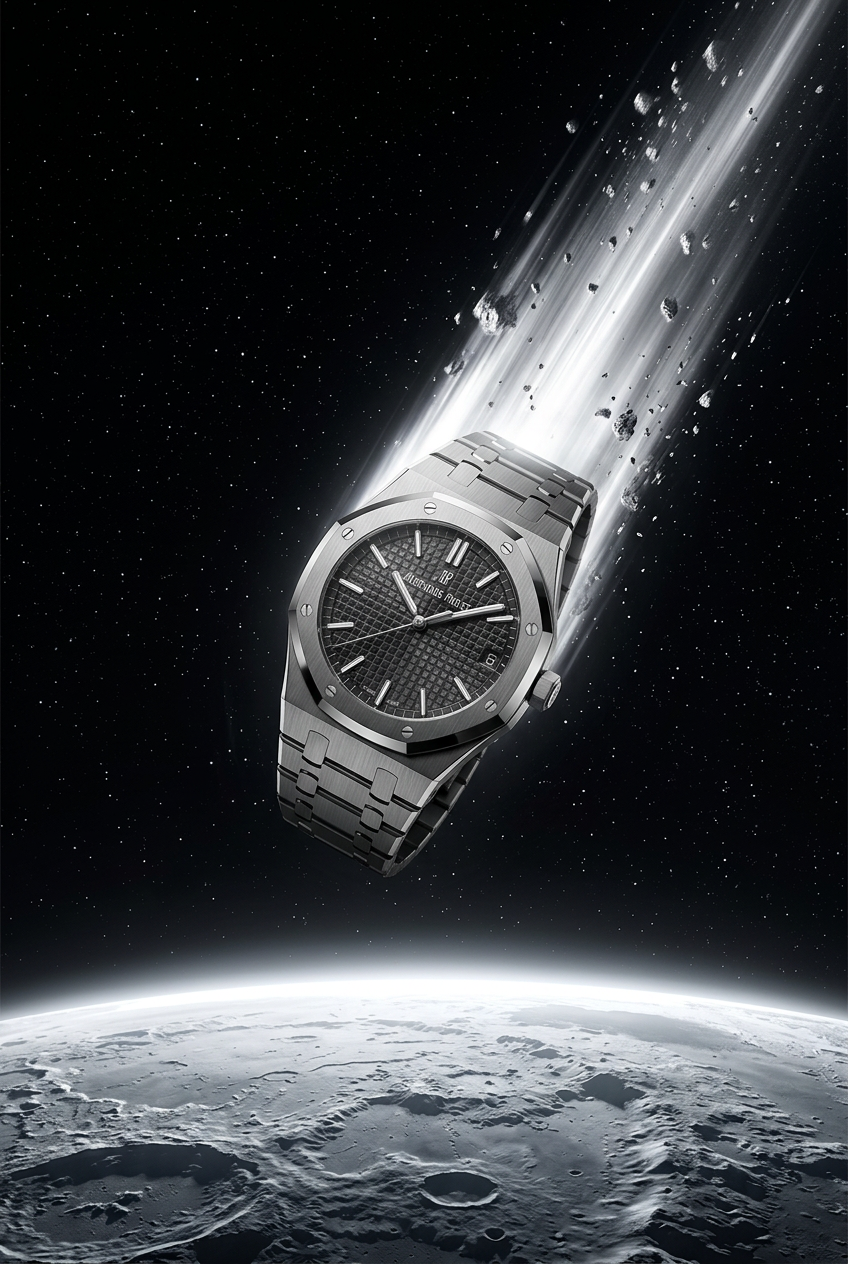
Drop your product into a dramatic, cosmic scene. It creates an epic set of images starting with a dynamic space launch framed by a blazing meteor, followed by a low-angle hero shot and an extreme macro of the surface textures catching the high-contrast light.
Regenerate using your own assets.
Directing your subject: Camera movement that feels intentional
Static shots are fine, but camera movement that relates to your subject is what creates energy and emotion. This is where most AI video tools fall short, offering only a generic 'zoom' or 'pan.' True cinematic motion is more nuanced.
Here are the key terms to take control:
- Dolly vs. Zoom: A zoom simply magnifies the image, flattening the perspective. A dolly physically moves the camera closer to or further from the subject, which feels more natural and immersive. Use 'dolly in' or 'dolly out' for this effect. Prompt: 'Medium shot of a chef tasting a sauce, camera slowly dollies in on their face to capture their reaction.'
- Truck / Tracking Shot: This is a sideways movement that follows a subject. The camera moves parallel to the action. This is essential for action sequences or following a character through a scene. Prompt: 'Side-view tracking shot of a marathon runner on a city bridge, keeping pace with them.'
- Pedestal Shot: This is moving the entire camera straight up or down, without tilting. It's often used to reveal height or look over an obstacle. Prompt: 'Pedestal up from a crowded market stall to reveal the entire bustling city square.'
For ads featuring athletes, products in motion, or any dynamic subject, a tracking shot is non-negotiable. The MyUP workflow below is built to generate high-energy, professional shots perfect for a sportswear ad, using precisely these kinds of controlled camera movements.
Workflow code: #myup-ywpr-rqz6
Professional Sportswear Ad
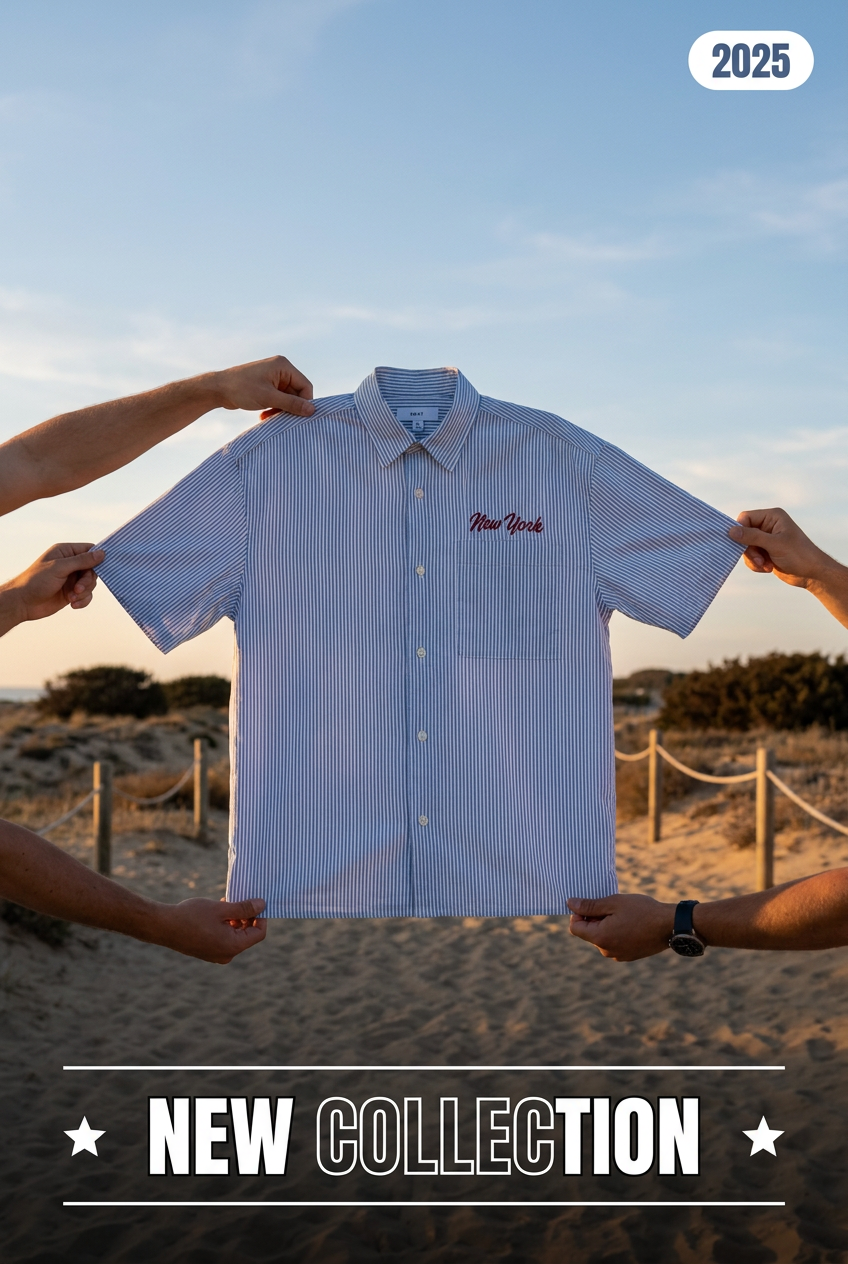
Suspends your apparel right in the center of a high-energy promo shot, held up by hands around the frame. It gives your shirts or jerseys a gritty, collaborative streetwear editorial look that feels alive and physical.
Regenerate using your own assets.
Adding style: How to create advanced and specialty shots
Once you've mastered the basics, you can start using more advanced camera techniques to create specific psychological effects. These are the shots that make a scene memorable.
- Dutch Angle / Canted Angle: The camera is tilted on its axis, making the horizon diagonal. This creates a sense of unease, tension, or disorientation. It's a classic technique in thrillers and action films. Prompt: 'Dutch angle shot of a detective running down a dark, narrow alleyway.'
- Dolly Zoom (The 'Vertigo' Effect): This is a famous technique where the camera dollies in while the lens zooms out (or vice versa). The subject stays the same size, but the background appears to stretch or compress, creating a feeling of unease or a dramatic realization. Prompt: 'Dolly zoom on a character's shocked face as they see a ghost behind them, the hallway background warps and stretches.'
- Low Angle / High Angle Shot: Camera position implies power dynamics. A low angle shot looks up at a subject, making them seem powerful and dominant. A high angle shot looks down, making them seem vulnerable or small.
Even a minimalist product ad can use a single, powerful shot to convey elegance and quality. A slow, low-angle pedestal shot can make a simple product feel monumental. The workflow below focuses on creating that exact kind of high-end, minimalist visual with a strong directorial style.
Workflow code: #myup-fy77-jljs
Minimalist Elegant Product Advertising Poster
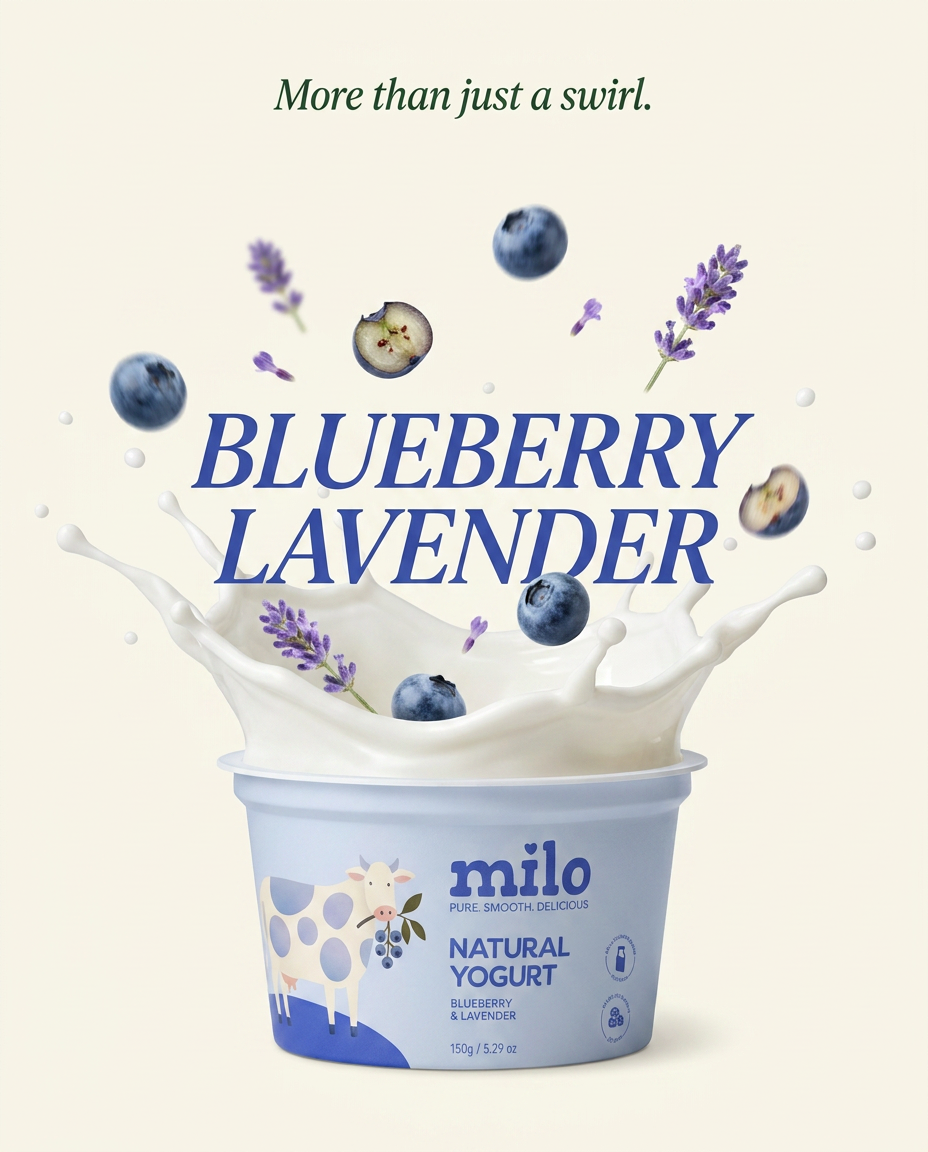
Turn any product shot into a high-end editorial ad. It places your item against a soft cream background with airy spacing and adds elegant, small serif typography at the top. Great for wellness or luxury brands wanting a calm, minimal aesthetic.
Regenerate using your own assets.
From a single shot to a complete scene in MyUP
Generating one perfect shot is a great start. But a video ad, a social campaign, or a film requires dozens of shots that all feel like they belong to the same world. This is where most creators hit a wall. Generating shots one-by-one results in inconsistent lighting, shifting color grades, and a disjointed final product.
This is the problem MyUP's Brandkit and workflow system is designed to solve. Instead of just prompting for a single shot, you define your entire visual identity once. You can specify your project's cinematic style—'anamorphic lenses, cool blue color grade, film noir lighting'—and save it in your Brandkit.
Then, you can apply that Brandkit to any of the cinematic workflows. You can generate a 'Drone Shot,' a 'Tracking Shot,' and a 'Dolly Zoom,' and all of them will automatically inherit the same visual DNA. MyUP handles the production and consistency; you validate the creative choices. This is how you move from making isolated clips to directing cohesive, on-brand scenes at scale.
