
If your social media feed suddenly filled up on June 24th with impossibly realistic AI-generated food, you weren't alone. A highly detailed prompting technique went viral on X and Reddit, finally cracking the code on how to make AI food look genuinely appetizing, not like plastic props.
The secret isn't one magic word. It's a method that stops describing just the food and starts describing the entire photographic scene: the light, the texture, and the camera that “shot” it. The results are stunning, but the prompts are long and complex. Copying and pasting them for every image isn't a viable strategy for any serious creator or brand. That's a production bottleneck, not a workflow.
The real solution is to automate the technique. A MyUP workflow can have these advanced principles built-in, letting you generate consistently professional shots by just describing your dish. This workflow for a bold, portrait-style shot does exactly that.
Workflow code: #myup-xjsb-hirr
Bold Portrait Food Advertising Photo
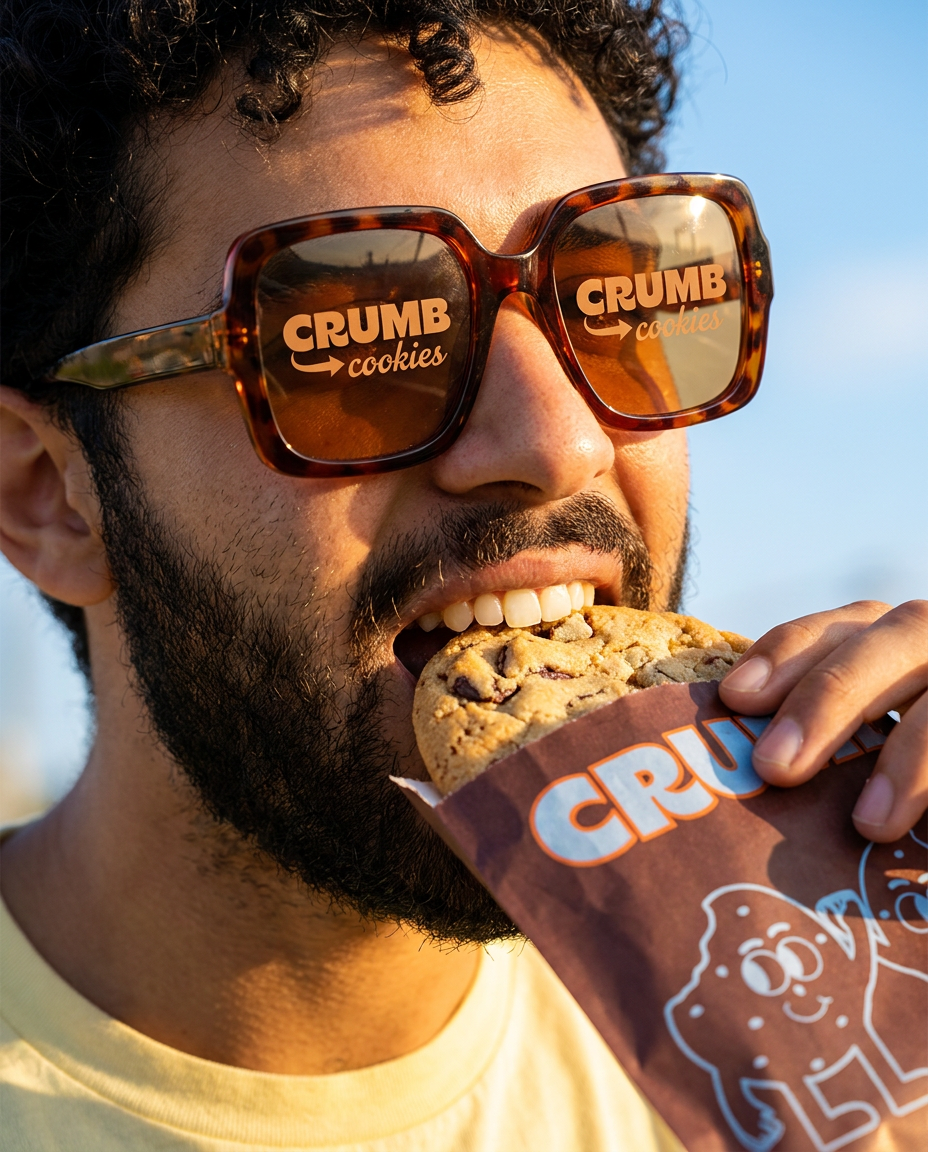
Get those high-impact, tight action shots of people actually enjoying your food brand. It drops your product right into a messy, realistic close-up bite shot that feels like a premium lifestyle campaign instead of a boring studio packshot.
Regenerate using your own assets.
That viral prompt: why it works when others fail
For years, generating truly edible-looking food has been a weak spot for AI. A simple prompt like “cheeseburger” often produces a perfectly shaped but lifeless, plasticky image. It lacks appetite appeal because it lacks the details our brains associate with delicious food: the glisten of melted cheese, the imperfect char on the patty, the soft texture of the bun.
The viral technique works because it forces the AI to think like a food photographer. Instead of just naming the subject, it provides technical and sensory instructions. It’s the difference between asking for “a burger” and commissioning a photo with specific directions: “I need a shot of a juicy burger, side-lit to show texture, with a blurry background to make it pop.” This new method just translates that direction into language the AI understands. We'll deconstruct it into three core pillars: light, texture, and camera settings.
Step 1: Prompting for light and shadow, not just food
Professional food photography is 90% lighting. The same dish can look flat and unappetizing or rich and dynamic depending on how it's lit. The viral prompt technique incorporates specific lighting vocabulary to create mood and reveal texture.
Key Lighting Terms:
- Dramatic side-lighting: Places the light source to the side, creating deep shadows that reveal the texture of crispy, bumpy, or layered foods. Perfect for fried chicken or a flaky pastry.
- Soft morning light / Golden hour light: Evokes a warm, inviting, and natural feel. This lighting is less harsh and works well for breakfast scenes, fresh produce, or coffee.
- Rim light: A light source from behind the subject creates a bright outline or halo. It’s excellent for separating the food from the background and highlighting the texture of liquids or the steam rising from a hot dish.
- Subsurface scattering: This is a more advanced term that describes how light penetrates the surface of a translucent object. It’s the key to making things like grapes, gummy candies, and sauces look real and not like solid plastic.
Simply adding “dramatic side-lighting creating long shadows” to your prompt can transform a boring image into a professional-looking photograph.
Step 2: Using the language of texture and appetite
The second pillar is using sensory language to describe the food's texture and state. This is what fights the sterile, “perfect” look of default AI generations. You need to prompt for the delicious imperfections.
Texture Vocabulary Cheat Sheet:
- For Sauces & Liquids:glistening sauce, viscous honey drizzle, dewy condensation on glass, rich and glossy reduction.
- For Baked Goods:fluffy crumb, crispy golden-brown crust, airy and light texture, delicate flaky layers, visible Maillard reaction.
- For Meats & Proteins:crispy charred edges, succulent and juicy, perfectly rendered fat, glistening sear marks.
- For Produce:freshly picked, dewy water droplets, crisp and vibrant, sun-ripened.
Instead of “pizza,” you prompt “pizza with glistening melted mozzarella and crispy, leopard-spotted charred crust.” Those extra words guide the AI to generate the specific details that trigger an appetite response.
Step 3: Thinking like a photographer with camera and lens prompts
This is the element that made the recent trend so effective. Specifying camera and lens settings gives you directorial control over the final image's composition, focus, and overall aesthetic. It's the most powerful way to signal to the AI that you want a photograph, not an illustration.
Essential Camera Prompts:
- Lens Type (e.g., `85mm f/1.8 lens`): This is a classic portrait lens. Prompting for it tells the AI to create an image with a very shallow depth of field—meaning the main subject (the food) is in sharp focus while the background is beautifully blurred (an effect called bokeh). This is the fastest way to get a high-end, professional look.
- Shot Type (e.g., `macro shot`): Use this for extreme close-ups. It’s perfect for capturing the tiny sugar crystals on a donut or the bubbles in a drink.
- Camera Brand (e.g., `shot on Fujifilm X-T4`): Different camera brands have different color science. Mentioning a specific model can influence the final image's color grading, contrast, and film grain, giving it a more authentic and specific character.
The full recipe: Assembling a perfect food photography prompt
When you combine all three pillars, you get a powerful, descriptive prompt that gives you precise control over the output. Here’s a template you can use:
[Photography style] of [Dish with 2-3 texture descriptions], [Composition/setting details], illuminated by [Lighting description], [Camera and lens details]
Let’s put it into practice:
“Food magazine photography of a stack of fluffy buttermilk pancakes with a viscous maple syrup drip and a pat of melting butter, on a white ceramic plate next to fresh blueberries, illuminated by soft morning light from a window, shot on an 85mm f/1.8 lens creating a shallow depth of field.”
The difference in output between that and just “pancakes” is night and day. But as you can see, crafting these for every single asset is a job in itself.
From a single prompt to an automated ad campaign
The viral prompt is a powerful recipe, but you shouldn't have to be the chef every single time. Manually writing, tweaking, and pasting that long prompt for every ad variation, social post, or menu photo is slow and prone to inconsistency. This is where a workflow system becomes essential.
In MyUP, we build these complex prompt structures into simple, reusable workflows. The entire multi-part recipe is pre-built. You, the user, just provide the key ingredients. You don't need to remember what f/1.8 does or the best term for a crispy crust; you just need to decide what food to feature.
For instance, the Vertical Gourmet French Fry Ad workflow already contains the instructions for dramatic lighting and crispy textures. All you do is describe the fries and the scene. The Food Product Ad workflow is designed for clean, commercial shots. The system handles the technical prompt engineering, and you provide the creative approval.
Workflow code: #myup-fts6-4ihp
Vertical Gourmet French Fry Ad
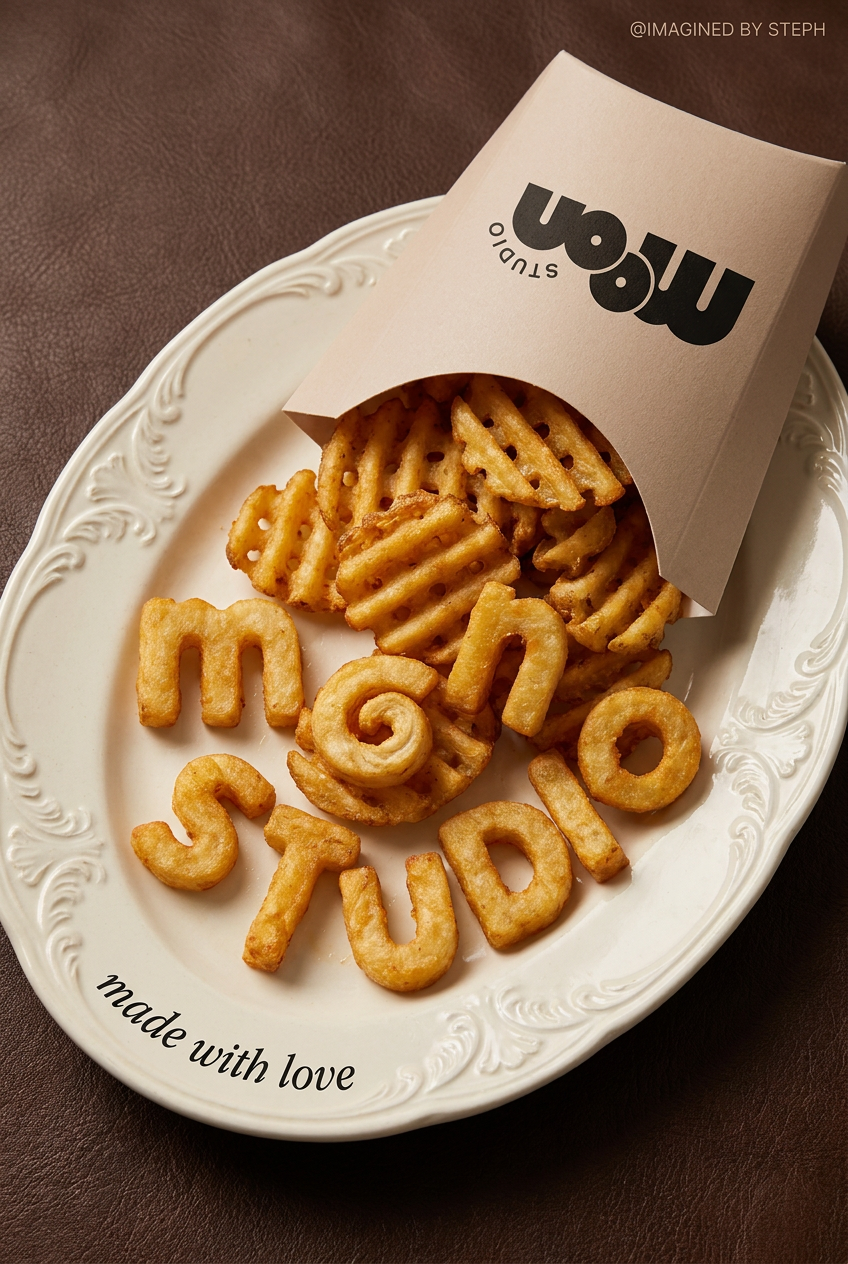
Transform your products into high-fashion editorial ads. This setup uses a dynamic diagonal layout and a slightly tilted overhead angle to give food and packaging incredible depth and texture. It's perfect for giving any brand a chic, premium look.
Regenerate using your own assets.
Workflow code: #myup-w0vh-abft
Food Product Ad
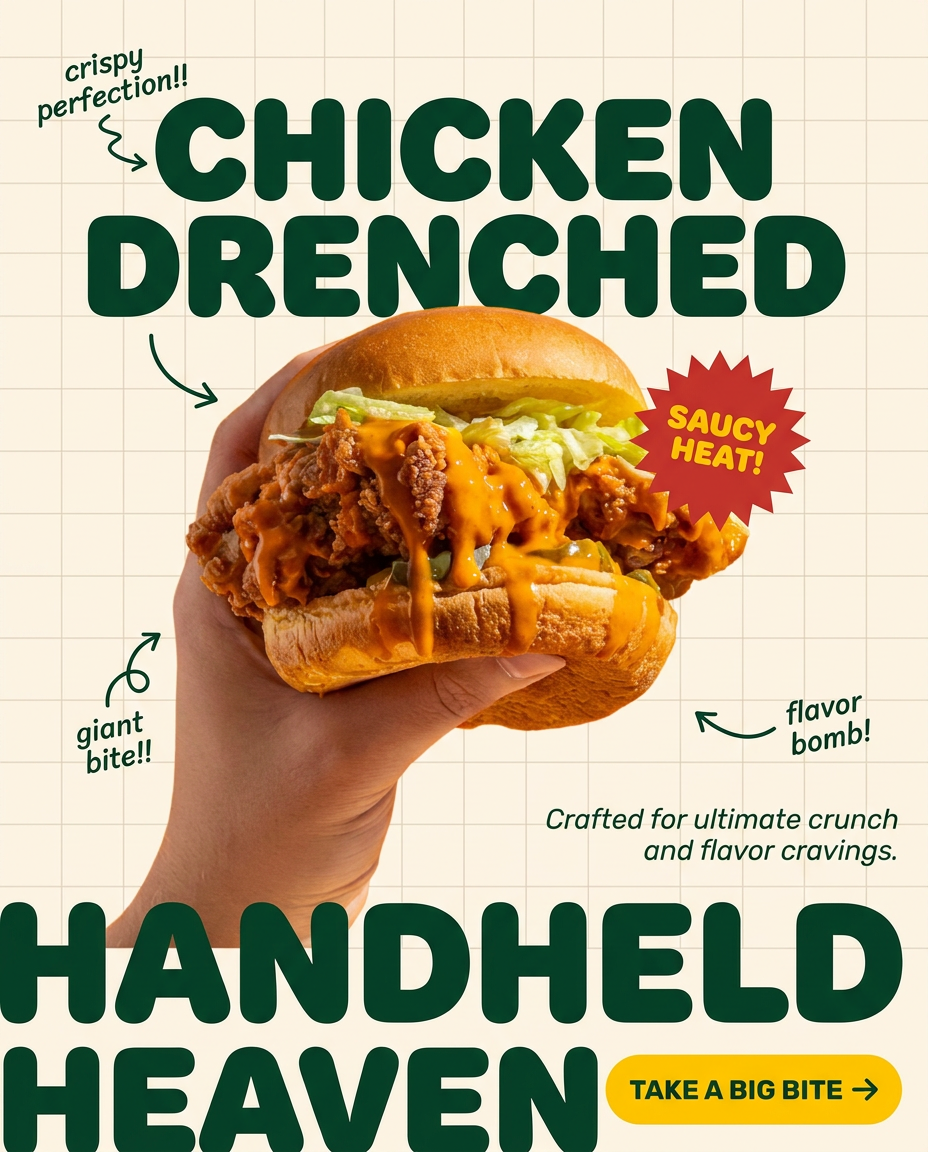
Turn any dish or snack into a bold, playful social ad. It places your food against a soft warm beige background with a subtle grid pattern, topped with chunky rounded headlines. It's clean, friendly, and instantly grabs attention in the feed.
Regenerate using your own assets.
This is the difference between a one-off trick and a professional production system. Stop copying prompts and start building workflows. MyUP executes the complex technical instructions, so you can focus on the creative validation and get back to building your brand.
